In this Article...
In this article, we are going to attach materials to our model. We are going to skip the artificial lighting and save it for later. However, we already have sunlight for now and it’s enough to create a photorealistic rendering. You probably now can’t wait to see how your model looks like when we render it. So let us just do it.
Rendering materials are now very easy to create and to use. In AutoCAD 2011, we have standard ‘Autodesk materials’ that also available for many Autodesk products, such as 3ds Max, Inventor, and Revit.
Using Autodesk Material Library
Before we can use the materials, we need to load them to our document. Open material browser by clicking material browser in render tab, materials panel.
AutoCAD will open materials palette. This material palette is for AutoCAD 2011. You will not see Autodesk material library in AutoCAD 2010.
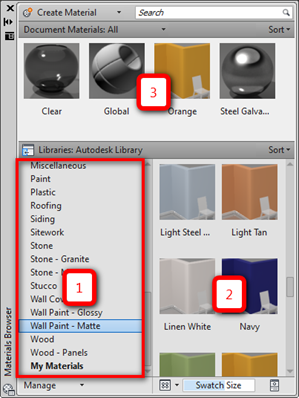
In this palette, expand the Autodesk library and find group of material you want to use (1). Click it, and you will see the materials within the group in (2). Find which one you like, and click it. By clicking the material, you add the rendering material to document materials (3). Continue to add materials for wall’s paint, steel, glass, and the seating cover.
That is easy, right?
Attaching Material By Layer
Now we already have the materials in our document.The next thing to do is attaching the material to our object.
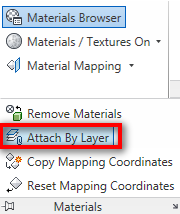
The easiest way to do it if you separate the objects by layer. You can attach materials to each layer, without having to attach it to each object. Expand the materials panel and click attach by layer.
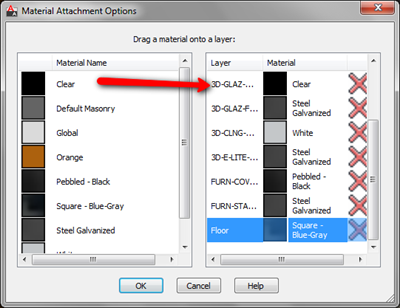
AutoCAD will open a dialog box. Choose your material on the left column, then drag and drop it to the layer.
Click OK when you are done.
Attaching Materials By Selection
Attaching materials to layer is the easiest way. However, we still need to attach materials to some object that is not using the same material with it’s layer. It doesn’t make sense if you have to create several layers for walls, if they have different materials, right?
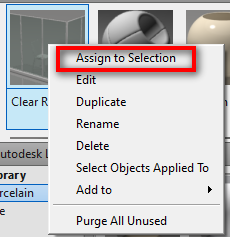
Applying it is easy. There are several ways to do it. You can drag and drop the material from material browser to your object. But the more convenient way to me is select the object first, then choose material that I want from material browser. Right click, and choose assign to selection.
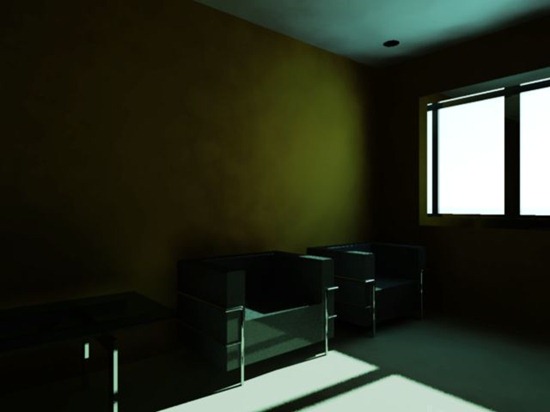
Apply materials to all your objects. Then you can test your material by rendering it. Below is my first material rendering test using medium quality. Not good enough, but I believe you get the idea. I’ll try to set different materials later, so we can see better result in the final render.
Next, we are going to create our own materials.



Hi Edwin,
I'm having trouble finding anyone who can help me with my problem. I have a student version of AutoCAD 2011. When I render, I can see the materials in the materials browser. However, when I try to attach them by layer, the images of the materials disappear. I only see black boxes. I also get a completely black image when it renders. There is no image at all even though I have lights and cameras on and in place. I read online that I might need to reinstall the materials library. I followed the instructions exactly and reinstalled it, all three sections. Still, I'm getting the same results when I try to render. Any suggestions at all? Thanks for your help.
Melody Enella
Hola Edwin, hace poco descubrí tu página y con cada tutorial avanzo en mis trabajos,
Trabajo con el 2010 y me gustaría un tutorial sobre las ESCALAS (Metros, centimetros, milimetros ajustar a gizmo Etc.) para la asignación de materilaes.
Gracias.
Un saludo
Hi Rodrigo,
I'm sorry but I don't speak Spanish :) I can translate your question (thanks to Google) but probably you want to use English next time. I'll see what I can do with your inquiry.