Revit is pretty straightforward to use. But it doesn’t mean that we can’t find something new to increase our productivity. Either you are new to Revit, or already use it for years, there are always new things we can learn!
There are 30 tips in this article, feel free to give your tips in the comment!
Part 1: Preparation and Basic
The first category we are going to explore is the preparation and basic use of Revit. There are settings and features that you can use to help you work better.
1. Use Keyboard Shortcuts
Keyboard shortcuts allow us to work when using the software efficiently. Revit is no exception. See how you can use keyboard shortcuts and modify the shortcut lists in this video.
You can find the list of Revit keyboard shortcuts here: https://www.autodesk.com/shortcuts/revit
2. Disable Double-click to Edit Elements
Double-click activates a contextual command. For example, element editing. However, accidentally double-click an element can be annoying. Sometimes it is better to disable double-click for a particular element.
See how you can disable double-click for particular elements in the video below.
3. Save Frequently Accessed Folders to Places
You can save frequently accessed folders to Places. You can go to different folders quickly, like accessing project folders, families libraries, etc.
See how you can save and access folders from places in this video.
4. Use Ribbon Shortcuts
Revit has shortcuts. However, sometimes it is difficult to remember all of them, especially tools that you don’t use often. You can use Ribbon shortcuts to help you activate tools too!
See how the Ribbon shortcuts work in this video.
5. Tear Out Ribbon Panel
When you have a low-resolution screen or need some tools that are always available, then tearing out the ribbon panels can help. It is similar to the toolbar in the old interface!
6. Disable Drag Elements on Selection
Selecting elements in a Revit view can be a challenge. There is a setting that allows you to prevent selection or dragging elements by accident. You can disable Drag Elements on Selection and other selection filters.
Part 2: View Navigation
The second part is view navigation. In this part you will see how to navigate in views and also arrange the Project Browser for easier access.
7. Define a Pivot Point when Rotating View
Sometimes when working in a quite complex model, we want to rotate the view around a specific element. You can do that by selecting the element.
See how it works in this video.
8. Use the Steering Wheel
Steering Wheel is an underutilized tool in Autodesk software. I like to use it because holding the mid button all day can be painful. I can use Pan in the Steering Wheel, and also several other tools!
9. Organize the Project Browser
Project Browser is the place where we can find all views in our project. When we have many views on the project, it can be challenging to find the view that we need. You can organize the Project Browser for easier access.
10. Find in the Project Browser
In tip #9, you can organize the Project Browser to find views easier. However, for a quick find you can use the search feature.
11. Use the View Cube to Navigate and Modify 3D View
We all know that we can use the View Cube as a navigation tool. We can see the front view or the isometric view quickly. But do you know that we can use it to modify the 3D view quickly? For example if you want to create a 3D view of Level 1 or a 3D section.
Part 3: Placing Elements
In the 3rd part, we will see some tips to place elements easier. They are basics, but some of us may not know it.
12. Use Any Units when Typing the Distance
When working with a Revit project, we use a default unit. However, you can use any measurement unit without changing the default. Just type the units, Revit understands it and converts it for you!
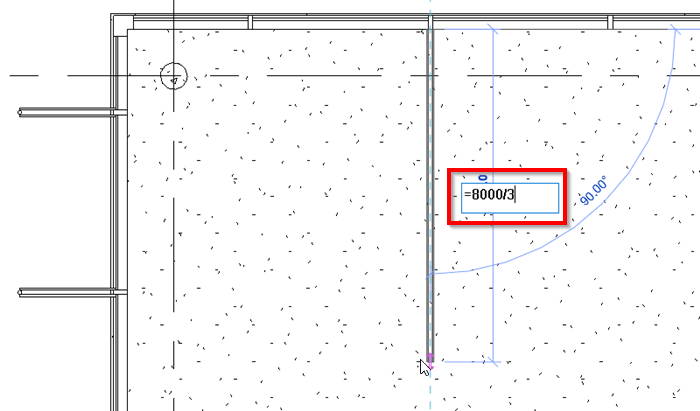
13. Use Equation in the Temporary Dimension
Temporary dimension also can recognize when you type a formula. It is very useful when you need to place an element relative to an existing element.
14. Adjust Snap Settings and Use Snap Override
You can adjust the snap to work as your prefered. You can adjust the increment for temporary dimension or disable snaps that you don’t want.
And don’t forget: use snap overrides to select a reference point easier.
Part 4: Object Modification
In this 4th part, we will see some tips to select elements and modify them.
15. Selecting Element by Types
You can filter out a particular element type from the selection set. Or you can also select all elements in your project from the Project Browser.
See how you can do it in the video.
16. Select Revit Elements with a Specific Properties
There are many tools to select elements in Revit. But how we can select elements with specific properties? For example, all windows on level 2, with width 500mm, and sill height 800mm?
Find out how you can do it in this video.
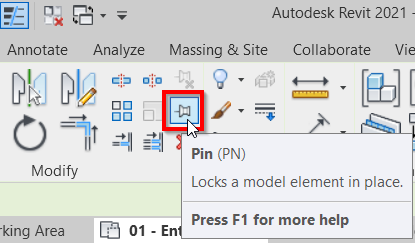
17. Lock Elements with Pin
You can lock elements with Pin. This is very useful if you don’t want the elements to change by accident. It is very annoying if you select an element, and it’s moved from the original location without us knowing that.
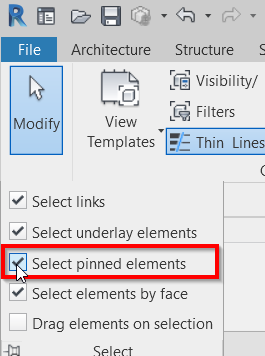
When you pinned the elements, it is also good to disable Select Pinned Elements. Eventhough you can’t modify a pinned element, selecting the element that you don’t want to edit will disturb you.
18. Rotate with Spacebar!
Yes, most of you probably already know that you can rotate elements during placement by pressing the spacebar key.
But do you know that it also works for existing elements? See how it works here.
19. Move and Rotate the Surface Pattern
You can move and rotate the surface pattern if you use the model pattern (not drafting pattern). This is useful when you want to arrange patterns like floor patterns, ceiling patterns, and any other pattern in your model.
Part 3: Working with Revit Views
Views are the main part of Revit. You can present the model in so many different ways by changing the view settings.
20. Rotate View Orientation
It’s easy to work on a floor plan when all walls are parallel or perpendicular. But when the walls are not parallel to your screen, it is not easy to work on it. You can rotate the view without messing with the project north or true north.
21. Set a Different View Range within a Boundary
You can set a different view range for a specific part of your floor plan. It will not affect the whole floor plan. This is very useful if you have elements outside of the default view range settings. See how to do it in the video below.
22. Using Revit View Filter to Have more Visibility Control
You can have more control in setting the elements view by using view filter. You can separate elements by their properties and set different view settings for each properties.
Learn more benefits of using view filter in this article: 3 Benefits of Using Revit View Filter.
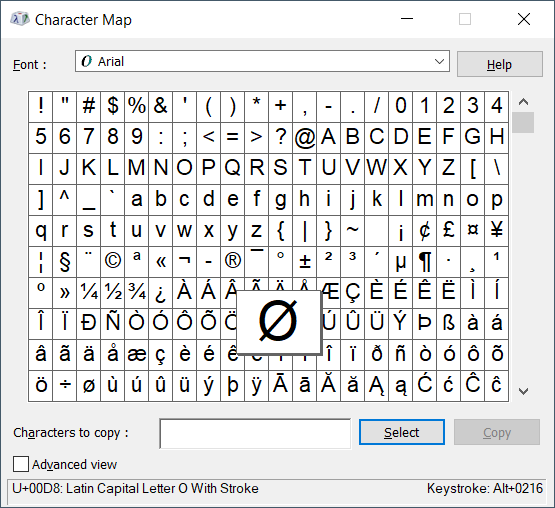
23. Use Character Map to Type Symbols
Revit doesn’t have a feature to insert symbols automatically. You need to use a Windows tool: Character Map.
However, if you remember the keystrokes, you can type it without opening Character Map.
Learn more about using Character map in Revit here: How to Add Symbol in Revit Text.
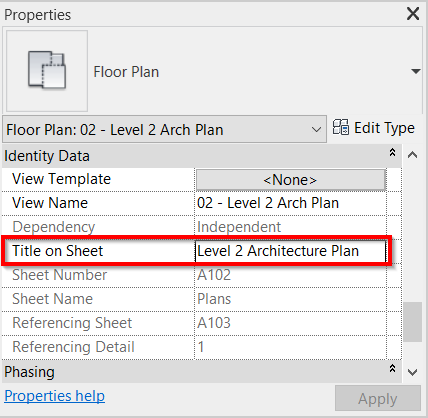
24. Use Title on Sheet
It is a common practice to use a number as a prefix to name views. The purpose is for the view name organization.
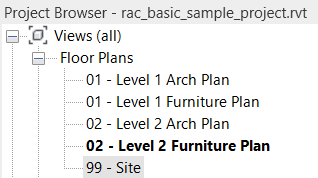
However, we don’t want the numbers to appear in the sheets. We only want the view name without prefix.
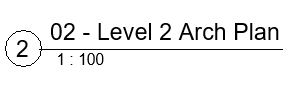
You can show a different text on the sheet by using Title on Sheet. In the example below, the view name is 02 – Level 2 Arch Plan, but the Title on Sheet is Level 2 Architecture Plan.
25. Use Temporary View Properties
There will be time when we need to change view properties temporarily. Maybe we want to hide a category in our view, or see it in coarse detail level. Then restore the settings back after we finished.
For this purpose, you can use Temporary View Properties.

It allows you to change any view settings temporarily and restore it to the original state. It also works even when you use a view template.
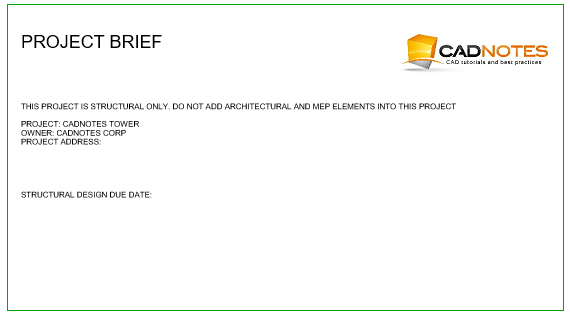
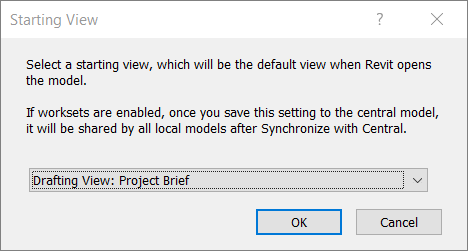
26. Use Starting View to Show Important Information
When you have important information to show to everyone who open your project file, you can use the starting view. When you use the starting view, everytime someone opens the file it will be the first view that she will see. Regardless the last view is opened when the file is saved.
The common view that we use as the starting view is a drafting view.
You can set the starting view in Manage tab> Manage Project panel> Starting View.

Select the view that you want to set as the starting view.
27. Use Depth Cueing to Distinguish Far Elements
When you have far elements in your model, you want to distinguish it from closer elements. Before Revit 2017, you need to change element properties to fade distant elements. But if you use 2017 and later version, you can fade elements only by changing view styles.
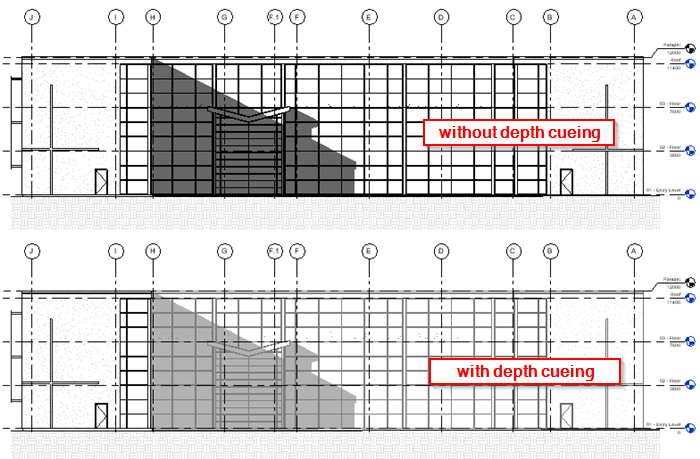
See how you can set depth cueing to fade far elements in this video.
Part 4: Visualisation
We always have the 3D model when we work with Revit. We can take advantage of it and present our model with a compelling visualization.
28. Use Section Box to Create Detail 3D View
You can quickly create a 3D view from any elements in your model quickly. The section box tool is very useful to create a 3D view for a detailed presentation.
Watch the video to see how to create it.
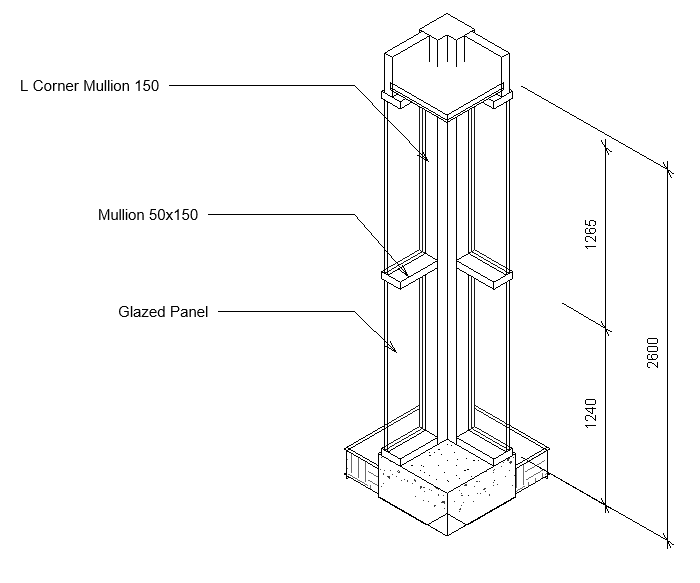
29. Create an Exploded View
You can create exploded view for presentation in Revit. It allows you to show how to assemble parts or to show what’s inside a building but still show the other elements.
See how you can create an exploded view below.
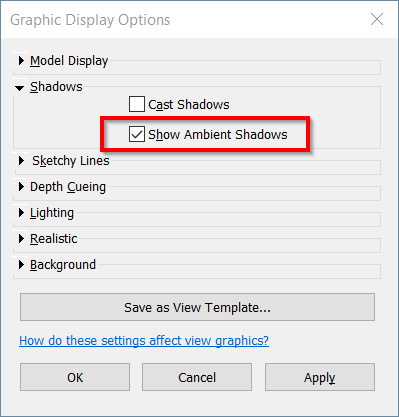
30. Use Ambient Shadows
Ambient shadows can make your presentation compelling. When you don’t have enough time to render the model or if you prefer to present the model in an artistic view, the ambient shadow is my first option on the list. I have 10 settings that I often use to make the presentation compelling.
See how much the difference one setting can make below. Without ambient shadows, it looks very flat.
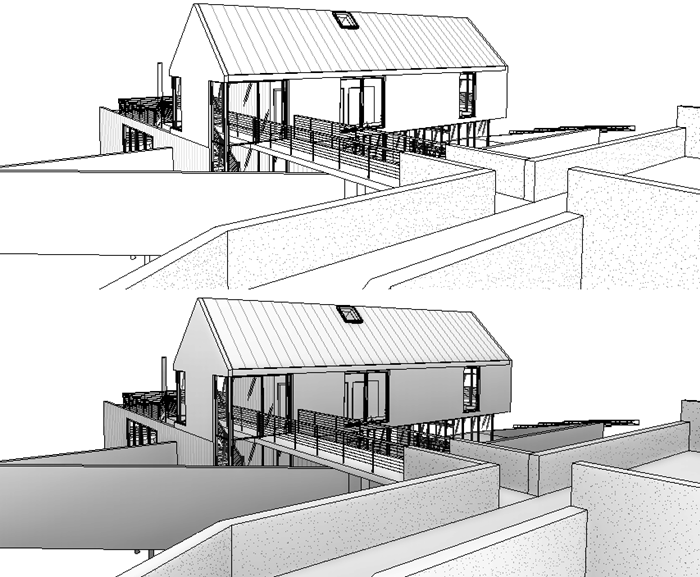
You can activate the ambient shadows in the Graphic Display Options dialog.
To Sum Up
Revit has many features to help you to work conveniently. Many of the tools are not covered in a training class or books. I hope you can find a thing or two you can use in your work.
Share your experience in using Revit in the comment!


just made it through the whole article, thanks so much!
Thanks, Ed, it never seems to amaze me it doesn’t matter how many times I look at an instructional video or lesson I totally learn something new. Your tips are no exception, even the tips I know about I still learned something new about them or a new way to apply them to something else.
I’m glad you like it, James :)
True, I also learn something new every time. The good thing about the internet!
Thanks for these amazing tips on REVIT.
As an experienced bim modeler myself I found these tips very informative.
Great step by step video and diagram tutorials giving very clear instructions. Also, it’s handy that links are included about the shortcuts! I like the useful little tips included within the step by step instructions about making things more user friendly (disabling double-click for instance). Fantastically clear tips and tricks!