We created water supply route in the previous tutorial. We use the connector and connect into tool. This time we will create a sanitary pipe with slightly different technique.
Let’s open the tutorial file. Open view 1 – Plumbing.
Placing Floor Drain
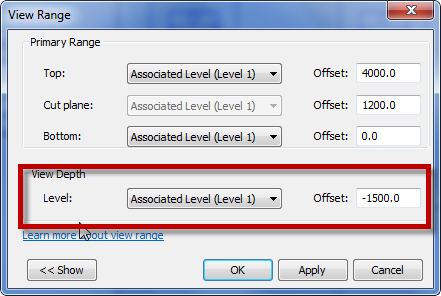
Before we continue, we need to change a view setting. The floor drain will not be visible unless we modify the view range.
In the Properties Palette, find View Range. Change the value to -1500 then click OK.
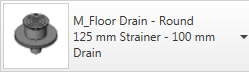
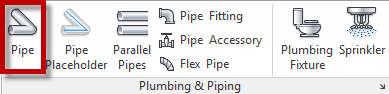
Now on Ribbon> Systems tab> Plumbing & Piping panel, click Plumbing Fixture. From the Type Selector, choose M_Floor Drain – Round 125 mm Strainer – 100 mm.
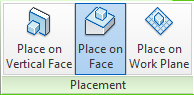
On the Contextual Ribbon Tab, change the placement to Place on Face.
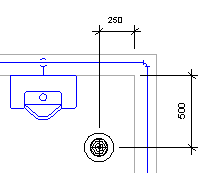
Place a floor drain like shown below. We use dimension tool when placing Plumbing Fixtures before, refer to that tutorial if you don’t remember how to do it.
Creating Main Drain Pipe
Let’s create the main pipe route. Activate the pipe tool.
In the Options bar, change the pipe size to 100 and offset -1000.
![]()
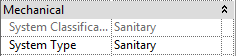
In the Properties Palette, change the System Type to Sanitary.
Start the pipe from the position shown below. You don’t have to worry about exact location in this tutorial. Click the next point at the position shown below. Give enough space to draw 45 deg pipe.
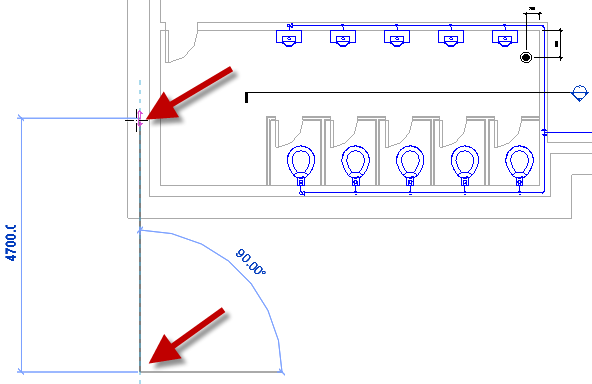
Continue the pipe with 45-degree angle. Click again when you see the dashed line from the floor drain.
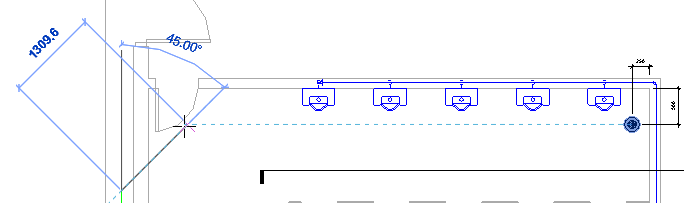
Click the last point, snapped to the floor drain. The elevation will adjust automatically.
Connecting Plumbing Fixtures to the main pipe
This time, we will draw the pipe manually. We don’t use the connector icon or connect into tool.
Connecting Urinal to drain pipe
With the pipe tool still active, change the pipe size to 50 mm in the options bar.
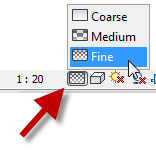
Change the detail level to Fine so we can see the pipe and fittings easily.
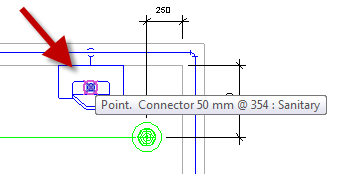
Snap to the right most urinal connector and click. Wait until the tooltip shows you are snapping to a connector.
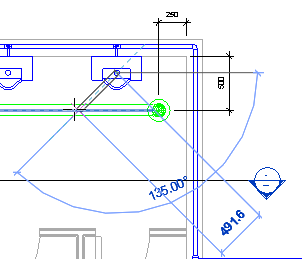
Continue to the existing pipe with a 135-degree angle.
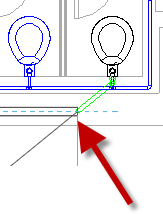
Finish the connection to remaining urinal.
Connecting water closet to drain pipe
Let’s continue to connect the water closet. Make sure the pipe size is 50 mm, and the offset is -1000.
Connect to the right most water closet connector and draw a pipe with 135 deg to the left. After you create the first segment (shown by the arrow below), change the pipe size to 100 mm.
Then connect to the main pipe.
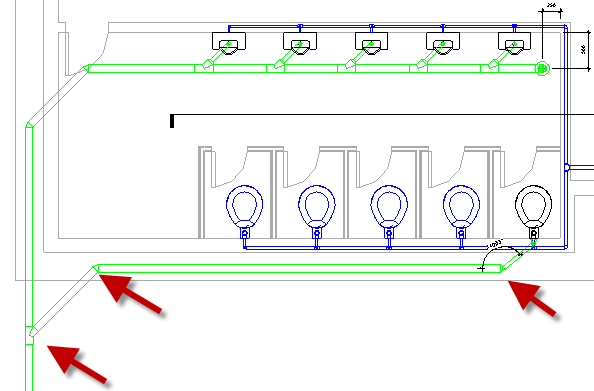
Now connect all the water closet with the drain pipe you created. Remember to change the pipe size to 80 and make sure the offset is -1000.
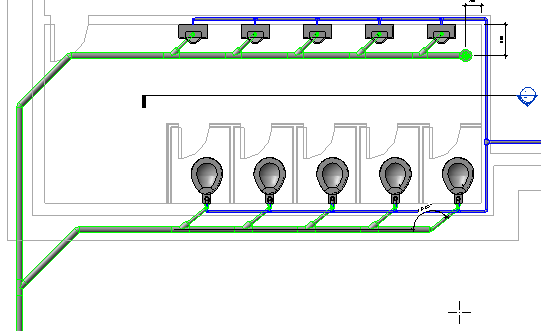
The completed result should look like the image below.
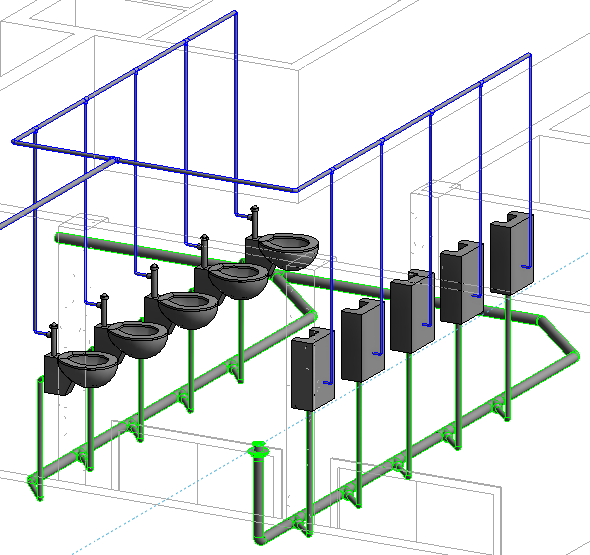
Review the model in 3D view.
Save this project. We will modify the pipe route in the next tutorial.
Have a Problem Following the tutorial?
You can watch this video for your reference.


I want to say thank you in the most sincere way! I am a student attempting to learn revit so i can become a design professional . I’m using a MEP REVIT book that in my HONEST opinion is CRAP in so many ways. In addition, I go on Lynda.com for reference. I was attempting to set the drain while doing a project and was unable to do because of what i know now to be “view range setting”. I’ve spent hours trying to better understand what i need to set the view range settings & watching a number of videos and reading! You have saved me, Your settings have allowed me to effectively set the drain and move on , I will most certainly use your website in the future . Do you ever host classes online???/
Hi David,
I’m glad that the tutorial helps! I haven’t hosted any online classes yet. Maybe one day I will.
y you are not considering slope to drainge .
We modify the slope in the other tutorial. Yes, you can define it at the first time you draw the route, but we do it a bit different here :)
check out this tutorial: Revit MEP tutorial: Modifying Route