We created a new Revit MEP project in the last tutorial. In this tutorial, we will start adding sanitary and HVAC components to our model.
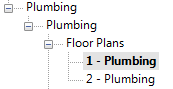
Open the model you created before. In the Project Browser, find 1 – Plumbing view. It’s below Views category> Plumbing> Floor Plans> 1 – Plumbing. Double-click the view to open it.
Adding the Water Closet
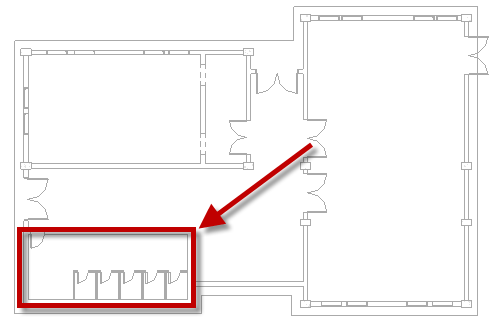
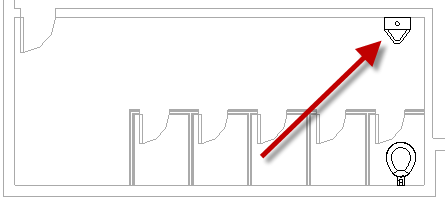
We will work on the toilet area as the image below shows. Zoom and pan to that area.
Placing the water closet
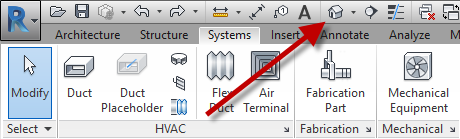
On Revit ribbon, go to Systems tab. On Plumbing & Piping panel, click Plumbing Fixture.

On Properties Palette, click the Type Selector and choose M_Water Closet – Flush Valve – Wall Mounted> Private – 6.1 Lpf.
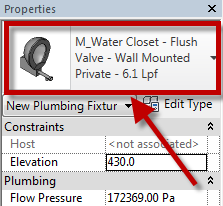
Examine the values in the Property Palette. We are not changing anything here.
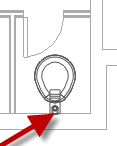
This water closet is a wall hosted equipment, so you need to select a wall to place it. Move your pointer to the wall at the right most toilet. You will see the water closet appears. Click to place it.
Note that we don’t see temporary dimension when placing the equipment. It is because the architecture model is a linked file. Temporary dimension will ignore the objects in a linked file.
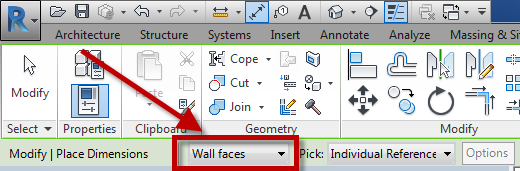
Moving equipment precisely with dimension tool
To place the equipment precisely, we need to add a dimension. Press DI to activate Aligned Dimension tool. On Option Bar, change the reference to Wall faces.
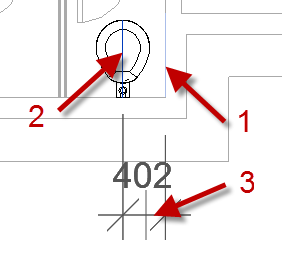
Click the wall face as the first reference (1), click the middle of the toilet as the second reference (2), then click at the position below the wall to place the dimension (3).
Now click Modify tool from the ribbon to end Plumbing Fixture tool and activate selection tool.

Hint: You can press Esc on your keyboard to activate Modify tool.
Select the water closet. The dimension value will change to blue. Click it. You may need to zoom in so you can select it easier.
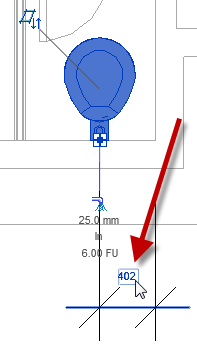
Type 400 then press enter. You can delete the dimension after change the value because we don’t need it anymore.
Copying the equipment
Now let’s copy the water closet to the other cubicle. Select the water closet if it’s not selected yet.
On the ribbon, in Modify panel, click Copy.
In the Modify option bar, make sure the constrain and multiple options are checked.
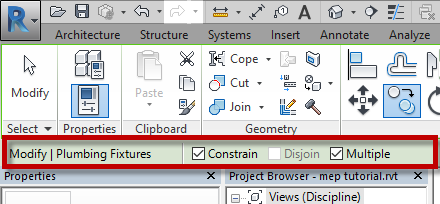
Now click the right bottom corner wall as the reference (1) then click on 2, 3, 4, and 5 to place the copies.
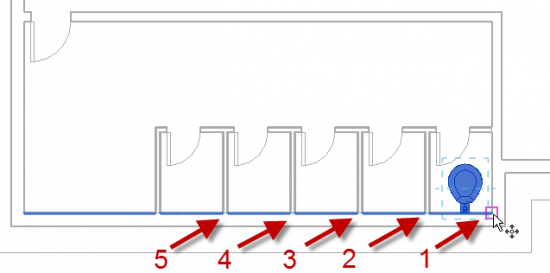
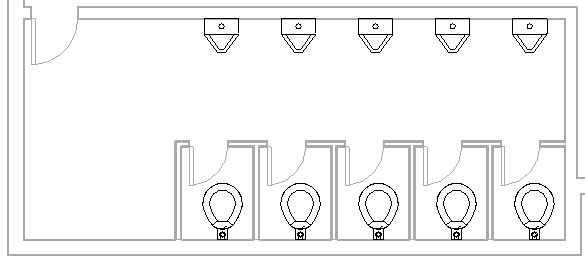
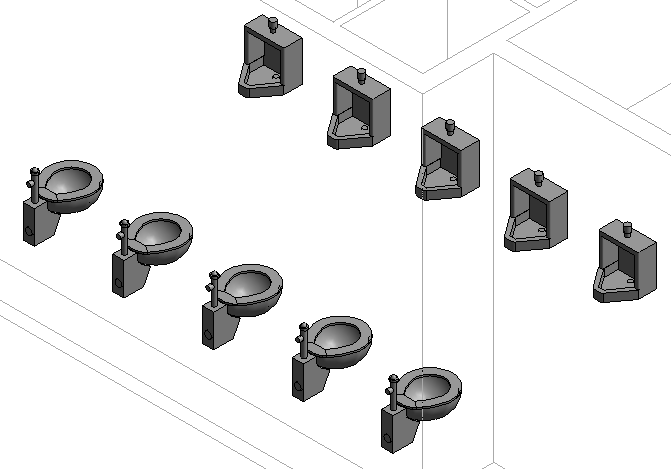
We will see 5 water closet like below.
Adding the Urinal
Activate the plumbing fixture tool.

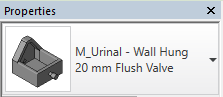
In the Type Selector, choose M_Urinal – Wall Hung.
Similar to the water closet, this urinal is a wall hosted equipment. You need to select a wall to place it. Place the first urinal.
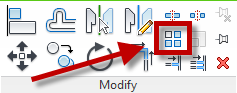
Press Esc to activate the modify tool then select the urinal. We will copy this urinal, like we did with the water closet before. But this time, we will use Array tool.
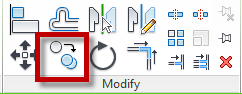
With the urinal selected, click Array. You can find it in Revit ribbon> Modify tab> Modify panel.
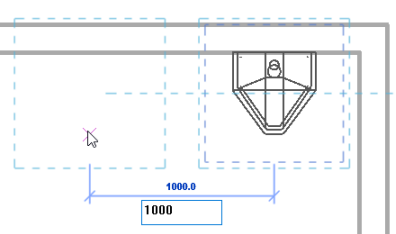
On the Array option bar make sure the array type is linear. Change the number to 5 and select Move To 2nd.

Click the base point at the urinal. You may click any where as reference. Move your pointer to the left. When you see the temporary dimension, type 1000 then press enter.
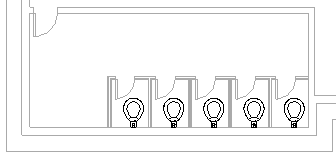
You will see the completed model like below.
Click the Default 3D view from the Quick Access Toolbar (QAT).
Examine the 3D model. Use the mouse scroll button to zoom in and zoom out. Click and hold the mouse middle button to pan. And press and hold shift key, then click the mouse middle button to orbit the view.
To Sum Up
In this tutorial, you learned about:
- Placing plumbing fixture.
- Select plumbing fixture from Type Selector.
- Using dimension tool to move component.
- Using Copy and Array tool.
If you have questions about the subject, please ask in the comment section.
Having Problem Following the Instruction?
You can watch this video if you have a problem following the instructions.
Or watch it on YouTube here: Revit MEP basic: Add Plumbing Fixtures


