I had a couple questions about creating a photorealistic rendering in AutoCAD. Probably after seeing the rendering sample I made. I’m not a rendering guru, but I think it would be interesting to write something about it. Setting up rendering environment is not difficult. But you need to do trial and error before finally get what you want. So I will create a series post about AutoCAD rendering. There are several steps to render.
- Create your model. I will not go there, at least not for now. You can use your own model or use the same model with me. Click here to download the DWG file.
- Set up your camera view, that will be discussed in this article.
- Set up lighting, which can be divided to two categories: natural and artificial lighting.
- Set up materials.
- Set up rendering configurations.
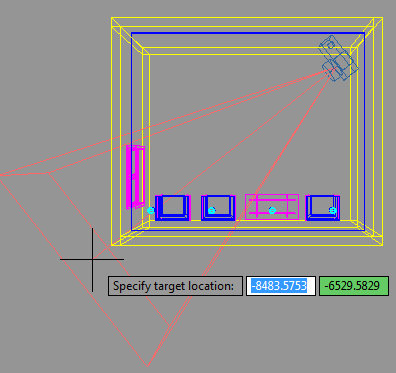
The first thing we are going to do is setting up our camera view. Type CAMERA and press [enter]. Click first point as camera location, then second point as camera target.
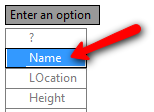
After you place the camera, AutoCAD will give you several options. Give the camera name. Use a name that clearly describe the camera purpose and location. If you have many cameras in your model, you will be grateful that you name it properly.
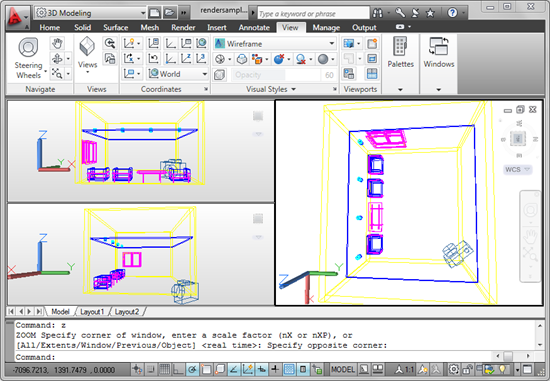
Don’t worry about the other options. We will change them later. To work in 3D easier, it would be more convenient to have several view angles in our viewport. Now let us configure the viewports. Click viewport configurations, then choose 2 or 3 viewports. Feel free to choose which one you feel more convenient.
I choose 3 viewports so I can view the model from top, front, and right side.
Now select the camera. Cycle between objects by holding [shift] then press [space] several times until the camera is highlighted.
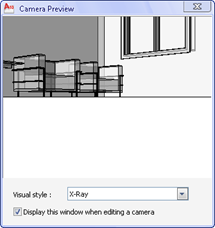
After you select the camera, you should see a camera preview like below.
Now look at your camera. There are several grips that you can use to control the camera location, camera position, camera target, and lens length (FOV).
Move your pointer above at the grip, wait for a while. Now you can see the gizmo or coordinate axis moved there. I’m not sure if we call it gizmo in AutoCAD, but 3ds Max users do.
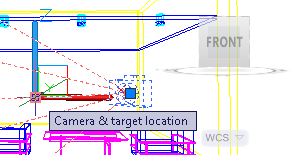
Move your pointer to any axis, then can see an infinite thin line at the axis. It means the axis is locked. Click and hold your left mouse button, and drag the grip to new position. By using this method, you can easily move the camera grips along any axis, without having to view the model from different angle. But sometimes you need to move to other viewport to move it easier.
You can also click the grip to select it and move it like you move any other AutoCAD object.
Feel free to place the camera and target. Choose the place you feel the best for you. You can also change the camera properties by changing the coordinate in properties palette. Try to change the roll angle and have fun!
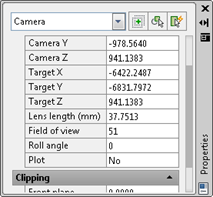
Now after you have done, you can select the camera, right click, and choose set camera view from contextual menu. Your viewport is now showing your camera view.
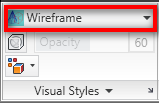
Now change the visual styles to shading, hidden lines, or anything that will show the solid form. We need to do this to check if the camera is showing the model correctly.



[…] Image source: CAD-Notes […]
how do i go to your next page to see the lighting tutorial?
Hi Levent, you can check it here: https://www.cad-notes.com/setting-up-autocad-sun-light-is-easy/
How do you render the Camera View
Hi Benjamin,
Try this tutorial to render your model: Rendering your Revit model
We have several tutorials for that. Try this for a start: Rendering sunlight is easy
Hi Edwin,
Thanks a lot for this tutorial. It really helped me figure out how to render my 3D. But I've got one problem, when i click Render, it always gets stuck at 90% and not only did it happen once. Any idea why this is happening? and oh, before that, a window pops up and asks me if i want to download medium library first. Please help. Thanks a lot in advance. :)
Hi, I have been recently using the camera command and accidentally crossed off the camera preview dialog box. I can't seem to get it back again :( Could you please help!!
I was searching for Tips on rendering and came across your site here (very nice job). I was hoping you might be able to figure out a rendering problem I'm having. I cannot (with any regularity) render using the "current view." All I get is a completely black render. Sometimes it works, most of the time it doesn't and I can't figure out the problem? I've tried saving the view to a Named View and that doesn't work. If I create a camera it does seem to work, but using the camera view doesn't give me the contol I want. (right viewing angle, close-up, etc.) In some of my other drawings, I've been rendering using the current view for best results; but like I said it's hit or miss whether it renders or not. Any clues? (I am rendering in Model Space, not Paper Space) Thanks much.
If you get black render, then most likely the problem is lighting. You probably turned off the default lighting, but didn't provide sunlight or artificial lights.
Check those settings and see if that's the problem.
Hi
will you please tell me how can i show the symbol of camera in drawing?
I have the 2012 AutoCad Mac Edition and when I type Camera in the command it doesn't seem to work. Please advice how I should continue. Thank you.
Hi Stefanya,
Unfortunately I don't have AutoCAD for Mac. And I know it doesn't use ribbon interface.
You may be able to find it under view menu> create camera. Or in view toolbar.
I'm sorry I can't help you further to find this command.