In the first challenge, you have examined your drawings. This should give you enough insight what you can improve in our challenges. We will start to work with AutoCAD template in this challenge.

Why AutoCAD template is important
When we create a drawing, you will use same settings, objects and object properties. We use and create them repeatedly.
If you don’t have your own template, you probably use default templates that are provided by Autodesk. The default template is empty. You will need to create layers, create and modify annotation styles, setup layout and other tasks.
You can put all common information to a template. Therefore, when you start a new drawing, all settings are ready. You can immediately focus on what you are going to draw.
What Can a Template File Do?
Snipped from Brian Benton’s article, Why You Should Use Template:
Template files provide users a place to start. Not only do they give a starting point, but they also force your team to be a team. A properly executed template file, or series of template files, will instill standardization increase efficiency. Standards are created and enforced because the template file comes preset with plot styles, layers, blocks, styles, and more. Since these drawing attributes are preinstalled, it also creates efficiency. And since these features are preset, CAD Standards are automatically implemented and enforced.
Create a new template
I found that common mistakes in creating a drawing is to start from a wrong template. You can create a new file from default template. Make sure you choose the right one.
AutoCAD has two types of measurement, imperial and metric. Choose the one that you use. Metric template has ISO in the file name. If it doesn’t have it, then it’s an imperial template.
The other consideration is to choose it by the plot style. AutoCAD has two types of plot style: color based (CTB) and named plot style based (STB). Mark Kiker has excellent article comparing CTB and STB here.
And never create a template by copy or save as your existing drawing!
Change settings
AutoCAD save system variable in two locations: registry and drawing. If there are settings that you want to keep in all drawing, set it in your template.
A popular example of this type of setting is GRIDMODE.
Add layers to a template
Adding layers to a template is easy, but it is a very tedious task. But remember, this time you will only do it once.
If that is still not compelling for you, you can copy layers from your existing drawings by using Design Center. There are also LISP program that can help you to create layers. Like this LISP to create AIA layers from AUGI.
You probably can find a template that you can download. But you need to make sure it will work well for you.
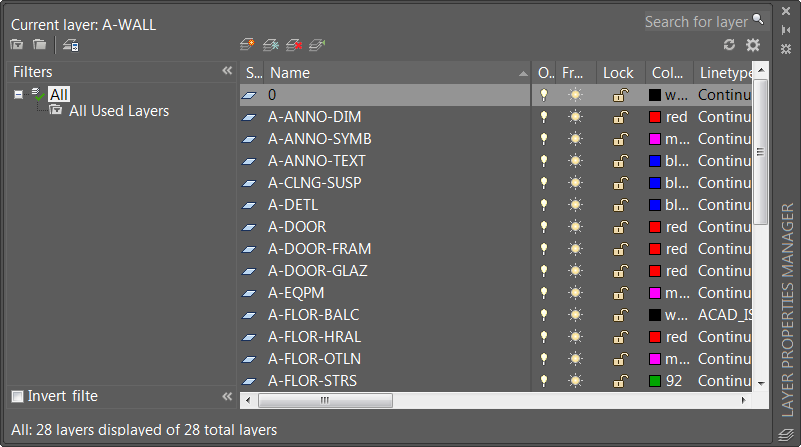
Managing layers
The downside of using default layers is you can have so many layers in your drawings. You and your team will need help to manage them.
AutoCAD has two features to avoid overwhelming number of layers: layer filter and layer states.
Layer filter will help users to see only what they need in layer manager and layer dropdown. You can define several filters. Define them based on your tasks in your template. Design and Motion has excellent article about AutoCAD layer filter here.
Layer states allows you to change layer properties quickly. You can turn on and off many layers at once if you use layer states. You can also change the layer properties like colors and line weight with layer states. This is useful if you need to plot with different line weight in different scales.
Check this article on Design and Motion to learn more about AutoCAD layer states.
Add Annotation Styles to your template
AutoCAD has many annotation styles. There are text styles, dimension styles, table styles and so on. Styles save settings for our annotations. Not only efficient, it will make annotations look consistent.
The number of annotation styles you need depends on how you add annotations. If you add annotations in layout, you may need less. If you add annotations in model space, you may need to have more styles. Some AutoCAD has different styles for different plot scales.
Another method that you can use is to use annotation scaling. You only need one style for different plot scales, even if you work in model space. If you are not familiar with annotation scaling yet, you can learn more about annotation scaling here.
Define page setups
You can save layout settings in page setups. Not everyone uses layout. But if you do, you can define your page setups in templates.
If you have many layout settings, you can save it in separate templates. You don’t have to put everything in a single template. You can create layout by importing it from other template. This will make your file more efficient and small.
If you don’t use layout, you may want to check 10 reasons why you should use it here.
Save and use the template
After you are finished, now save this file as a template. You may want to save it in custom location or server.
If you save it in custom location, don’t forget to change the drawing template location in AutoCAD option. It will make you easier to access it. This option only allow you to add one location. If you have several locations, you can add more file location in open/save dialog box.
You may also need to change the default template for QNEW.
Discuss with us

In this challenge, you created AutoCAD templates. You may need more than one template. The templates should be able to help you to reduce repetitive tasks. But having too many settings and objects in one file will be counterproductive. It will be confusing and your files will be prone to corrupt.
Now share with us, what do you have in your template? Is there anything else you can suggest us to put in a template?
Do you have any problems completing this challenge? If you already have templates, do you think you can make some improvements?
Do you know any resources that we can use to create templates or to download AutoCAD templates?
How many templates do you have? Why do you need more than one template? Is it because you use more than one standard? Or to keep it simple?
Let’s discuss it here. Any discussion about template is welcome.
Remember, we have prizes for active participant at the end of this program. So make sure you join the discussion!
If you are finished, try to complete the 3rd challenge: Create reusable content.


Where I worked last, we had close to 100 drawings that were used as templates for starting new drawings. In order to make it easier for the users I created an AutoLISP function that would start a new drawing based on a specified drawing.
(newFromFile filePathAndName)
I then added a ‘Standard Drawings’ panel to the ribbon and pull-down menu in our Enterprise menu to get them organized and easy to locate. I could then easily add new categories and drawings and make finding the right template drawing a breeze for the users.
That is very nice Jim. A little customization can help. But what makes you need about 100 templates? That’s quite a lot.
Yes, that is a lot. It’s why we created a ribbon tab for them. They are mostly assembly drawings (not to scale) that contain tables of relevant information related to the assembly. The operator uses the ribbon tab to create a new drawing, fills in the table (either manually or using an AutoLISP program) and they’re done. As some projects could have 100-200 drawings, we did everything we could to shorten the time it takes to create them.
I limit blocks in my template but utilize pallets to insert them as they are needed. That way blocks can be updated for the next drawing file without having to update the template.
Additionally I use multi leaders in my template to set up door bubbles which is simply a circle with annotation but no leaders. I create annotations with leaders that utilize the default shapes – circle, square, triangle. A triangle with annotation but no leader is named “Delta” becoming a revision delta. A leader only with no annotation becomes an arrow when I just need to point to something.
I have always thought of templates as being stagnant. You have to create a template for each discipline, each plot scale, create all the layers that you think you will need, and create all the blocks that you think you will need. As time goes on, you have to change your template. Once you change one template, you have to change all your templates. Using layer states is similar to templates. They work fine as long as nothing changes. If you have to add a layer, you have to manually update the layer state. There are more efficient ways of using AutoCAD then templates and setting the current layer by choosing it from a layer pull down list.
I’m sorry. This is probably not the right place for alternatives to templates.
Regarding using Layers, you can also create Standard Layer blocks by category (i.e. Anno, Wall, Electrical, etc) which can be inserted prior to starting your work. you also can create custom tool palettes to place these blocks for ease of access.
Hi everyone!
I have only one template file since I always work with architectural or interior design drawings.
This template is a dwg file that is always open for me to get the elements that I need.
I do it that way because I’m a very ‘visual’ person and I need to see everything there. Also, I’m always adding something in my template, and it is easier that way.
So, for example, my dimension styles are actually dimensions that I copy with CTRL-C and paste in the destination drawing with CRTL-V. My dynamic toilette blocks are all there too, and I copy to my project with CTRL-C and CRTL-V.
The same is for text styles, drawing title blocks, etc.
In this file I also have several layout tabs, each one with a size of sheet and its page setup.
This works for me as a catalog where I can pick what interests me.
For this challenge I reviewed my template file and converted it into a dwt file that I set to default whenever I open AutoCAD or a new drawing.
I deleted all sheet tabs and left just one with a dynamic block that will meet all sizes that I need and its pages setup. I usually use one sheet for layout. In the Stamp I use fields that seek information on the Drawing Properties (dwgprops) and the name of the tab, so half of the stamp is automatically filled.
I left a tab (layout) with all my layers inserted (in case of an accidental purge). In the end of work I delete the tab and run a purge command.
My layers start with “Aq” for elements of architecture in the model or start with “Ge” for elements of sheets in the layouts.
As PepaR, I also use two auxiliary layers, one for the viewport boards and another to keep the polylines that I create and use to calculate the areas of the rooms. Both layers are turned off in the plotting property on the Layer Properties Manager.
I also have a tab (layout) with my text and dimensions styles, and the blocks that I use to label the drawings (at end of work I delete the tab and run a purge comand).
At this point I have deleted all my other blocks from this template. I will continue to import them from my dwg template.
I really enjoyed the challenge! I always wanted to review my template but have never found the time…
Thanks
I have several different templates for my job because we have several types of jobs we do. Many of our projects are related to governmental agencies and they require different colors, types of lines, etc. for clarification on their drawings. We do FEMA storm shelter designs, foundation plans, geotechnical boring locations, and slope developments, just to name a few. Rather than reinvent the wheel over and over, I created templates with the title blocks, objects, text, leader, dim styles and annotation scales I need to streamline my work. As a result, an environmental site assessment project that took my predecessors 36 to 48 hours of work takes me 5 to 10 maximum, that’s including edits after submission to the project manager. I’m still looking for a way to copy scales without having to redo my templates. I made them and have improved or changed things since but haven’t figured out how to change all across the board.
I recommend add to template:
– General titleblock at layout.
– Layer for temporally and help entites named „- HELP“ and layer for viewport boundary named „- VIEWPORT“. Both layers has turn off plotting property in Layer Properties Manager.
In template I have only necessary dimension styles. I create DWG with instance of all dimension styles (with and without annotate property), separately and use Ctrl+C/Ctrl+V or DesignCenter for add more dimension styles.
I use different templates for each project as each one has differing information I want to include. So when I start a new drawing for that project all the specific info for it is included in each new drawing. That would include title blocks, floor plans, etc.
I also use blocks that contain all the layers, dimension and text styles I use and place them in a tool palette. That way I can insert them into drawings I get from others or when I wblock a drawing and want to add missing standards and all that information is there with a simple click of the mouse, easy peasy!
I have created several templates over the last coupe of years which include:
-Discipline Specific DWT files: Each discipline in my company has a template file that has been tailored to their respective use including Layer Names, Linetypes, and Symbology. Some templates are vertical application specific like Civil 3D. Each discipline also has a detail library
-General Annotation Template: I created a General Annotation drawing file that has definitions for: Text Styles, MLeader Styles, Dimension Styles, and Symbology like North Arrows, Section Arrows, Bar Scales, etc. The majority of the Annotation styles are both associative and Annotation Scale ready. The symbols are blocks that have Attributes (single and multiline), Dynamic Properties, Annotation Scale ready, and with default attribute values for the Sheet Set Manager
-Title-Sheets: I have created title-sheets for all standard sizes for both Metric and Imperial values; they are blocks with attributes where the default values are set up for the Sheet Set Manager. I have also created some Sheet Set Manager templates so they work seamlessly with the title-sheets
All template files and settings can be accessed through either a Tool Palette, or the Design Center
With all the various template files, it was important to create documentation explaining what templates where available, where to find them, how to access them, and more importantly – how to USE them properly.
The biggest challenge was/is getting representatives from each discipline to create their templates both on time and properly. Also, I experienced a LOT of hypocrisy from the “old salty dogs” who don’t like change, or never did things properly in the first place. In the first Challenge, I explained how bad the CAD operators were at using CAD, but when it came time to use the templates I created, they couldn’t be more critical. They would say things like “The arrowhead in your MLeader style is too small”, and my reply was “No two arrowheads in YOUR drawings were ever the same size or style, and you are criticizing a CONSISTENT looking arrowhead?” etc. etc. etc.
As far as improvements go, I have constantly improved my templates over the years. When I get on my soapbox at the office, I often explain the importance of knowing what new and improved features there are in AutoCAD. In my office, I would say “First, there were BLOCKS… then there blocks with ATTRIBUTES… then there were blocks with WIPEOUTS…then there were blocks with MULTILINE attributes… then there were blocks with DYNAMIC PROPERTIES… then there were blocks with ANNOTATION SCALING…then there were blocks with CONSTRAINT PROPERTIES…” and the often response I got from my coworkers was “What’s a BLOCK?”
To make your layer filters truly automatic:
Name your demo and existing layers consistently. i.e. I use the suffixes -demo and -exst and I don’t use a suffix for new construction.
As many of you already know, you can sort layers into useful groups automatically using layer filters (*demo* for demo layers, *exst* for existing layers). And you just knew you should be able to combine filters, and/or negate them with a single string. You probably searched in vain for some documentation that would tell you what ACAD was looking for. Here’s the magic you were looking for to sort for layers without the suffixes, and yes it’s that simple:
~(*demo*,*exst*)
Thank you for sharing Brad :)
Layer filters is very useful to show layers based on current task. Your tip proves that!