 After we have finished creating a 3D model, then it is natural if we need to represent it in a nice photorealistic rendering image. We can do that in Revit, and we don’t need to be a master to produce a nice rendered image. Revit is included with mental ray rendering. It might not be the same with other rendering application you know. It’s much simpler. It is simplified for architects.
We are doing to render some of our camera view. If you haven’t created a camera, you can place them now. It can be interior or exterior view.
SETTING UP YOUR LIGHTING
First, we are going to define our project location and time. In your ribbon, open manage tab.
In project settings panel, click settings>sun and shadow settings. There are 3 tabs in this dialog: still, single-day, and multi-day. We will only use ‘still’ for now. The others are used for solar study purpose. You can see the solar light during the whole day or even on multi day.
There are several pre-set settings in this dialog. Like we always do, create a duplicate before we start messing with these properties.
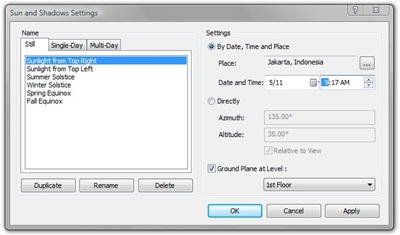
We can set the sun light by location and time. If you want to see how your model will looks like at a location and at a defined time, you can define it here.
However, sometimes we just want our model to look nice and don’t care about the real lighting. You can set the sun light angle manually by changing the settings to ‘directly’. You can set the azimuth and altitude directly by this method.
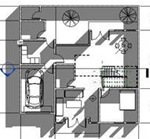
You can open a floor plan view and review your sun light direction and angle before you actually start rendering the model.
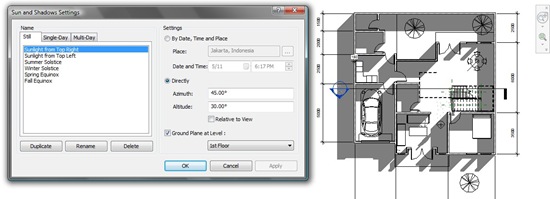
Adjust the date and time (or azimuth and altitude if you define it directly) and click apply to see the effect. After you satisfied with the result, click OK.
RENDERING THE MODEL
After we finish with the model and setup the lighting, then we can start rendering our model.
Click ‘show rendering dialog’ in your view control.
![]()
There are not many settings available here. It might be simple, but it still powerful. You can get good result without having to set too many properties.
First, let’s take a look to lighting group. You can set the lighting to exterior or interior. With or without sun, and with or without artificial lights. If you render interior view, choose one of interior options available. The lights effect between interior and exterior settings will be different. There are not many options available in Revit rendering. It is simplified so you don’t need to worry to set many rendering properties. However, if you have been mastering rendering, it may not satisfy you. You can export the model to fbx format and render it in 3ds Max.
If you placed lighting fixtures component before, you can see how the artificial lights affect your model. Revit uses IES, so basically the effect is pretty close to real lights. But I must warn you: if you have many artificial lights, it would take a very long time to finish the rendering. I suggest you to try with sun only first.
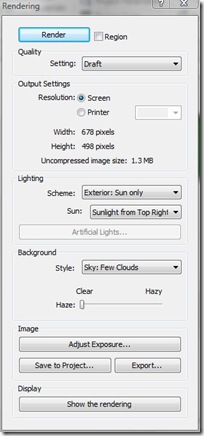
It is simplified for architects, so you don’t have to take care a lot of properties Now, let’s try with draft quality first. Click render. Wait until you see the rendering result. You may want to change the sun angle, some materials are not looking as expected, or we may think we need to add more objects.
After you feel your rendering is good enough, you can try to render it in higher quality.
CHANGING OBJECTS MATERIALS
Do you remember when we created our own wall type? We set the wall material for interior and exterior side. But we haven’t set any materials for other objects.
After you render it in low quality, you may see that some objects don’t have a nice materials attached with them. You can change the materials in type properties. Select the object you want to change the materials, and click on type element properties on your contextual tab, select type properties.
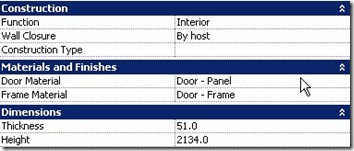
Tips: Remember, changing the type properties will change the render material for all walls that use the same type. If you only want to change the rendering material for several objects only, create a duplicate first. Then change the objects type to the new type.
FINE TUNING THE RENDERING RESULT
After we render the model in high or best quality, sometimes we don’t feel the exposure is not good enough. It can be too bright or too dark. We can adjust the render result to be brighter or warmer.
Let’s compare these images. The first one is the render result using default exposure value. I changed the exposure to get better result.
Please note that this is really depends on your monitor. The original rendered image looks too bright in my LCD display, but looks fine in my CRT monitor. If you want to display it for presentation, you may want to try how it looks in your projector first. If you want to print it, some image editing software provides monitor profiles setup utility. So you can get the same result in your monitor and your printer. But if you have printed before and the result in your monitor and your printer is just the same, then you don’t have to worry about it.
The reason I mention this, is because you read this on your monitor. You may see differently with what the others see.
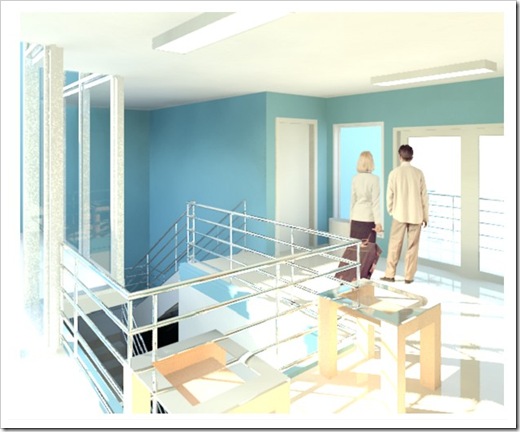
Original rendered image with default exposure. Looks too bright in my laptop, but looks fine in my CRT monitor.
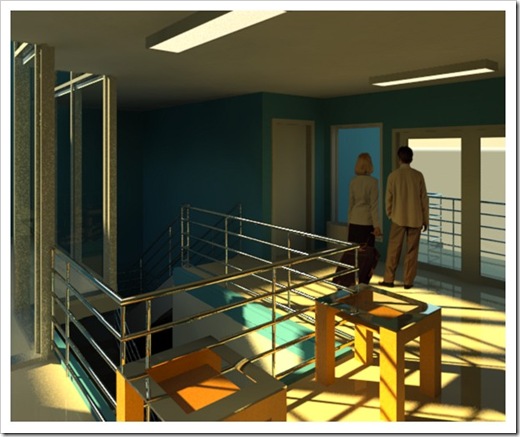
After exposure adjustment. It looks too dark in my CRT monitor, but looks great in my laptop display. How does it look in your monitor?
I would like to know, what type of display do you use? Which one do you see the best: using default exposure or adjusted exposure? I need that information, so I will use most of monitor you use when I write about rendering again.


This is a good tutorial even though it seems that Revit is still relying on 3rd party apps like V-Ray and Lumion to do good rendering
Hi! I love this although I would like to do an exterior rendering with a brick facade, and have the interior wall to be a different material. How do I change the materials for same the interior and exterior wall?
Meghan,
You need to create a wall type that has different material for exterior and interior finish. If you are not familiar with creating wall type, you can read it here
Thank you Edwin. This tutorial is very useful!
very useful ,but i cant see the pictutres.can u send me a copy in pdf or other format? thanks
NICE WORK! All of your tutorials are fabulous.
Thank you,
Andrew
Thank you Andrew :) I'm glad you find it useful.
Recommend this site to your friends will you? ;)