Let’s continue the Revit Architecture tutorial series. We have learned about Revit user interface. The next thing you will learn is about understanding Revit views. How to access it, and how to navigate through it. I have prepared a little tutorial file for you to use. Download this file, extract it. Then open it with your RAC 2010. If you use older version, you can try to open a sample file provided.
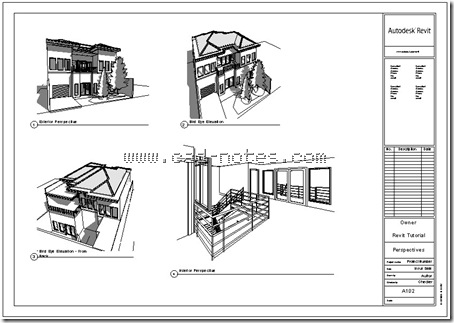
You will see similar view as above. We will model the same building in these tutorial series. But first, let’s explore the views and get familiar with the navigation tools.
Double click 1st floor under floor plans category. It will open the view. If you have problem with using double click, just right click above 1st floor, the choose open from shortcut menu.
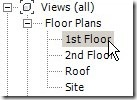
Now try to open the 2nd floor, bird eye elevations, and perspectives.
Each view represents the model. Every changes on the model will be updated instantly on each views. We will get to this later.
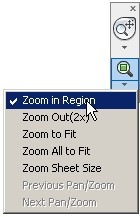
Now, open 2nd floor plan again. On navigation bar, below magnifier icon, click the down arrow. Choose zoom in region.
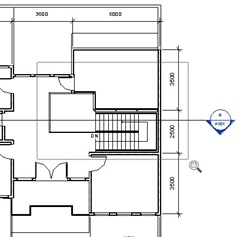
We are going to magnify the stair to fit our view. Click once a little bit outside of the building at the back, then click again below the stair. Use image below as reference.
Now scroll your mouse to front and back. You can also use scroll button to zoom in and out.
Hold down your middle button, you should see your pointer changed to 4 arrows like this.
![]()
Move your mouse. You can use it to pan your drawing.
What if I don’t have 3 button mouse? Well, you should consider of buying one :) But yes, you still can use 2 button mouse. Click steering wheel on navigation bar to activate it. Or press [shift] + W.
![]()
With steering wheel, you can pan and zoom. Just move your pointer above pan, hold your left button, then move your mouse. Or hold it when your pointer above zoom.
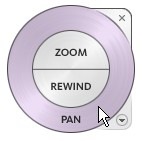
Try to get familiar with these tools.
Zoom to a wall until you can see the brick pattern. From your view control bar, click the detail level button. Choose coarse. You should see the pattern is hidden now.

Now change the drawing scale from 1:100 to 1:200. Now you should see the annotations look larger. Revit will automatically arrange the annotation size for you. Just define the right scale, and may be you need to tidy it a little bit.
Open the standard 3d view {3D}. In 3D views, you will see the view cube. Click the front face in the view cube to see the building from front. Try to click other faces and arrows you see.
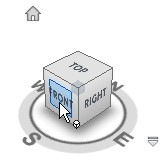
What else? Double click on the project browser, exterior views under 3D Views category. Click on shadow and choose shadows off.

Try to change the model graphic style to shading with edges, wireframe, and shading.
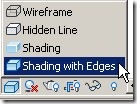
Try to get familiar with them. Next we will discuss about levels then placing walls.
*You can purchase this tutorial compilation in an e-book. Find out the books in our E-Store.


[…] https://www.cad-notes.com/understanding-views-and-view-navigation/ Source link […]
Great tutorial Edwin. Thanks.
Hi, tried to download the file for the tutorial as in your link for this tutorial (view and view navigation) but unable to download. Pls advice
Sebastian,
Try to download it from here: https://www.cad-notes.com/download/revit/exercise_views_navigations.zip
I am working as a designer and new to revit. We have huge plant that is already built. The building has offices in different spots with levels. Also we have production area. We call it as cell. There are lots of cells within the building. some are just open space with floor marking to separate from each other and some are in a room with special requirements like hvac, fume hoods.
I have drawings drawn in acad architecture. I want to use revit to convert everything. This is an existing building and we will be doing upgrade, moving cells, expanding cells, removing cells. Every time we create renovation drawing it is not necessarily turn in to reality. I dont want to see all changes in existing drawings unless it is built.
Should I create separate models as follows and link model?
1 exterior wall/windows/doors as one model,
2. internal wall/windows
3. equipment layout for each cell
I am not sure how to handle this project. Should I create one file that has every thing loaded and create renovation sheets? there will be thousands of sheets after few years.
Type of drawings sheets I want to create.
1. one layout drawing with all equipment, office furniture
2. individual cell or office layout.
3. new proposed layout for new cell
4. construction drawing for renovation
5.MEP
6. Schedules for renovation work
We just do modification or add new rooms or renovate as required.
Please help with your ideas.
Hi Raj,
Typically we create linked models for different disciplines, like: architecture, structure and MEP. If your hardware permits, I prefer it this way. If your concern is for collaboration, then you can use worksets and central file.
Are you familiar with Revit phases? You can use this feature to handle renovation projects. You can view existing, demolish and new design by using phases in each view.
There are no definite answer to this question, but I will use phases and try to work with less files whenever it’s possible.
The download file (exercise file) is damaged. Please upload again. Great effort done to understand Revit.
Looking forward for your prompt and favorable reply.. I am using Revit Architecture 2008.
The download file (exercise file) is damaged.
Hi More,
I have fix the link. Can you try to download it again?
excellent tutes thank you