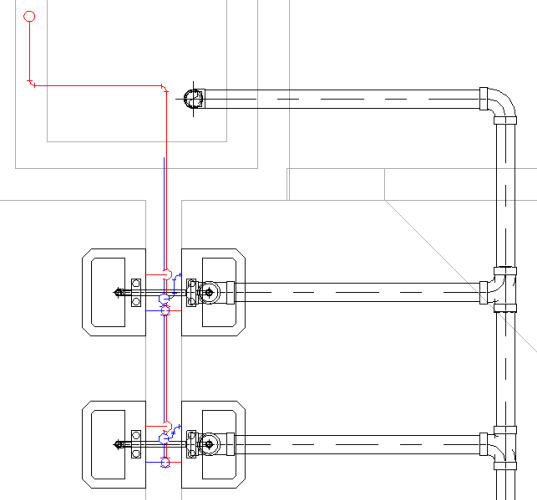
Showing 1-line drawing for small pipes and 2-lines for larger pipes in a common practice in MEP drawings. In the example below, only the drain pipes are shown as 2-lines.
In Revit, there is no setting to have a view like above.
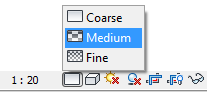
When you set the view Detail Level to Fine, Revit shows all pipes as 2-lines. And Revit displays 1-Line when you change the detail level to Medium or Coarse.
You can’t selectively show 1-line and 2-line pipes in one view. However, there is always a workaround: you can create two separate views for each setting.
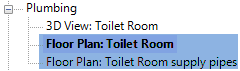
Duplicating View
Fist, you need to duplicate your plumbing view. Right-click on the view name in the Project Browser. Choose Duplicate View> Duplicate from the contextual menu.

Rename the views as necessary.
Setting the Visibility/Graphic Overrides
Hint: You can show the Visibility/Graphic Overrides dialog by pressing the shorcut VG
I have two views now. I want the first view to show the building model and the drain pipes. The second view shows supply pipes only.
For the first view, the only thing that I need to change is to turn off Domestic Cold Water and Domestic Hot Water visibility in the Filter tab.
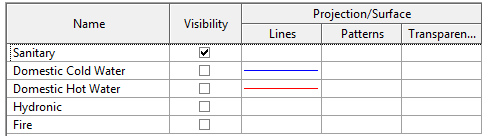
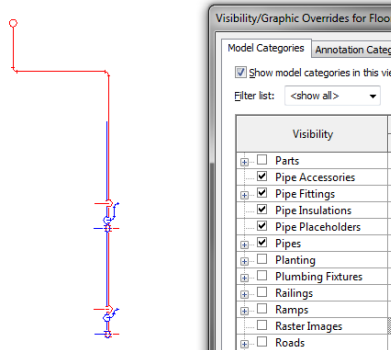
For the second view, I turn off Sanitary and turn on Domestic Cold Water and Domestic Hot Water visibility. And I turn off everything in the Model Categories tab, except for pipes object. Because I already have the other objects in the first view.
Don’t forget to set the Detail Level to medium for supply pipes view and fine for the drain pipes view.
Combining Views in Sheet
To show both of the pipe types, you need to place them both on a sheet. Place the view on top of each other. You may need a reference point to do this precisely. In this example, I use the grid lines as reference.
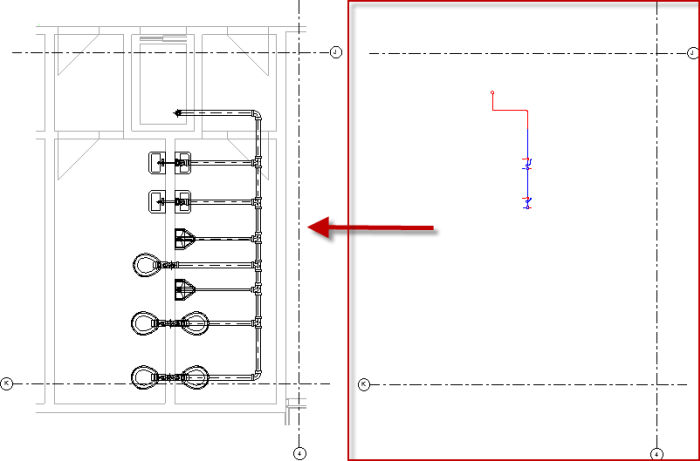
Now you can see the drain pipe as 2-lines, but the supply pipes as 1-line!
Summary
We can’t show 1-line and 2-lines pipes in the same Revit view. If you need to do this, a workaround is to create two views with different settings and place them on top of each other in a sheet. The downside is you can have many views in your Project Browsers, but you can use Browser Organization to manage it. We will cover this later.
The other workaround I see is to use pipe placeholder for 1-line pipes. Revit always shows pipe placeholder as 1-line.
So which one do you prefer?


thanks for sharing, I did some similar tricks in AutoCAD to do the same thing. Thanks for confirming my less than preferred plan, but if this is a regular occurrence setting up the view style templets and filters would make this a very simple task that will be much simpler in Revit.
xaynhasaigon.net làm sao có 2 line