In this Article...
Revit comes with 2 different units by default: metric and imperial units. But it doesn’t mean that you have to use mm or Inch for your project.
I know some people don’t want to use millimeter and prefer to use meter. And sometimes we want to use millimeter in our project, but we want to show meter in dimension. A very large building maybe better shown in meters. There will be too many zeros if we show the dimension in millimeters.
Let’s see how you can change these settings for your project.
Changing Project Units
If you want to change the units globally, you need to change it in Project Units. All annotation settings by default are set to “use project settings”.
Unless you changed this before, then all annotations will use the new project units.
You can change project units from Revit ribbon> Manage tab> Settings panel> Project Units.

By default, the setting for length in metric template is mm. Area is m2, volume is m3. Try to change the discipline to see all unit settings available. You can change units for Structural, HVAC and other disciplines as well.
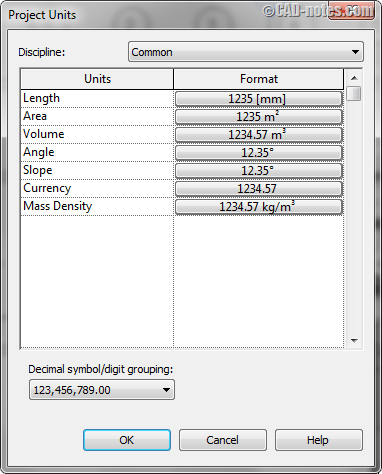
Remember, project units are stored in Revit file. If you want to use it for all your future project, you need to change it in your template as well.
Changing unit in dimension
Revit annotations is set to use project units by default. You can change dimension units without changing project units. This allows you to work with millimeters, but show the dimension in meters.
Each annotation may store this setting in different location. For dimensions, you can change it in dimension type. It may be a good idea to create a duplicate and leave the default type unchanged.
Select a dimension, then click Edit Type in Properties Palette.
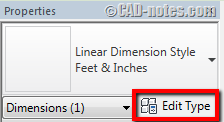
Create a dimension type duplicate before you make any changes.
In dimension type properties, below Text category, find Unit Format. Click the Units Format button.
Uncheck “use project settings” then change the unit to your preferred unit. If you show different units in your final drawings, it would be a good idea to show unit symbol.
For example, for floor plans you use meters, but in detailed drawings you use millimeters. Showing unit symbol will avoid confusion.
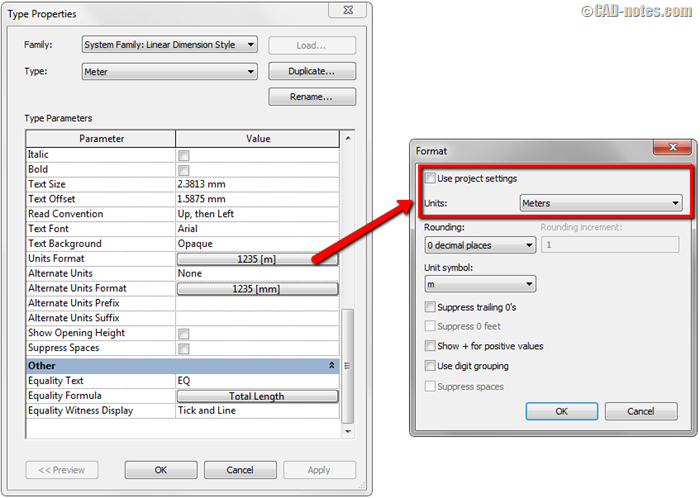
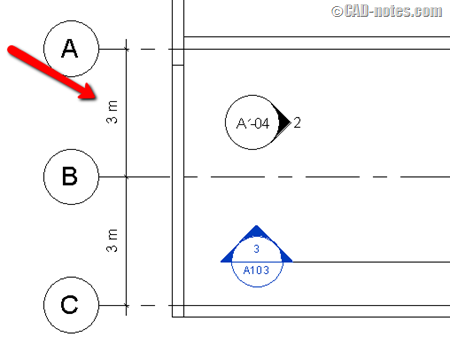
As you can see, now dimensions that use this type will show measurement in meters. Regardless what you set in the project units.
Changing unit in Schedules
Schedules are views. It means that you can override the appearance for each view. There is no global setting if you want to use different unit in schedule. Except by changing the project settings, obviously.
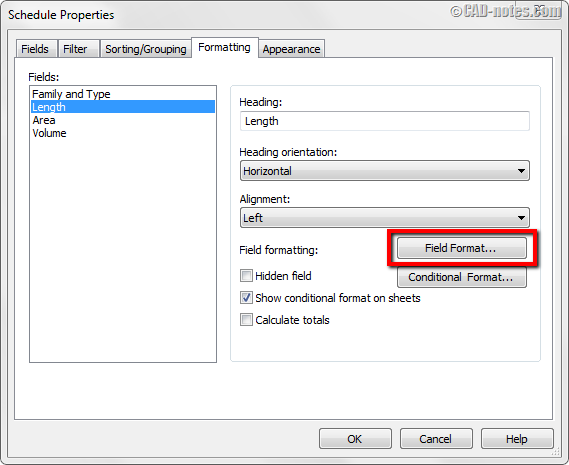
You can change unit in Revit schedule in Formatting tab. Select the fields that you need to change the unit. Click Field Format.
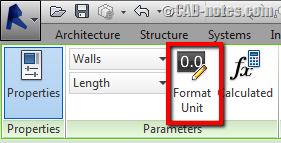
Alternatively, you can change units in existing schedule using Format Unit button in contextual ribbon. Select the row that you want to change the unit, then click Format Unit.
The option for unit format is similar to the one in dimension unit format. Uncheck “Use project settings” and change it as necessary.
Changing unit in Labels
Many annotations are stored in external families. The example that we will use here is level symbol.

This level symbol use “Level Head Circle” family. You need to open that family to modify it. By default that family location is in: C:\ProgramData\Autodesk\RVT 2016\Libraries\US Metric\Annotations\M_Level Head – Circle.rfa.
If you use other symbol, open that family.
In Family Editor, select the Elevation label.
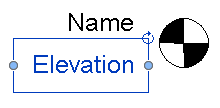
Click edit label button in Revit ribbon. Or you can do that by clicking Edit… button in Properties Palette, next to Label button.

Click the Elevation label in Label Parameters category.
Then click “Edit Parameter’s unit format” button as shown below.
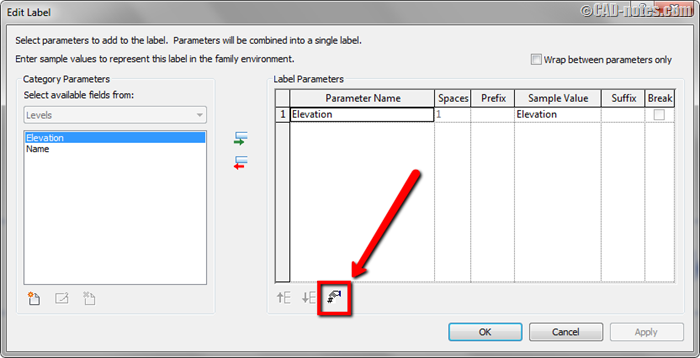
Like we did for dimension type and schedules, the unit format dialog is the same. Uncheck “Use project settings” and change the units as necessary.
Click OK to close all dialog box. And save this family. It is recommended to save it with other name, so you can still use the original family.
Now you can load the family to your project and override the existing family.
If you set this right, you should see the symbol is now showing the elevation in meters.
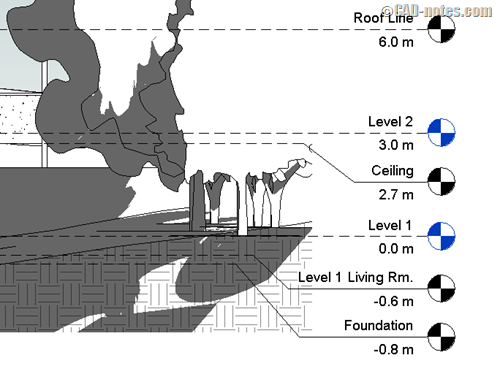
To sum up
Revit works with real world measurement. You can change the default units at any time during working at your project.
In fact, you can still use millimeter as default unit and type the distance in meter.
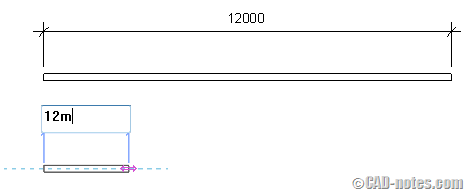
Typing 12000 or 12m in temporary dimension will give the same result.
So set the project units to the unit that you use most in your work. You can easily use other unit by typing the unit in temporary dimension.
For annotations, you have the freedom to use same unit with the project, or use a specific unit for that particular annotation. You can use meter in site plan, mm in detailed drawings or any other settings.
How about you? What is your preferred unit to use when you work? Do you show annotations with the same units?


Hello, any idea how to or if you can change unit case? For example, Revit appears to display “lb” by default. Is there a way to change this to “LB”?