If you need to analyze the minimum distance between two points in your building, now you can do it in Revit. Path of Travel is a new feature in Revit 2020. It is updated in Revit 2020.1 with the ability to show the origin and destination of the travel.
Let us see how it works and how you can utilize the tool.
Using the Path of Travel
Before using this tool, you should copy the floor plan view and use a specific view to draw the travel path. The travel path lines are 2D lines and appear only in that particular view.
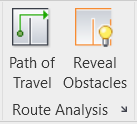
You can access the Path of Travel tool in the Analyze tab, Route Analysis panel. To try this tool, open a floor plan. Click Path of Travel.
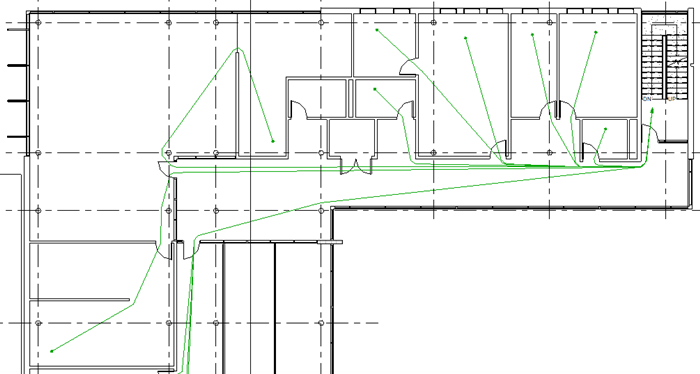
To define the travel path pick the start point, then click the destination point. Revit will find the closest path for you.
Defining Obstacles
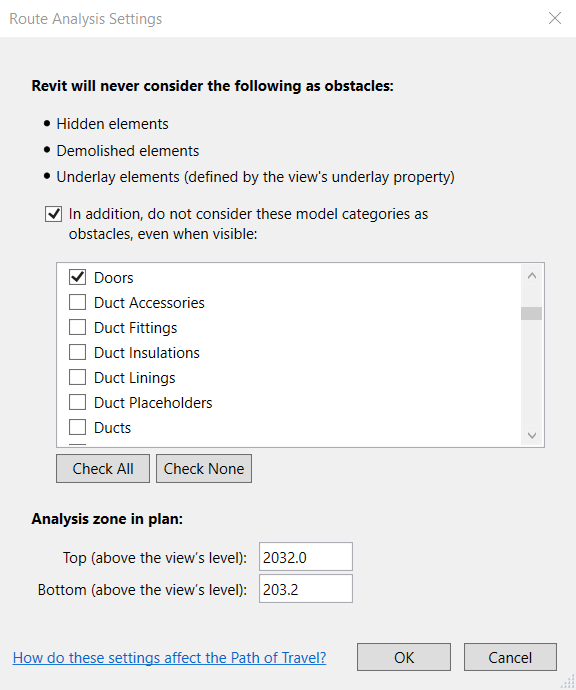
By default, Revit will consider all elements as obstacles except doors. Revit also ignores hidden elements, demolished elements, and underlay elements. If you want to ignore an element category, you can change it in the Route Analysis Settings.
Click the small arrow in the Route Analysis panel.
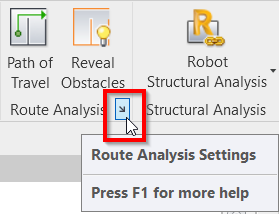
You can select elements to ignore by checking the category in the list.
Setting Up the Line Style
Path of Travel is a line. If you need to change the appearance, you need to change the line style. You can change the line style from Manage tab> Settings> Additional Settings> Line Styles.
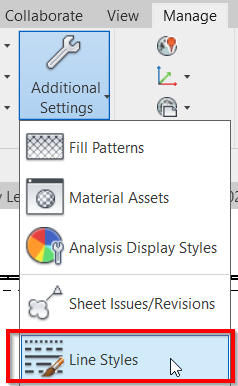
In the Line Styles dialog, Find the Path of Travel Lines type. You can change the line weight, color, and type as necessary.

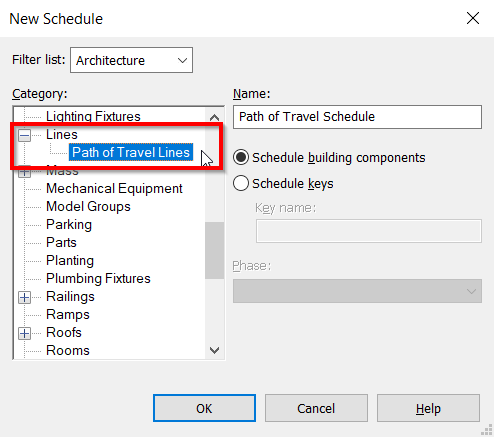
Creating Path of Travel Schedule
Path of travel is not just for visual purpose. You can create a report using the Path of Travel Schedule. The schedule category is Path of Travel Lines, under the Lines category.
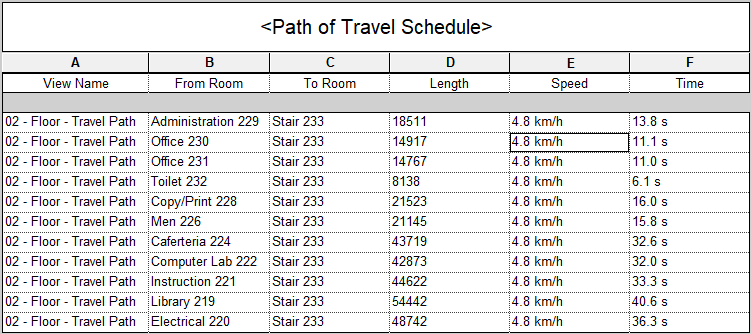
You can show the fields as below. The travel speed is a read-only parameter. However, if you need a custom speed value you can create a custom parameter and input your preferred value.
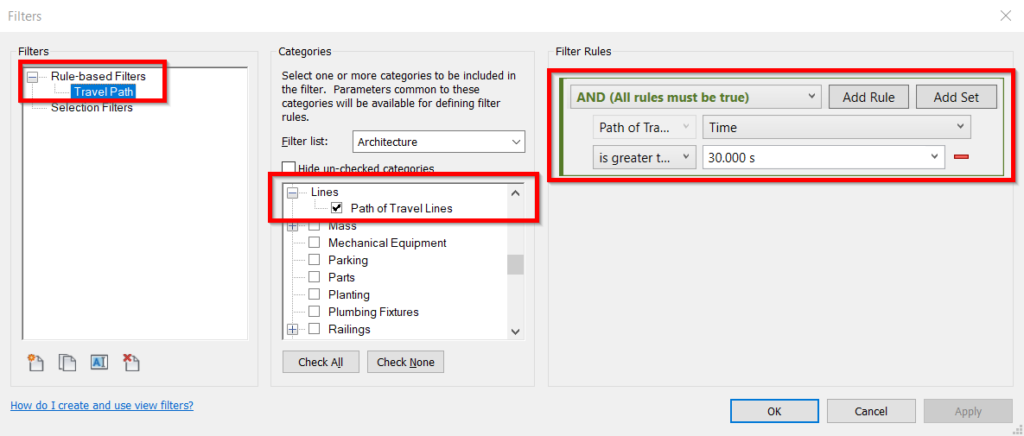
Defining Path of Travel View Filter
You can use Path of Travel lines’ parameters in a view filter. It is very useful if you need to show the travel distance or time that exceeds your design standard.
If you are not familiar with view filter, you can learn about view filter here: Controlling Revit Appearance: View Overrides
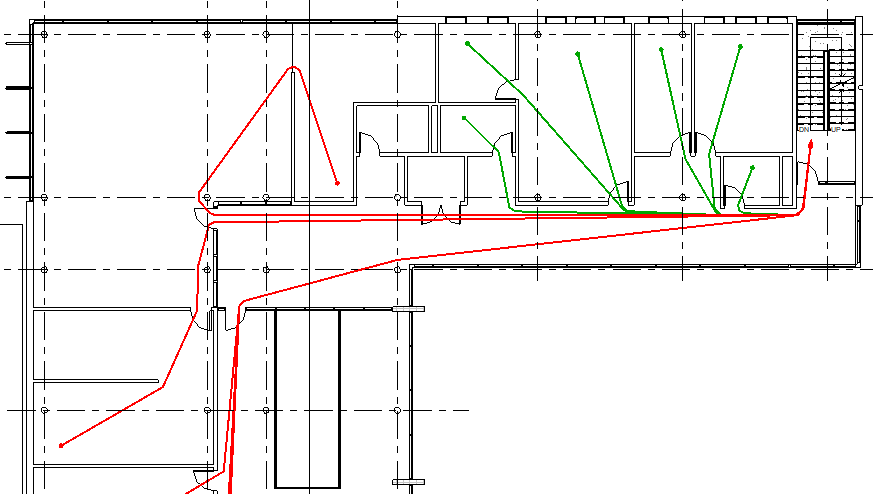
In the image below, the travel time that exceeds 30 seconds is shown in red.
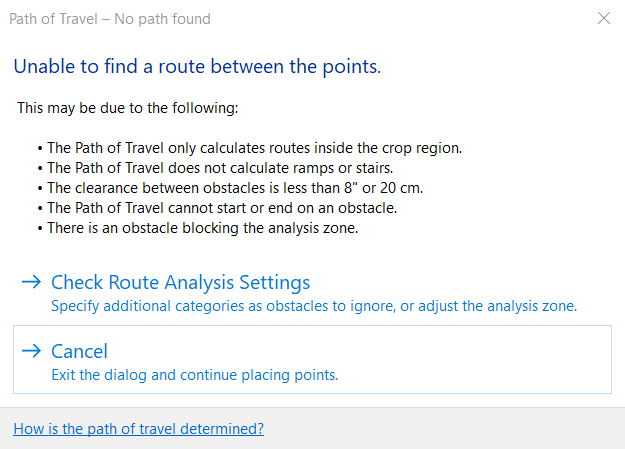
Limitation
There are several limitations in travel path analysis. You may see this dialog when Revit can’t create the path.
Conclusion
Path of travel help if you need to analyze the minimum distance of travel time in your design. If you need to analyze how long people can get to the emergency exit or how long a nurse can get to the patient rooms, then this tool would be great.
What do you think about this new feature? Would it be useful for you?


