In this Article...
Modeling in Revit can be overwhelming when you work with complex model. But you shouldn’t be worried about that. If you are comfortable working with views, then this won’t be a big problem.
In this article we will cover about Orient to View tools. This tool can be easily overlooked, but it has many advantages. At least, we can list 3 of them here.
In this article, we use rac_basic_sample_project.rvt that is included in default installation.
To align elevation view
Creating 3D perspective view in Revit is very easy. Once you have the model, all you need is to add a camera to make it. One problem with placing camera is, it doesn’t work with snaps. It makes a bit difficult to place a camera and it’s target precisely. For example, you want to place a camera showing front elevation view. You can place the camera approximately. But it won’t be precisely align to front view.
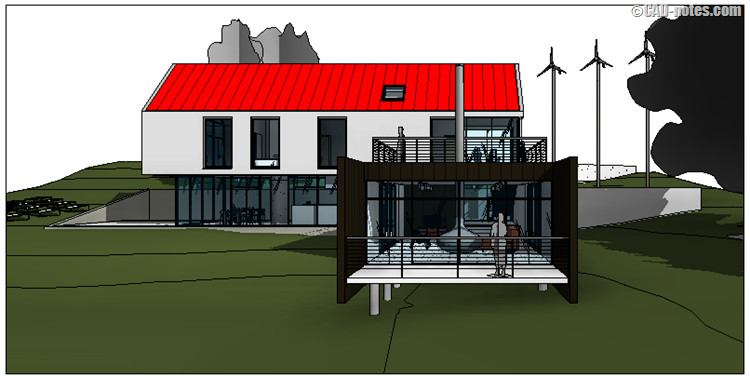
You can use orient to view to conveniently create this type of view. Let’s see how you can create a view like this.
Create your camera
First thing you need to do is to create the camera. What you need to remember is, you need to set the camera target correctly. The orient to view command will move the camera for you, but not the camera target.
To create a view like above, you can define camera like below.
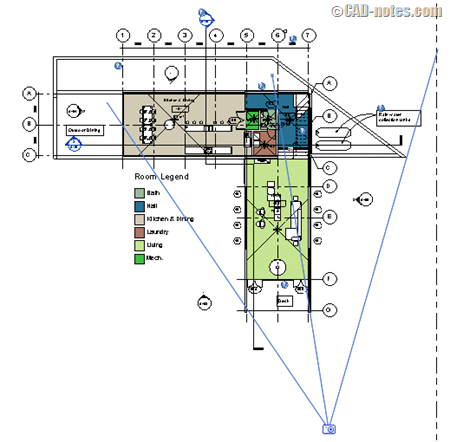
Revit will open the camera view after you create it. Within the new camera view, right click on the view cube. (You can also right click the home icon).
From contextual menu, choose Orient to View> Elevation> Elevation: South. Which elevation view you need to choose, it depends on which view you want to create.
In this example I want to create perspective South elevation view.
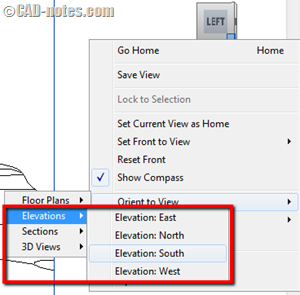
If not all parts of your models are shown, you can drag the view border control to show them.
To isolate a floor plan
Orient view will only move your camera to match your view to other view. However, it will do more if you use it in 3D parallel projection view.
Floor plan
By default, Revit only creates one 3D parallel projection view. So it is a good idea to copy the {3D} view before you continue.
In Project Browser, find {3D} view. It’s below 3D views category. Right click above {3D} then choose duplicate view> duplicate. Rename the new view as “1st floor”.
With the new 3D view open, right click above view cube.
From contextual menu, click Orient to View> Floor Plans> Floor Plan: Level 1.
Revit will align the view AND activate the section box. It will cut the elevation like the floor plan view.
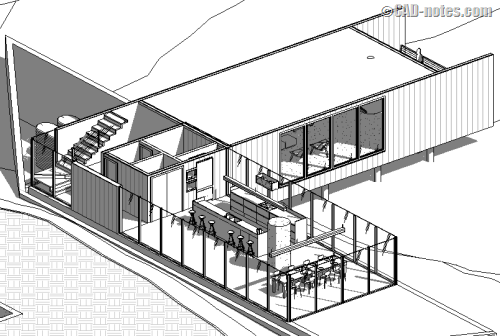
This is very useful if you want to isolate objects on that floor plan when working with complex model.
To create 3D section view
You can also use orient to view to create 3D detail view.
Let’s copy the {3D} view again. This time rename it to “Typical Wall Section”.
With the new 3D view open, right click the view cube.
From contextual menu, choose Orient to View> Sections> Section: Typ. Wall Section.
Your 3D view will orient to the section view. This is a nice way to create a “3D section view”
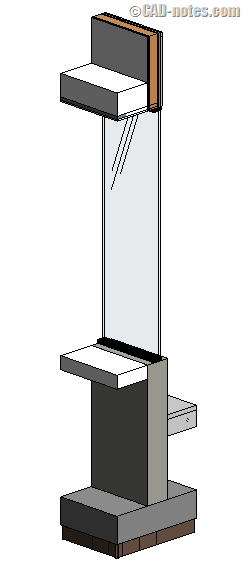
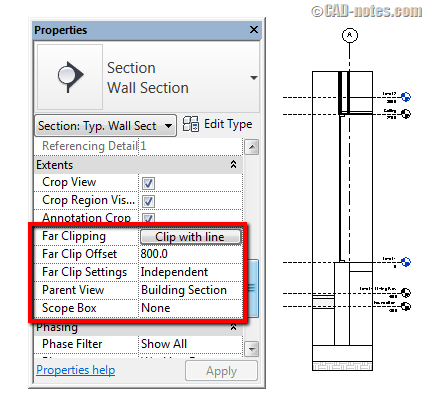
Your 3D view will grab the settings from your section view. So if you want to show specific area only, drag the crop view boundary.
For the section depth, change the far clip offset value.
Have you used Orient to View before?
Orient to view is a very useful tool. But not many of us notice if it’s exist. It used to be in menu bar but since it uses Ribbon, it’s moved to view cube.
Now, have you used this tool? Is there anything else we can use it for? Don’t hesitate to share it with us!


Isolating the floor plan:
Will it orient the 3D view based on the floor view range or the floor actual elevation height?
Thanks
Hi Edwin,
How to reset the 3d View after aligning to one of the sections or plans? For example, I want to orient 3D view to one of the sections and after finishing the work on it, I would like to take the view back to it’s normal. Can I do that?
Thanks in advance.
Hi Raja,
The easiest way is rename your current 3D view. Then click the 3D view button from Quick Access Toolbar.
Revit will recreate a default 3D view for you.
Is it possible to use autodesk360 desktop to share files with engineers (I am an architect) from Revit, using the sync functions?
What is the best way to do that and make sure that the drawings are safe and will not be lost in the cloud?
Thank you