In this Article...
This article is the first part of our Revit MEP tutorial. This tutorial series is for basic, so you don’t need to have a Revit knowledge before. However, the experience will help. I will guide each step you need to do to complete the tutorial. This tutorial is in metric, but it shouldn’t be a problem. Because you don’t use the measurement often.
This tutorial is in metric, but it shouldn’t be a problem. Because you don’t use the measurement often. And the version that I use to make this tutorial is Revit 2017. If you want to use the exercise files, you will need to use the same version.
If you have some questions about the tutorial, please ask in the comment section. I might not respond if you contact me directly. If you ask in the comment section, other readers who have a similar question can also read the answer. Or probably respond to you so that you can get the answer faster.
Exercise Files
MEP engineers usually use a building model from the architects. That’s why in this tutorial we don’t create a new architecture model from scratch.
We will create a new project, then link the architecture model to our project. It is a good practice to have a separate file for MEP project. Architects can continue working with their own file, and MEP engineers can work with their own file. So we don’t open the architecture project and work in it.
I have prepared a simple architecture model to use in this tutorial. You can download the architecture model here. Download and save it in your tutorial folder.
Create a new project
Let’s start by creating a new MEP project. In the start page, click New… under Projects category. Alternatively, you can access it from Application Menu> New> Project.

In the new project template file, click Browse… button.

Navigate to the project template folder, choose file Systems-Default_Metric.rte. If you don’t have that template on your computer, you can download it from this link. This is the template provided by Autodesk for an MEP project.
Now we have a new MEP project to start the tutorial.
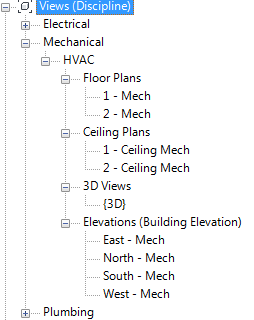
Examine the Project Browser. You should see the views for MEP models are created as below.

The next step is to link the architecture model to our MEP model.
Link an architecture model
Linking an architecture model will show the latest design in the architecture model. When the architect makes changes, you will see the changes in your model as well. It is similar to XREF in AutoCAD.
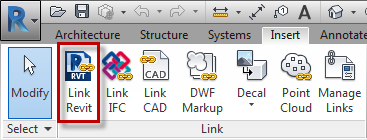
To link the architecture model, go to Insert tab. In Link panel, click Link Revit.

Choose the arc plan.rvt you downloaded earlier then click open.
You should see the architecture model in your project now. Save the project.
We will add sanitary equipment in the next tutorial. While you are waiting for the next tutorial, you might want to install US Metric library that we use in this tutorial. You can install the library by following this Knowledge Base.
Have a problem following the instructions? Watch the video below.
You can also watch it on YouTube here: Revit MEP Basic: Create a New Project and Link the Architecture Model


