One benefit of using the Revit family is the parametric capability. We can control the size, provide information, ensure standards, and much more. In this post, we will see how to use parameters in a Revit family for more advanced usage. We will use formulas and conditional statements to control array and element visibility.
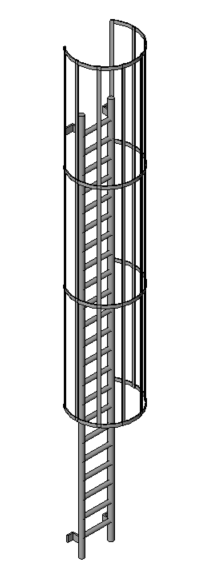
This post assumes you are familiar with creating families and parameters to control the dimensions. The case that we use is a ladder with a cage.
This ladder has simple elements. If you want to develop it further, you can edit it to add more details.
You can download the family here.
A few parameters you need to pay attention to are:
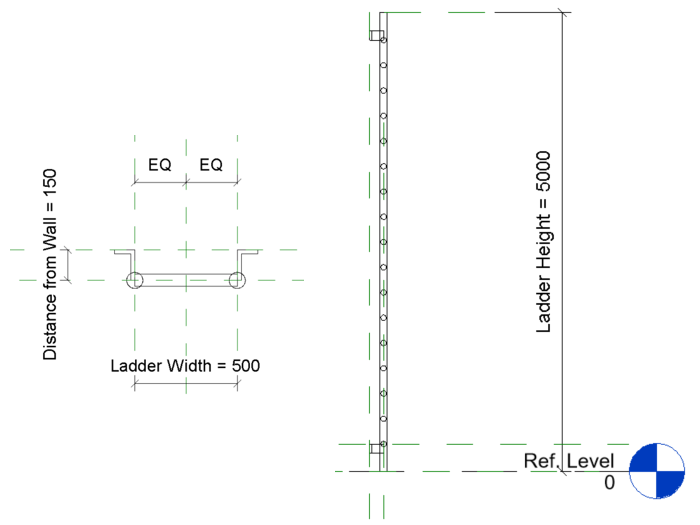
- We need to use parameters as labels for the dimension to control the ladder size, such as the width and height.
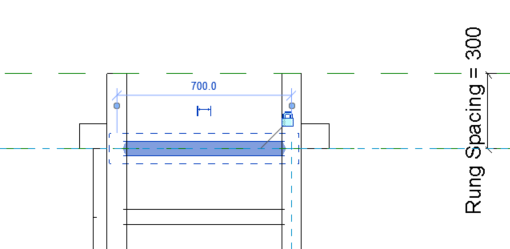
- The number of rungs follows the ladder height. You need to calculate the number of rungs with a formula.
- According to OSHA standards for fixed ladders, a ladder more than 20 feet height must have a cage for safety. We are going to use it in a yes/no parameter.
Standard Parameters
This family’s basic parameter usage is controlling the ladder height and width. Here I created two parameters to control the ladder.
Don’t forget to flex the parameter to test if they work correctly.
Using Formula
To calculate the number of rungs, we need to use a formula. But before we can use the formula, we need to prepare a few things.
Creating an Array
Place the first rung from the bottom, then create an array. Ideally, in a family, you need to make the rung as a family and then load it to the main family. Indeed, you can create the array directly from an extrusion. But Revit will warn you that it will affect Revit’s performance.
This form is straightforward, so it shouldn’t affect Revit much. However, I use a nested family to get used to family best practices.
Create an array and activate Group and Associate and activate the Last option.

Lock the position of the last rung to a reference plane. You can lock the position by using Align tool and then lock it.
Defining Formula in a Family Parameter
The formula to calculate the number of rungs is simple: divide the ladder height by the rung distance, then round the number to convert it to an integer. Remember that the number of items in an array must be an integer. You can’t use decimal numbers.
The formula is =round(Ladder Height / Rung Spacing)

Round is the function to make the number into an integer. You also can use rounddown or roundup.
By using roundup, the number of rungs will keep the rung spacing lower than the distance provided.
Using the Parameter in an Array
Now we need to use this parameter in the array. Select an item in the array, then click the dimension that shows the number of rungs (1). When the dimension is selected, you can change it to a parameter in the options bar (2).

Now we finished defining the rungs array.
Conditional Yes/No Parameter
We must add a cage when the ladder height is 6000 mm or more. We need to define a conditional when this cage should be available.
Defining a Visibility Parameter
This cage is also a separate family. We can control if an element should appear by using the Visible parameter. We need to add a Yes/No parameter to control it from the family type.
Test if this parameter works well, then load the cage family to the ladder family.
Defining a conditional
Now I will make a yes/no parameter. The value should be yes when the height is 6000 or more. The formula is straightforward. I only need to write >5999.

As soon as the Ladder Height parameter reaches 6000 mm, this parameter changes to yes. If less, it will be no.
Associating Main Family Parameter with the Child Parameter
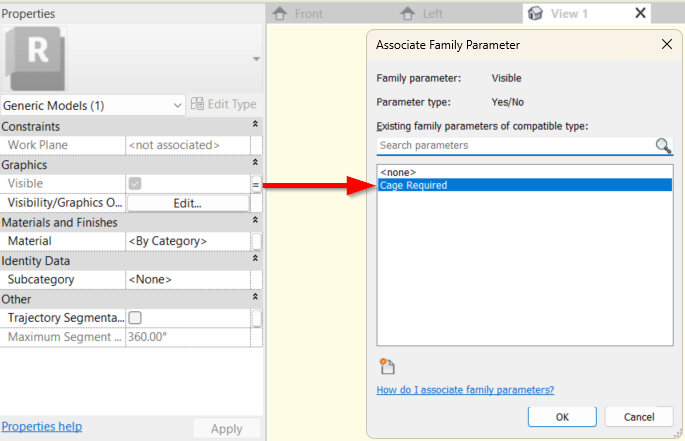
The last thing we need to do is associate the main family parameter with the child’s parameter. In the main family, select the cage parameter. Click Edit Type in the properties palette. Find the parameter that controls the element visibility.
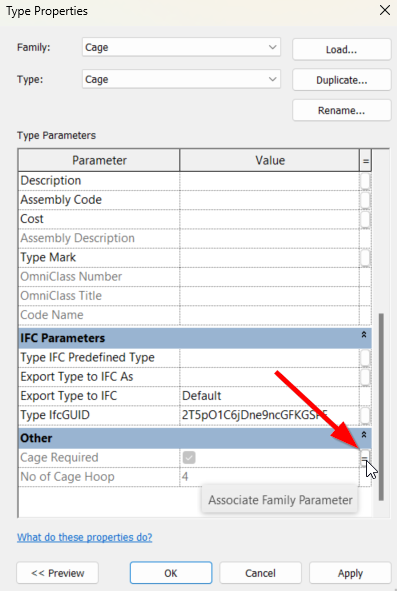
Click the = button (Associate Family Parameter), then find the conditional parameter that we created before.
Video Guide
If you want to see the video guide, you can see it below.
To Sum Up
Parameters are the main benefit of Revit. It allows you to revise the design quickly, create a family that has a similar appearance, and enforce standards. Not only drawing standards but also design standards.
In this example, we try to enforce using a safety cage when the ladder height is more than 20 feet. Do you think you can use parameters to control design standards in your design? Please share with us!


Thank you so much, your solve was very good