In this Article...
When presenting your design, either in elevation or section view, you may want to show far objects thinner than objects at the foreground. Similar to the image below.

In AutoCAD, you can use a layer or override the object properties to achieve this. How can we do this in Revit?
If you use Revit 2017, you might want to check Depth Cueing option as explained here. However, if you want to know another workaround, you can continue reading.
You can also override elements properties in views
As you know, every Revit view can have different elements’ graphic properties. For example, you can show furniture in furniture layout, but hide them in a floor plan. Or you can make furniture show as halftone in architecture floor plan, but can be shown clearly in furniture plan.
We can use this behavior to achieve this effect.
All you need to do is open the elevation view. With that view active, select objects at the background. Right click then choose override graphics in view> by element…

Step by step tutorial
Some of you probably already figure how it works. But let’s cover about this in more details.
Selecting objects
Before we start, let’s configure our views for easier objects selection. The easiest way to select objects at the back is by seeing it from the top view. But you need to open 3D view, not the floor plan. Remember, if you select objects in a floor plan, objects that are not visible here will not be selected.
You can show both of the 3D views from the top and also the elevation view.
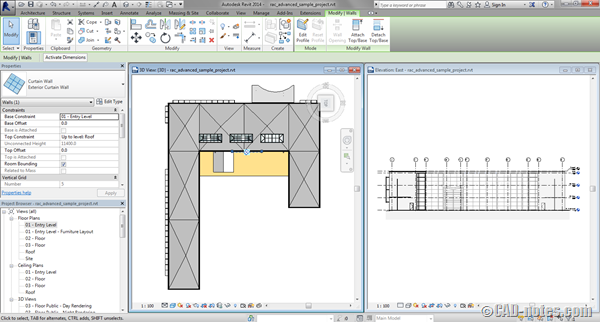
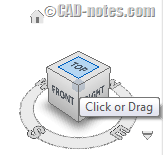
Hint: You can see the top view of your model by clicking top at your view cube.
Now make a selection window to select the objects.
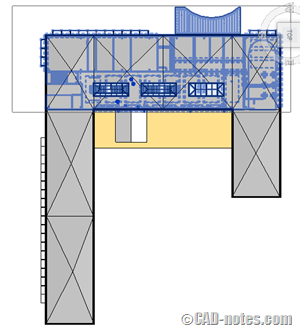
Why don’t we use floor plan to select objects? If you select objects using floor plan, then you can only select objects visible in that view. If you have objects outside of that particular floor plan, then they will not get selected.
Overriding objects view
Now with the objects selected, click anywhere in elevation view to activate the view. It’s recommended to click the view title, to prevent you lose your selection set.
With elevation view active, right-click in any empty area. Choose override graphics in view> by element… from the context menu.
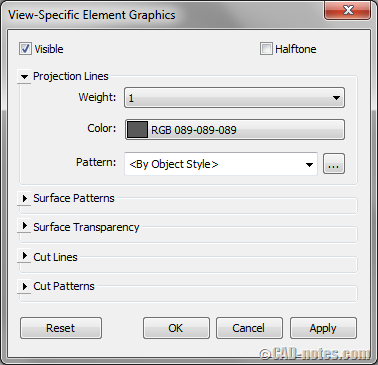
In this example I change the line weight to 1, the thinnest line weight available. To give even more distance effect, I modify the color to dark gray.
If you have more objects farther than this, you can repeat the process and give the lightest color.
You can see about Revit line weight control in more details here: Controlling plot thickness in Revit.
Silhouette option
If you work on section view, there is one thing that you can do to make silhouette effect quickly.
With your section view active, in Properties Palette, click edit on graphic display options.
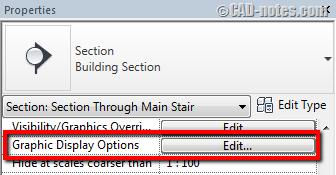
In graphic display option, change silhouettes to thin line style. You can create your own if necessary.
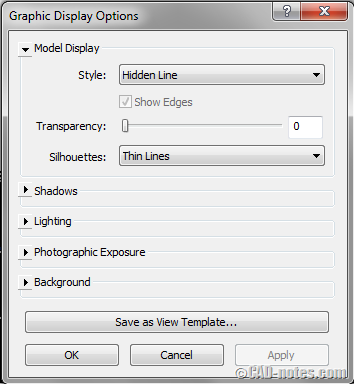
Applying this effect will override graphic display for objects that are not cut. This option can make cut objects thinner (using object styles), but objects behind them will look thin.
Revit views: priority topic to learn
Revit views are very powerful and can be customized independently. Sometimes view options and settings can be confusing, but when you master it you can do many things with it.
Do you have other experience with Revit views? Things that confuse you or cool things that you did?
Share with us here!


I want to know how to create a wall coyne on Revit
and also how to create a hood round about my window in an elevTion.
Thank you
A better option would be to cut 2 sections, 1 for the foreground and 1 for the background and overlay them on sheets. For the background section override the linework in the visibility graphics to be light gray. This way when new elements are modeled within the “background zone” they won’t need to have element overrides applied each time.
Great tip. Thank you.
I think Revit could have a tool work in building section object which apply override based on a distance from cut plane and a clip line. It could yet create one or two intermediate distances for this tool, setting by the user.