In this Article...
One question I often have when teaching Revit is ‘how can we control the plot styles in Revit?’.
That question is obviously come from AutoCAD users. Revit doesn’t have plot styles. But certainly, we can control how the objects to appear when we plot.
Object styles
Objects in Revit is controlled by object styles. You can access object styles in Manage tab, Settings panel.
![]()
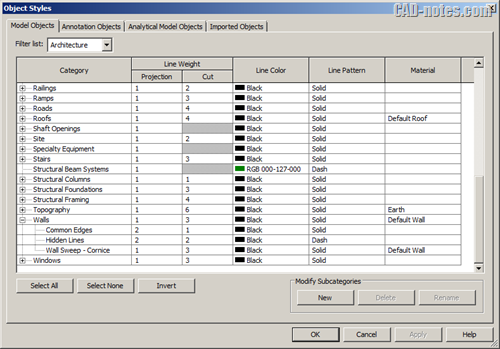
As you can see below, in object styles dialog box you can control the line properties.
For example, railing is drawn with black line and solid line pattern. It will be shown with line weight 1 in projection. And 2 when cut.

Visibility/Graphics Overrides
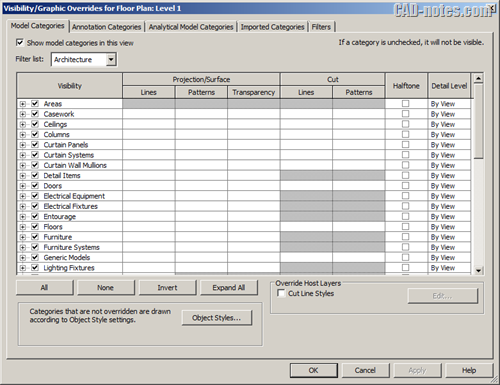
We can override object styles for specific views. We can do this with visibility/graphic overrides.
You can access this tool in view tab, graphic panel. Or default shortcut for this tool is VG.
If you set any value here, then your view will use it instead of object styles.

Filters
Filter is another way how you can override object appearance. It has higher priority than object styles and visibility/graphics override.
It means, doesn’t matter how you set object styles and visibility graphic overrides. If you override settings in filter, then your view will use it instead.
About filters
You can set a common property for filter. By using filter, you are not limited to a specific object. For example, you can set properties for interior walls, doors, and stairs at once. As long as they have common property, you can set it in filter.
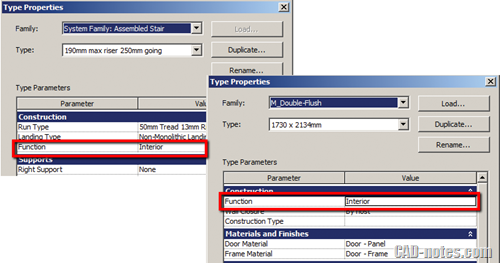
In this example, you can see common property for those objects is function.

It means only interior wall and stairs will be included. Exterior walls and stairs are not. You can create filters from view tab, graphic panel.
In this sample, the filter rule is set for function: interior. You can set 2 more conditions if necessary.

Overriding filters visibility
After you define your filters, you can override the visibility. It’s also in Visibility/Graphics Overrides, in filters tab.
Click add to add filter to the list, and change the properties as necessary.

View templates
View templates is the highest priority, since Revit 2013. View templates can store visibility settings for your view. Once you have it set, you can apply it to views you want to. By having templates, you can set the visibility only once. You don’t need to change properties for each view.
If you apply view template to a view, all filters override will be removed. And visibility/graphics override is greyed out. You are no longer able to change it.
Read more about view templates here.
Changing line weight
Now we know how we can set object visibility in Revit, including the line weight. But how do we set the line weight for plotting? Revit only has integer number, not real plot thickness.
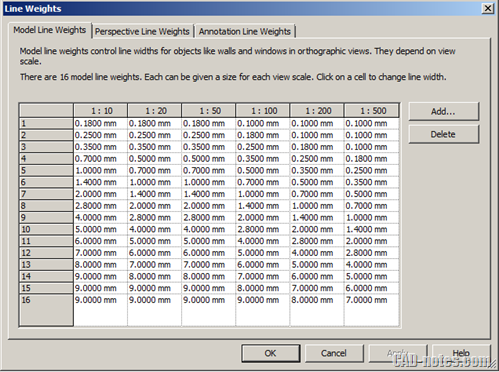
You can see and change the plot thickness in ribbon> Manage tab> Settings panel> Additional Settings> Line Weights.

As you can see above, line weight 1 will be plotted 0.18 mm or 0.10 mm. Depends on the view scale.
It’s not difficult, isn’t it?


Too bad that wouldn’t make a difference when plotting to pdf .. . No matter what you set in your line weights, it will get clamped to 0.085 mm. How frustrating.
Hi, i just want to add, that lineweight 1 is implicitly used as lineweight for patterns. Just for me, it’s really important information to know, before you start setting your own lineweights