• Home
  • Training Books
  • Subscribe to Our Email Newsletter
  • About
    • Contributors
    • Feedback
    • Contact
    • Privacy policy
    • Cookie Policy

CADnotes

CAD Tutorials and Best Practices for professionals and students

  • Featured
  • AutoCAD
    • AutoLISP
  • Revit
    • Revit Architecture Basic
    • Revit MEP Basic Tutorial
  • Inventor
  • MicroStation
    • MicroStation Basic Tutorial
  • CADnotes on YouTube
You are here: Home / Revit / Creating Staircase

Creating Staircase

August 10, 2009 by Edwin Prakoso 1 Comment

staircaseWe completed our Revit model exterior by creating roof. Now we start working on the interior by creating staircase.
If you always create stairs by drafting it in AutoCAD, you will love stair tool in Revit! Revit create stairs automatically, it will also calculate how many risers you should create to the next level. It’s pretty easy!

We have created 2 story house. So, we need to add a stair to connect this two levels. Open your 1st floor level plan. We will start here.
First of all, let’s put some references for our staircase so it will be easier to define our staircase run. Activate Ref Plane from your ribbon bar.
ref plane
Place your plane as below. You remember how to place objects in Revit right? It similar way with placing exterior walls here and interior walls here.
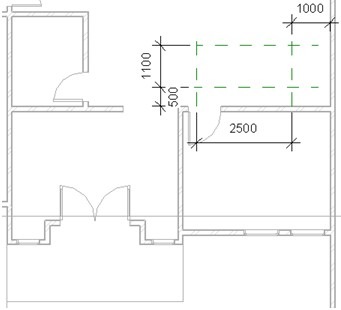
create-plane
Now, let’s do the magic. Activate stair tool. This also bring us to sketch mode, just like floor and roof tool.
stair
By default, the active draw mode is run. We can also define it by drawing boundary and riser. More about this later. For now, just make sure run is the active mode.
stair draw mode
Now we have to define the points for this stair run. Click consecutively on point 1,2,3 then 4 as below.
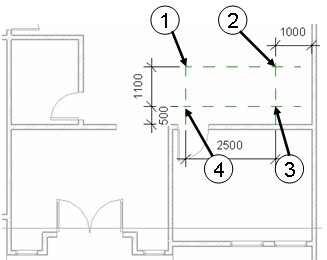
stair-location
When defining the stair run, you will see a preview of your future stair. It will also mention how many more riser you should create. It should be 0 remaining at point (4).
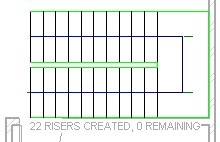
create-stair
Now that we finish defining our stair run, click finish stairs.
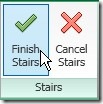
finish stair
Review your design. Open your 2nd Floor level plan. You should see the 2nd story floor connected to our stair is not correct yet. Let’s edit it. You do remember how to do it right? Review how to do it here.
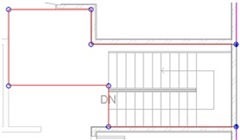
edit-floor
Let’s review it by placing a camera. Open your 1st floor plan. Open your view tab on your ribbon. Click the small arrow below 3D View, then click camera.
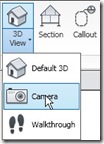
camera
Now place your camera: first click define camera location, and second point define camera target.
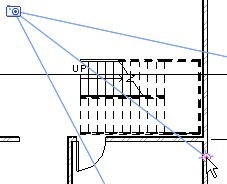
camera placement
You might see that not all of your staircase shown. Select your camera view boundary, then click and drag the view grip. Arrange until you see your staircase as you want to.
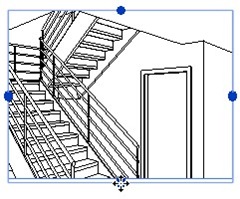
grip control
Try to select your railing, and change the railing type!

*You can purchase this tutorial compilation in an e-book. Find out the books in our E-Store .

About Edwin Prakoso

I work as a Solution Consultant in Datech Solutions, Tech Data Indonesia. I've been using AutoCAD since R14 and Revit since Revit Building 9. I occasionally write for AUGIWorld magazine and I am also active in Autodesk discussion forum. I'm a member of Autodesk Expert Elite, an appreciation for individuals who give contributions to the Autodesk community.
Connect with me on twitter or LinkedIn. If you want to have my new articles sent to your email inbox, you can subscribe to the newsletter.

Filed Under: Revit Tagged With: Revit Architecture Basic

0 0 votes
Article Rating
Subscribe
Login
Notify of
guest

guest

This site uses Akismet to reduce spam. Learn how your comment data is processed.

1 Comment
Inline Feedbacks
View all comments
Sergiu Simniuc
Sergiu Simniuc
12 years ago

Thanks, i helped me ! Now i know to to put stairs in Autocad 20121

0
Reply
wpdiscuz   wpDiscuz
Join Our Free Email Newsletter
  Thank you for Signing Up
Please correct the marked field(s) below.
1,true,6,Contact Email,2 1,false,1,First Name,2 1,false,1,Last Name,2

Featured

Doing computer exercise

A Simple Guide: 12 steps to Master AutoCAD

So you want to be an AutoCAD jedi? Learning AutoCAD is easy, not as difficult as you think. See the 12 steps to get there!

Recent Articles

  • Revit 2024.1 Update is Released
  • What’s New in Revit 2024: Bending Detail
  • What’s New in Revit 2024: The Dark Theme

Advertisement

New on CADnotes

  • Revit 2024.1 Update is Released
  • What’s New in Revit 2024: Bending Detail
  • What’s New in Revit 2024: The Dark Theme
  • Autodesk Build: Using Assets for Progress Tracking
  • My Home on the ACC Unified Platform

Meet the Authors

avatar for
avatar for
avatar for
avatar for
avatar for
avatar for

Get Connected

CADnotes on FacebookCADnotes on InstagramCADnotes on TwitterCADnotes on YouTube

© 2009 – 2023 CADnotes · Feedback · Privacy Policy · Become an affiliate

wpDiscuz