In this Article...
When we do a design in MicroStation, our design can be very large or complex. It will be very useful if we can open several views to see the design from different angle/perspective (for 3D) or simply open different views to show different areas. Imagine you have a very large area. Instead of zooming and panning every time you want to see different area, you can show them in different views. It will be more useful if you work with multiple monitors with your workstation. MicroStation allows you to do that. We can open 8 views simultaneously when working with a MicroStation design file.
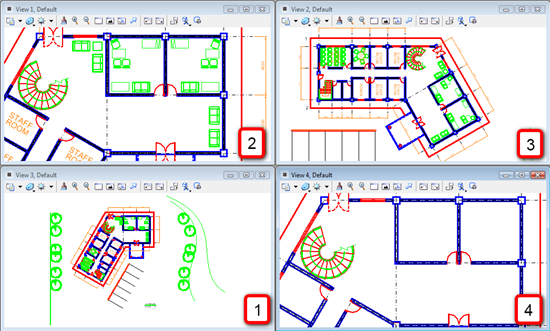
The interesting thing about MicroStation views is, we can treat them individually. Each of them can represent any part of your design from different angle with different properties. Let’s take a look at this example.

- View 1 is the ‘fit view’ of our project.
- View 2 is the larger view of the north area of our building.
- Now take a look to view 3. It is a rotated view of our project!
- Still not impressed? In view 4, we can hide some annotation and building details!
We can open/close a view by clicking the view buttons in view groups.
![]()
Arrange and Manage MicroStation Views
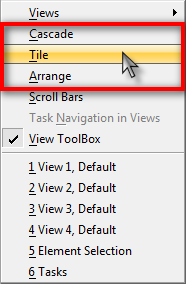
After we open several views, we can tile or arrange them just like in other Windows applications: using windows menu>tile. You can cascade or arrange them too.

However, sometimes it’s easier to meet our requirement just by dragging the views corner, and drag the title bar to move the views to their desired position.
![]()
When we work with common views arrangement, we can save the MicroStation views arrangement using view group. We will do MicroStation view exercises later.
![]()
View Control
Each MicroStation view has a view control bar. You can zoom, rotate, and pan your views individually. And you can get previous/next view from each of them too!
![]()
If each of them has a view control, then how does it work? Simple. You can activate the view control tool in any view, and click in whichever view you want. It will control the view you click. Doesn’t matter where you activated the tool. This applies to all view control, except for rotate view and window area.
For rotate view, it will rotate the view where you activate the tool. But you can click in other view to get the reference points.
And for Windows area, you can select where you want the area to be shown. You can define area in view 3, but show the selected area in view 1.

View Attributes
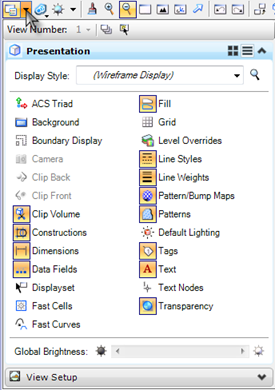
Each MicroStation view has view attributes. We can control them individually. For example, we can show annotations in view 1, but turn them off in view 2. Or shading in view 1, but wireframe in view 3 (for 3d design).

MicroStation Saved Views
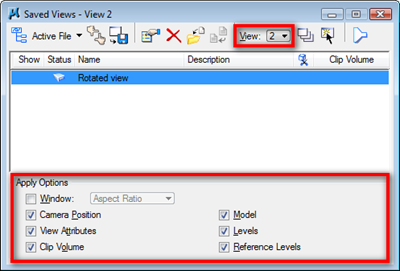
If you have many view configurations that you want to keep, you can use saved views. Saved views will save your configuration for individual view. This is different with view group. View group saves the views arrangement and location. Saved views save how your views are set.

In the next tutorial, we will practice with view control and view arrangement.


Is it possible to change level colors in each view. IE shade back certain elements in one view and then bring others to light in another? Then I would like to know if it is possible to save the state of the levels for each view?
Jason,
I'm sorry. I'm not familiar with MicroStation VBA.
hi i was wondering about saving views using VBA. I have to make 3 saved views of each object i have, one front, side and plan. the only diffrence in the saved views for each is _F, _R, _T. The problem i have is i dont know how to stop the name and description from being a user input? if you could point me in the right direction that would be greatly appreciated. (Macro gets Plan Front View 1, Front from View 3 and Side from View 4)
impressed!!!