In this Article...
We have created two building masses for design alternatives. We created the masses as Revit mass families which are saved as external files, not as in-placed families. Creating them as external families are good practice if you have design alternatives. We are going to see why. In this tutorial we are going to place it to our project, present the design to our customer with several early data: the building mass floor.
Placing the Mass
Placing the mass is exactly the same with placing Revit components. We use place component tool within our project file.
Creating the Revit Project
Now let us create a new project file. After you create the project, go to massing and site tab, activate show mass.

You can activate it later. But if you don’t activate it, you will not see the mass and get this warning:

Placing Mass
Now we are ready. Let’s go back to home tab. Click place component to place it.

Remember, we haven’t load the masses yet. You can load it now using load family. You should see it now in Revit contextual ribbon tab.

In load family dialog box, choose all masses you created. I have two masses, if you have more, load them all. Change the placement to place on Work Plane. This will make Revit try to find the level 1 work plane and place the mass using it as host.

Click your mouse to place it.
Creating Reference Levels
Open an elevation view. As you can see, default Revit template only has 2 levels. Our building mass is much higher than 2 levels. I created 200.000mm height building (200m), which about 50 levels height. Well, if the level height is 4m. Select level 2, then activate array tool.

We want to add 48 more levels, 49 include level 2. So change the number to 49, deactivate group and associate, and choose to move it to 2nd object.
![]()
Click first point as reference, then move your pointer above. When the temporary dimension shows 4000, click your mouse again. Now we have 50 levels! The new levels are just reference levels, shown in blue. If you look at the project browser, the floor plans are not created yet. If you want to create the plan views, you can create them later.
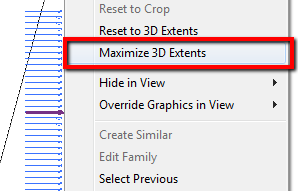
Select all levels, right click, then choose maximize 3D extents. The level lines will be extended following the object size.
Creating the Mass Floors
Now we have the reference levels as necessary. Select the mass, and click mass floor from your contextual ribbon tab.

In opened dialog box, activate all levels. You can do it quickly by clicking the first level, hold [shift], then click the last level. Click the box to activate the check mark.
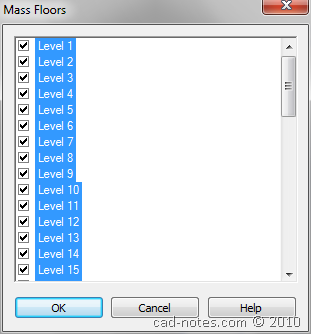
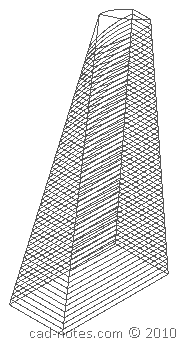
Click OK. Now you will see the conceptual mass divided to 50 levels.
Creating Mass Floor Schedule
The next step from this conceptual mass study is creating the mass floor schedule. Schedule is a view, so go to view tab, and click schedule> schedule/quantities.

In new schedule dialog box, find mass floor. Click OK.
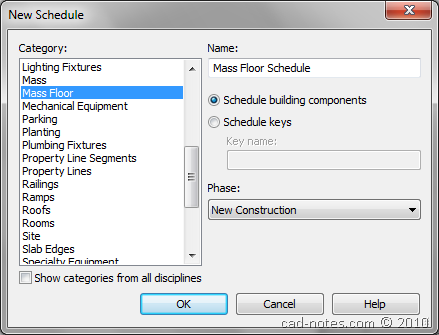
In the next dialog box, choose which field you want to report. The most common fields probably are: level, level area, level perimeter, and level volume. Arrange the schedule as necessary.
Switching Between Options
Remember that we have two alternatives? You can quickly switch between options by selecting the mass and change the type from properties palette.
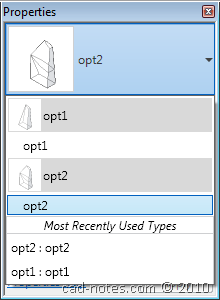
Even we only created the mass floor on first alternative, we will also see the mass floor on the other alternatives. As you can see here, the mass quickly changed and the schedule updated.
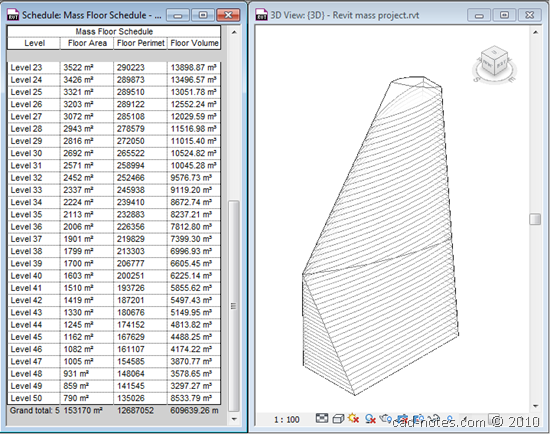
Pretty impressive for first presentation right?
The Animation
If you have problem with the steps described above, you can see the animation below.


I created a mesh geometry in conceptual mass but when load into project it cant able to add floors????
Excellent tutorial!
Thank you very much.
Great, clear and very detailed instruction. learn a lot.
thanks, Edwin.
Hi. I am trying to export a rhino model into revit to create the mass floors. But I keep getting the "Mass only contains mesh geometry" which then doesn't allow me to create mass floors. I tried exporting "solid" as .sat and .dwg files but still doesn't work. Please help.