In this Article...
In this post, I will share some tips to control your views for large models. Let’s see how we can split it into several views.
Duplicating View
When you work with quite a large model, and the model is not fit to a single sheet, you will want to separate them to separate sheets. His question is, how can we split the Revit views?

We have discussed how we can create duplicate views. The first one is when we create door and window tags. The next one is when we create room legend.
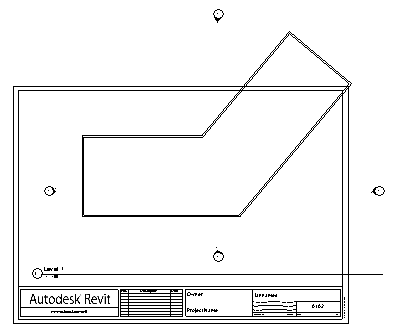
The idea is the same. We duplicate (or create) the floor level, and each view will represent the different areas from the model.
Create a simple model like above. Sorry that I don’t provide a better exercise file. But I hope you will get the idea.
Right-click your view from the Project Browser, and select from the context menu: duplicate view>duplicate as dependent. Create another dependent duplicate. Rename the views. I use East Wing and West Wing here.
Let’s see in the project browser. Not like other duplicate views, we will see the duplicates as child views.

Controlling the Crop Region
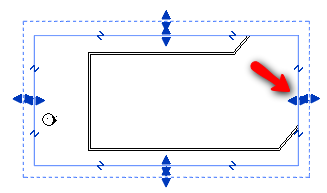
Open the east wing view. If you don’t see the crop region, click show/hide crop region in the view control group.

Drag the boundary control so you can get the area you want to show.

Do the same to the west wing view.
Now open the primary view, which is the level 1 view. You will see the dependent-view boundaries in this primary view.

Dependent vs Independent View
When we should use Revit dependent-view? And when we should use an independent view? Unlike an independent view, where you need to place all the details and annotations, you only need to control them in the primary view. At least most of them.
In the primary view, add your annotations, such as dimensions, tags, etc. And after you finished, open the dependent views and see that your annotation is there! If you use independent views, then you will need to add the annotations in each of them. Dependent views will be much easier to be controlled for this specific purpose.
Revit is also intelligent enough not to display the cropped annotations. You can control this behavior in view properties, and disabled the annotation crop option.

Creating Match Line
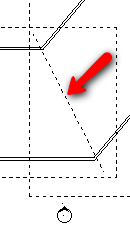
Now we need to add a reference to tell people about which sheets are the views. We can do this by adding a match line. You can activate the match line from Revit ribbon, view tab>sheet composition>matchline.

Activating match line will activate sketch mode. Draw the match line, and after you finish, click finish match line from Revit ribbon. Here is my match line.

Now try to place the dependent views on separate sheets.
Adding View Reference
To complete this match line, we need to add a view reference. This view reference will tell us where we can find the rest of the model. You activate view reference from Revit ribbon, annotate tab>tag panel.

Place your tag. Change the target view as necessary, and place for the other target. You can change the target view in the options bar.

Don’t worry about the exact placement. Revit will only show the target view reference in the dependent-view. So it will not show the reference to itself.
Examine your views and sheets.


Thank you for the easy and detailed information
This was very helpfull. Thank you for the tutorial. The Revit help was less than adequate and you have done a fine job in filling the void.