As we covered in part 1, a key schedule is to set default information to a component. One key schedule can have many keys for each type. For example, a room key schedule can list receptacle, telephone jack, wall finish, floor finish, and any other default equipment or accessories.
A small meeting room needs 2 receptacles, 1 telephone jack, and carpet flooring. Let’s call this type “small meeting room”. A large meeting room might need 5 receptacles, 2 telephone jacks, and carpet flooring. This type is a “large meeting room.” A restroom only needs 1 receptacle, no telephone jack, and no carpet flooring. If you have typical properties like that, a key schedule will be handy.
Creating a Key Schedule
Let’s try creating a key schedule. We are going to create a door key schedule. Later we will use the keys in the schedule we created in part 1.
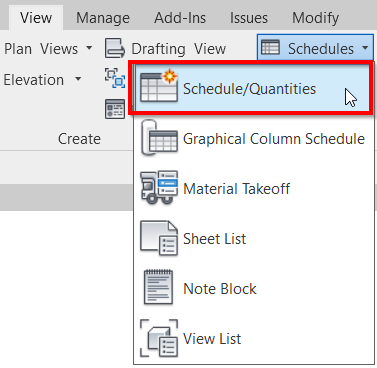
Creating a key schedule is similar to creating a Building Component Schedule. In the View tab, Create panel, click Schedules> Schedule/Quantities.
In the New Schedule dialog, select category Door (1), and schedule type is Schedule keys (2). The key name, by default, is Door Style. We do want to create a door style, so let’s leave the name as default. However, you can change the name if you want to.
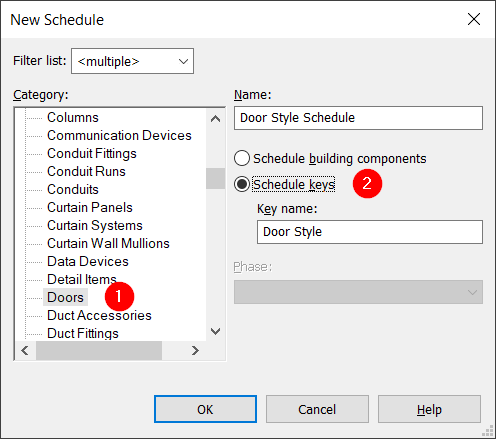
Click OK to continue.
Adding Information to a Key Schedule
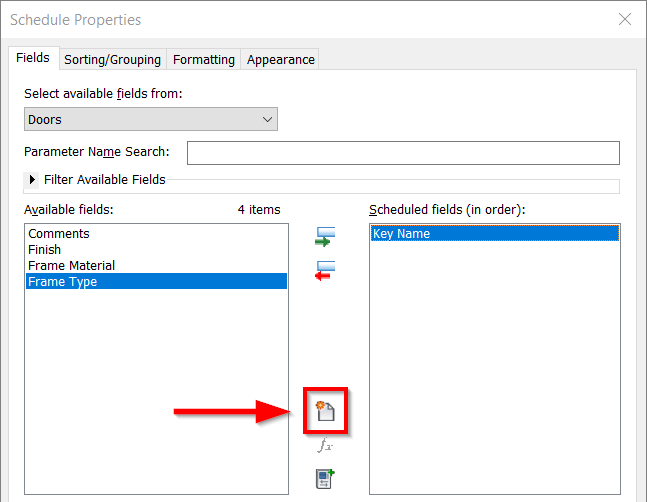
Now we need to add information to this key schedule. By default, we have several keys already. And Key Name is already in the schedule fields. But they are not what we wanted. Let’s create several keys.
Creating New Project Parameters
Click the New Parameter button.
In the Parameter Properties, use the following options:
- Select parameter type as Project Parameter.
- Give parameter name as Door Closer.
- Use Common as discipline.
- Use Yes/No as the type of parameter.
- Select Data for Group parameter under.

Click OK to add the parameter.
Add more parameters like below to the Door Style Schedule.
| Parameter Name | Parameter Type | Discipline | Type of Parameter | Group Parameter Under |
| Door Closer | Project parameter | Common | Yes/No | Data |
| Door Stopper | Project parameter | Common | Yes/No | Data |
| Kickplate | Project parameter | Common | Yes/No | Data |
| Automatic Lock | Project parameter | Common | Yes/No | Data |
Now we have the following keys in our door style.
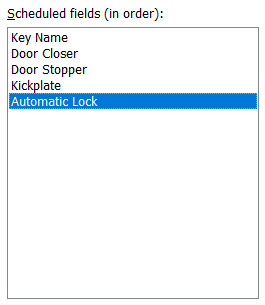
Click OK to create the key schedule.
Defining Door Styles
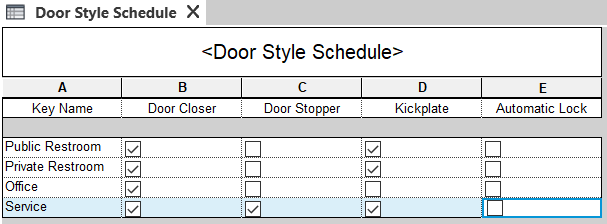
The key schedule is empty. We need to create the door styles in this schedule. Click Insert Data Row from the Contextual Ribbon tab.

Give the styles name and define what accessories available for each door style. The finished table should look like below.
Adding Key Schedule Information to a Schedule
Now we already have several door styles. Each door style has a set of accessories. Now we need to define the style for each door. Select a door. Or you can also select multiple doors with the same styles.
Using the Door Style in the Element Instance
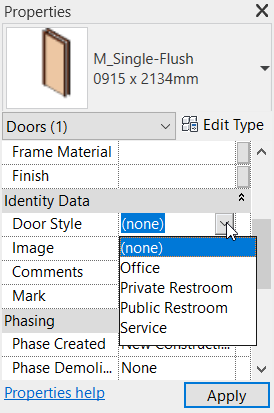
In the Properties Palette, find Door Style under the Identity Data category. Change the style using the dropdown list. Notice that in the list, you can see all styles that you defined previously.
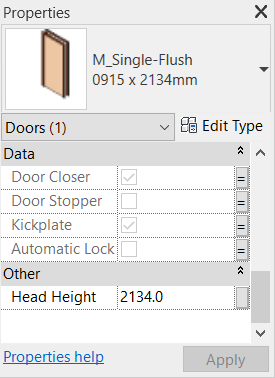
Examine the Properties Palette. Under the Data category, you can see all the keys. But they are read-only. The value depends on the door style you selected.
Adding Keys to the Door Schedule
Open the Door Schedule we created in part 1. Edit the schedule fields.
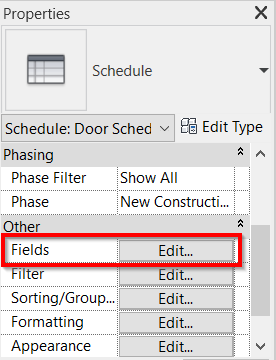
Now we can see the parameters in the door schedule as well. Add the new parameters to the door schedule.
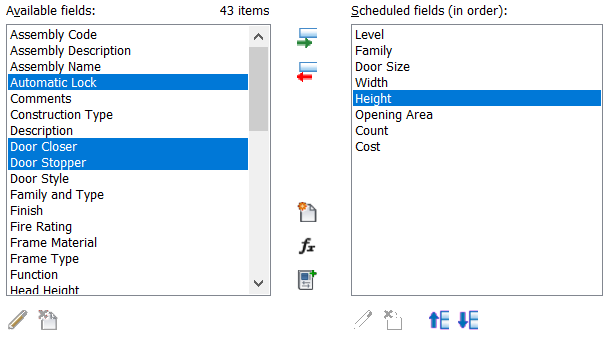
Now I have these fields in my door schedule.
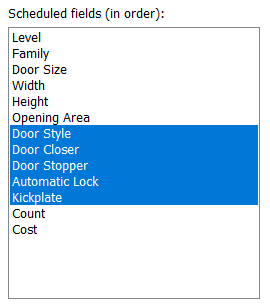
Click OK to add the new parameters to our door schedule. Review the schedule.
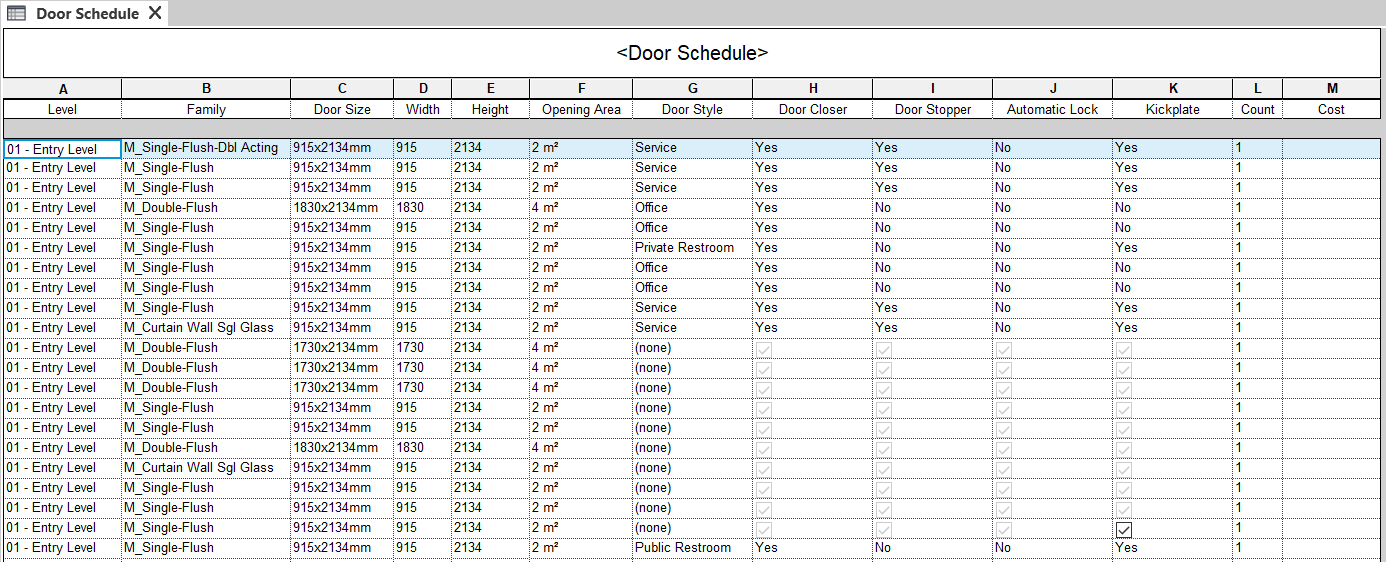
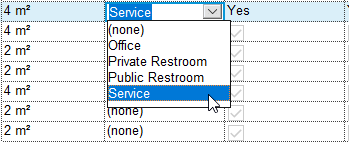
You can change door styles in the schedule if necessary.
Key Schedule Video Guide
Do you need to see how it works in a video tutorial? Check this video!
To Sum Up
Revit Key Schedule is useful to apply a set of properties to your elements quickly. Usually, we use it to define what accessories or what equipment should be available for a specific type of element.
You probably think that setting the style is tedious work. However, there are some tricks to select multiple elements quickly and easily: Revit basic tip: Selecting objects. Then you can apply styles to multiple elements quickly.
We will cover how to manipulate the data in our schedule in the next article.


