 Now you know how to use mouse in MicroStation. Now let’s see how we can draw precisely in MicroStation. AccuDraw is your ultimate weapon to place drawing elements in your design files. It can help you to place elements precisely, effectively, and efficient.
Since this tutorial is about 2D drawing, you will only see X axis and Y axis. But when you create a 3D drawing, you will see one more axis: Z axis.
You can find AccuDraw above status bar. You can tear it off and make it floats like image in this tutorial. It’s your choice.
If you’ve been playing with MicroStation for a while, you might have close AccuDraw by accident, and now wondering how you can turn it on again. I did it before :) You can turn it on/off by clicking Toggle AccuDraw on Primary Tools bar.

Let’s get started. Create a new file, and open it.
Rectangular Coordinate
![]()
Activate Place SmartLine by clicking the button on task navigation. Click anywhere on your drawing area. You will see a compass on your pointer.
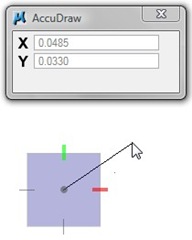
Try to move your mouse pointer around. You will see the X and Y value changing. Move it to the right or left of your compass. You will see the field focus is on X field. We can tell where the focus is by the highlighted field. Now move your pointer up and down near the compass. You will see the highlighted field now on Y.
The AccuDraw focus will move to field with higher value.
Now move your pointer near to X or Y axis. You will see the line is thicker and sticky to the axis. We call it indexed. Indexing will help you to draw lines parallel to X or Y axis.
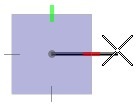
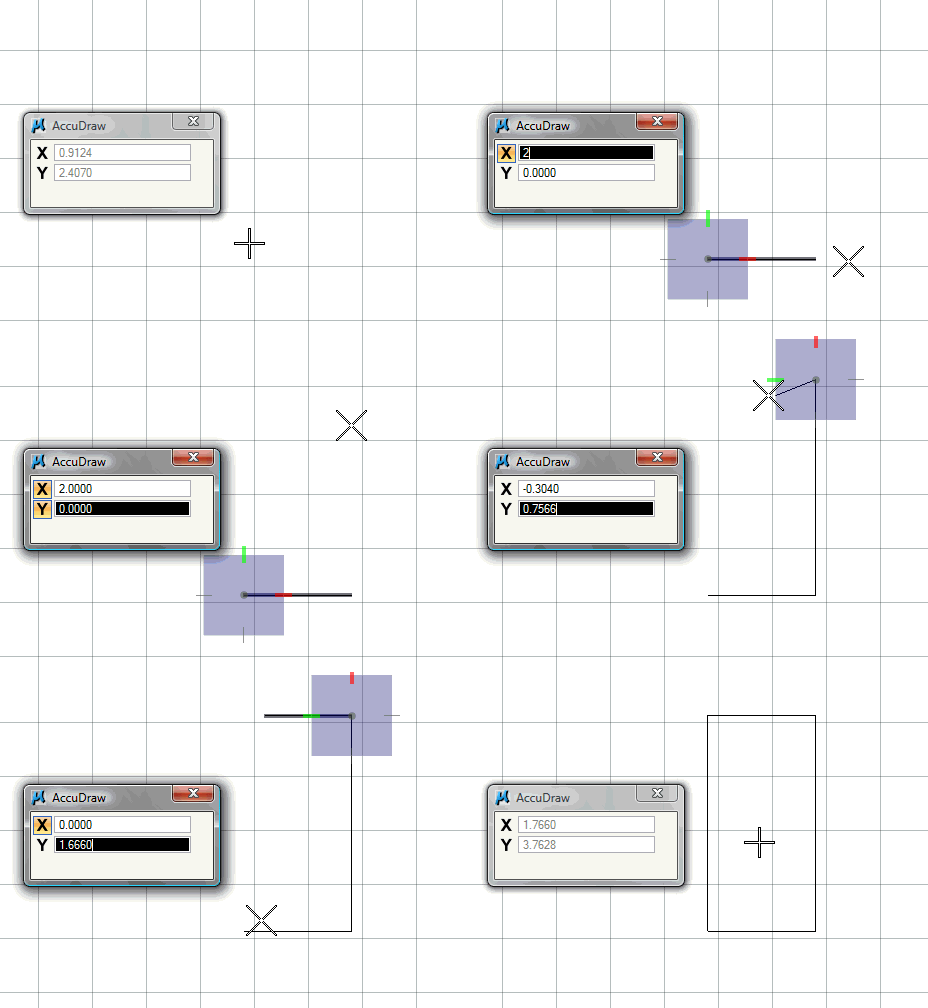
Move your pointer to the right, make sure X field get the focus. Type 2 then [enter]. You will see the X is pressed down, it means that the X value is locked. The focus automatically switched to Y value. Now we can change the Y value. Since we want to create a horizontal line, type 0, then [enter] again. Both of you X and Y value is now locked. Click your mouse left button to define the data point. Remember, MicroStation users call the left button mouse as data point. You will see the SmartLine placed.
Now move your pointer up until Y field get the focus. Type 4 then [enter]. Move your pointer until it’s indexed to Y axis. This will change the X value to 0. No need to lock it, click data point.
You may need to zoom out to see all your drawing. Scroll your mouse, until you see what you want.
Move your pointer to the left. Pay attention that AccuDraw now have focus on Y, not X. Isn’t X axis is parallel to horizontal axis? AccuDraw compass will be rotated and follow the previous data points orientation. Don’t worry about this now. You just need to move your pointer to get the correct focus.
Move it to the left, make sure it’s indexed. Press [enter]. This will activate SmartLock. SmartLock will lock the horizontal value, which is Y value now. Move your pointer to the first data point you defined. It’s the starting point of this line. Wait until you see the yellow X symbol, and click on it. It was the snap tool. Snap tool will ensure your data point ‘snapped’ to a certain point. We have a horizontal line now.

The last line, should be a vertical line to our starting point. Snap, and click on it again. There you go! You’ve just created a rectangle with size 2×4 mm.
Polar Coordinate
During the design process, you may need to use other method to input your object. Not by X and Y value, but using distance and angle. This is known as polar coordinate. How can we use polar coordinate in MicroStation?
Easy, when AccuDraw get the focus, press [space] to change it to polar coordinate. You will see the X and Y now is changed to distance and angle.
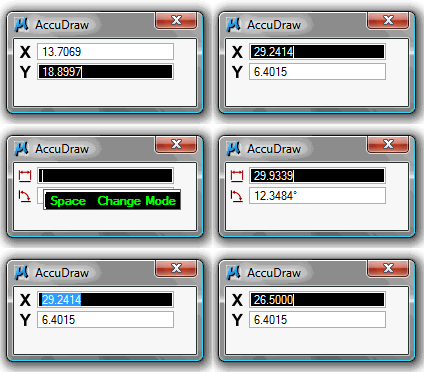
If you need to change it back to X and Y, simply press [space] again.
AccuDraw Challenge
Here is a little challenge for you. Can you create a profile like this image below?
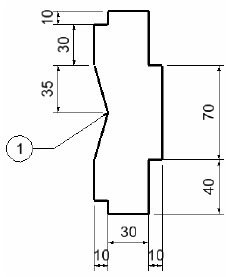
Tips:
As mentioned previously, AccuDraw compass follows the previous data points orientation. When you get to point (1), you need to reset the compass orientation. Press V to reset the compass to view orientation. More explanation on this later.
Next, we will continue the tutorial on how to use tool settings.



Awesome stuff. Thank you very much!!!
I JUST WANT TO LEARN HOW TO CREATE CONTOURS FROM EXCEL SHEET DATA X,Y,Z.
WHAT PROCESS SHOULD I TAKE. CAN YOU HELP ME . I CANNOT AFFORD THE PRICES OF PRESENT DAY SOFT WARE ,HOW CAN HELP YOU ME.
YOUR THESE TUTORIAL PROGRAMS ARE EXCELLENT ONES. THANKS.
I have an issue with accudraw staying fixed with the view. I have reset to global with no change and am at my whits end. I would like it to go back to the auto rotate to each line drawn, but I dont know how.
Scott:
Type "P" in AccuDraw, which is "Point Keyin" og M for multiple.
What is an easy way to enter coordinates with AccuDraw?