• Home
  • Training Books
  • Subscribe to Our Email Newsletter
  • About
    • Contributors
    • Feedback
    • Contact
    • Privacy policy
    • Cookie Policy

CADnotes

CAD Tutorials and Best Practices for professionals and students

  • Featured
  • AutoCAD
    • AutoLISP
  • Revit
    • Revit Architecture Basic
    • Revit MEP Basic Tutorial
  • Inventor
  • MicroStation
    • MicroStation Basic Tutorial
  • CADnotes on YouTube
You are here: Home / Revit / Dynamo / Placing an Element using Dynamo

Placing an Element using Dynamo

February 13, 2019 by Edwin Prakoso 2 Comments

In this Article...

  • Point
  • Family Type
  • Level

In the last tutorial, we learned how to add nodes and providing input. You define x and y value to create a point. You can’t place an element by giving coordinates, but you can do that with Dynamo easily. We use the point we created in the last tutorial as a reference for our column.

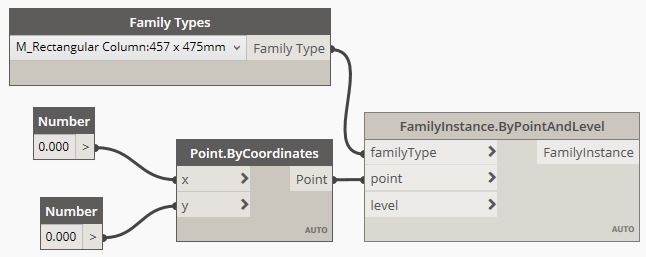
We want to place a family instance to our project. Expand the Dynamo library, under Revit, Elements, FamilyInstance. You can see that there are several nodes to place a family instance. Move your mouse pointer above a node. You can see the tooltip that describe the method of each node. Click ByPointAndLevel.

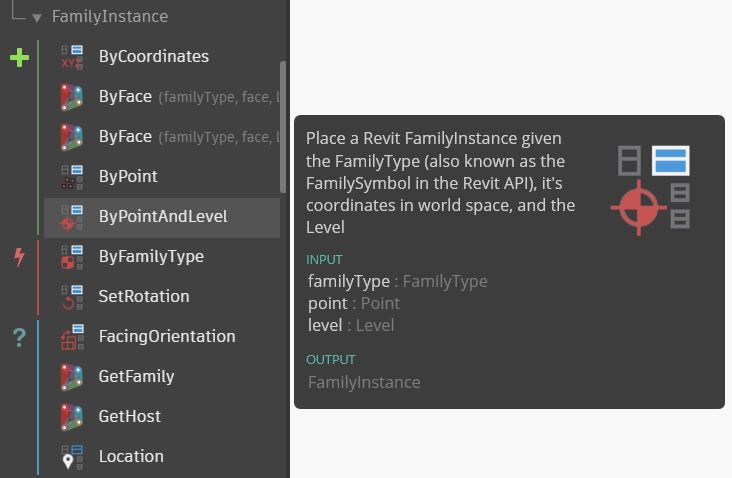
This node needs three inputs:

  1. The family types that you want to place.
  2. The point as the reference.
  3. The level as the reference.
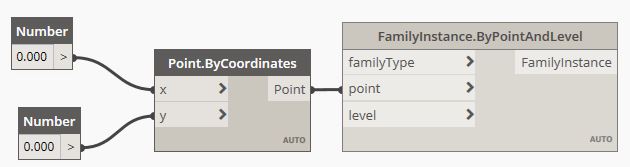
Point

We already have a point in the last tutorial. Use it as the reference point.
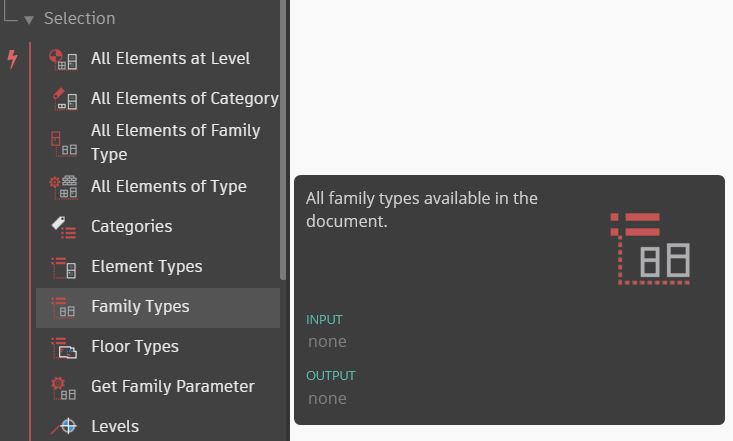
Family Type

You need to provide family type data type as the input. The easiest way is by using the Family Type selection node. You can find it in library under Revit, Selection, Family Types.

In that node, select a column family type. The family type names in the list might be different with yours.

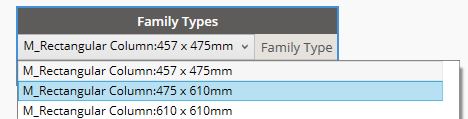
Connect the nodes using wire.
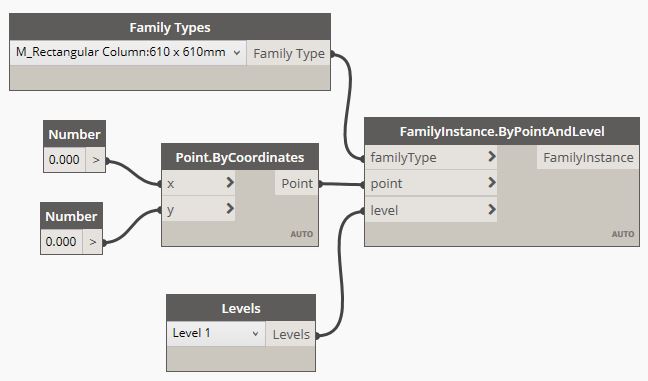
Level

The last data you need to provide is the level for this instance. You can find the Levels node in the library under Revit, Selection, Levels.

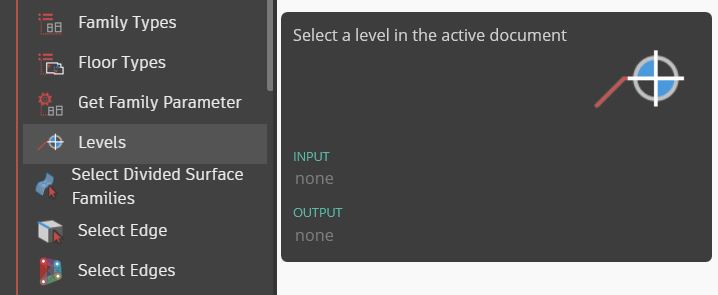
Similar to the Family Types node, you can select a level from the drop down list. Select Level 1 and connect the node to the Family Instance node.

The Dynamo definition is complete. You can see the column in the project now. Change the x and y value and examine the column position in your peoject.

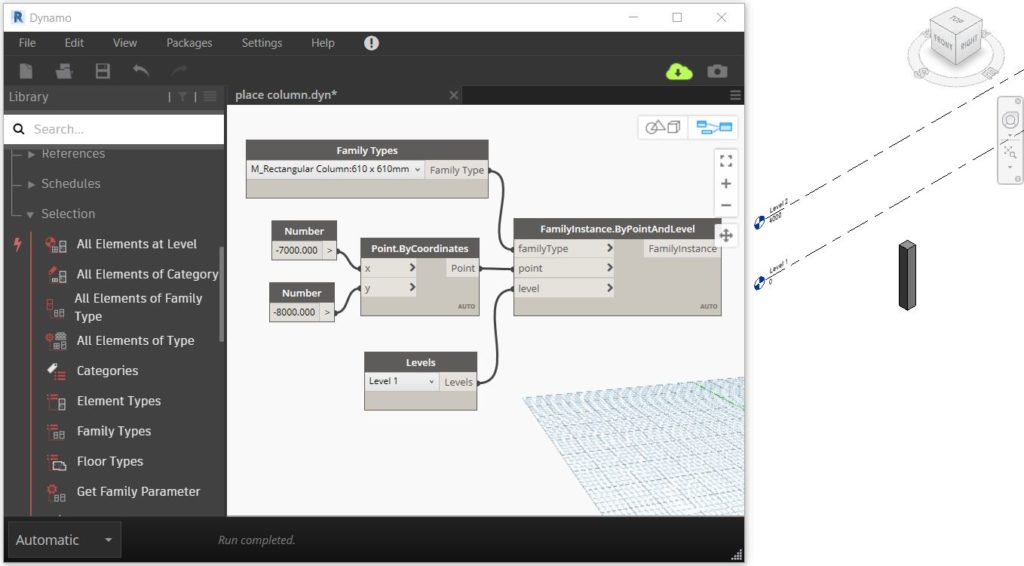
You created a simple program to place an instance to your Revit project. However, recreating the program every time you need to place an element won’t be effective.

In the next tutorial, you will learn how to prepare the program for Dynamo Player. Dynamo player allows you to share and use the program without opening Dynamo.

About Edwin Prakoso

I work as a Solution Consultant in Datech Solutions, Tech Data Indonesia. I've been using AutoCAD since R14 and Revit since Revit Building 9. I occasionally write for AUGIWorld magazine and I am also active in Autodesk discussion forum. I'm a member of Autodesk Expert Elite, an appreciation for individuals who give contributions to the Autodesk community.
Connect with me on twitter or LinkedIn.

Filed Under: Dynamo

0 0 votes
Article Rating
Subscribe
Login
Notify of
guest

guest

This site uses Akismet to reduce spam. Learn how your comment data is processed.

2 Comments
Inline Feedbacks
View all comments
Ronald
Ronald
3 years ago

Como haría para colocar familias que necesitan anfitrión, por ejemplo caras de un techo. O colocarlas en un plano de referencia horizontal o vertica?

0
Reply
Dubhghall MacDubhh
Dubhghall MacDubhh
4 years ago

The node needs FOUR inputs, the fourth one from the program itself: collision detection.
No more wall type symbols or keys on top of doors and windows.

0
Reply
wpdiscuz   wpDiscuz
Join Our Free Email Newsletter
  Thank you for Signing Up
Please correct the marked field(s) below.
1,true,6,Contact Email,2 1,false,1,First Name,2 1,false,1,Last Name,2

Featured

3D model with annotation

What’s new in AutoCAD: Annotations

This is AutoCAD new features roundup in annotation features. Read it if you want to implement AutoCAD new features!

Recent Articles

  • Model-Based Progress Tracking in Autodesk Build
  • Understanding Surface and Cut Patterns in Revit
  • Revit 2024.1 Update is Released

Advertisement

New on CADnotes

  • Model-Based Progress Tracking in Autodesk Build
  • Understanding Surface and Cut Patterns in Revit
  • Revit 2024.1 Update is Released
  • What’s New in Revit 2024: Bending Detail
  • What’s New in Revit 2024: The Dark Theme

Meet the Authors

avatar for
avatar for
avatar for
avatar for
avatar for
avatar for

Get Connected

CADnotes on FacebookCADnotes on InstagramCADnotes on TwitterCADnotes on YouTube

© 2009 – 2023 CADnotes · Feedback · Privacy Policy · Become an affiliate

wpDiscuz