In this Article...
Everyone has their own unique way of working and how they use AutoCAD to accomplish their objectives.
There is a way to take this a step further and actually customize AutoCAD to suit your requirements and we’re not talking about Workspaces either. What follows are two effective ways you can use to streamline your drawing process.
Keyboard Shortcuts
These are really handy to help speed work along however at times we can hit the wrong key and get our fingers crossed over. This can be overcome by changing what command that key represents to make it more user friendly.
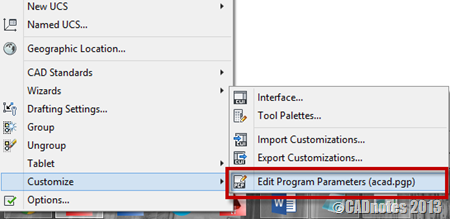
Go to AutoCAD menu: Tools\Customize\edit program parameters (acad.pgp)

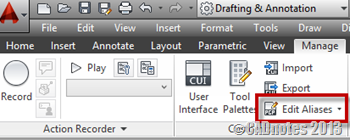
If you use ribbon interface, you can go to manage tab> customization panel> edit aliases.

This brings up a Notepad window with all the command aliases. The important thing to remember here is NOT to overwrite what’s there.
If you scroll to the bottom there is a section called “– User Defined Command Aliases –“ This is where you overwrite the default Alias. For example if you don’t draw circles too often but copy is an integral command in your daily tasks you can make “C” trigger the copy command instead.
Custom Command Buttons
If your drawing style favours the toolbars instead of the keyboard short cuts you can set up your own commands to cut out some of the little, time consuming, steps. An example of this could be if you wanted to set up a command to curve a polylines corners at a set radius, rather than clicking fillet, selecting the radius and select polyline.
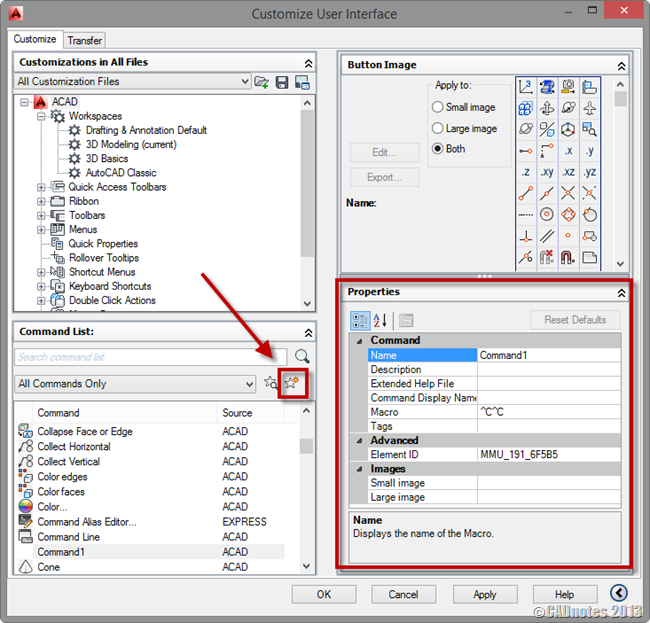
Open up the Customise User Interface dialogue and select the New Command Icon

This will give you a set of options on the right hand side; here is where you set the command properties like the name, description, image, etc. But the intelligent part is the Macro and it’s really easy to get to grips with.
All it is, is basically what you’d type into AutoCAD.
Applying this to our example of filleting a Polyline’s corners with a set radius we would type in the Macro
˄C˄C_Fillet;R;150;P;
Let’s break this down so we understand what’s been typed
˄C – Represents the escape key to cancel a command. It’s always best to put two escapes first to make sure a previous command is not still active when you use your new one
_Fillet – Is the command we want to use
; – A semi-colon indicates where we’d press enter
R;150; – Selects the radius option, sets it to 150 (or whatever you require) and returns to the initial command line
P; – allows us to select the Polyline
It’s as easy as that. All you have to do is run through the command (or commands, as you can link them together i.e. Overkill, Purge, Audit, Save) and transfer what you type into the macro, remembering to put ; where you’d press enter.
Once you have set up your new command simply associate it with a toolbar, whether that’s an existing one or a new one you’ve created.
N.B. These Macros only work with Icons as part of a toolbar, you can’t assign a keyboard short cut to it. This is because these Macros are not defining a new command as the .pgp file would understand it. The .PGP looks for single line commands whereas most of the Macros, like the above example, are multi lined, stringing a sequence of commands together.
If your preferred command input option is with the keyboard and you need a hotkey, you will have to define a new command by creating a .lisp routine for it. Then you can assign it to an alias.
So these are two simple but effective ways of speeding up your drawing time and honing your drawing style.
Editor’s note:
If you are interested to explore more about CUI, you can read our CUI tutorial series here.
And if you want to learn about creating basic LISP program, you can read our AutoLISP tutorial series here. No fancy LISP program, just to get you the idea how AutoLISP works.


