In this Article...
We covered how you can keep your AutoCAD template simple, by using Tool Palettes. As we mentioned earlier, keeping the data in AutoCAD template can give a good start, but we want to keep it simple. When a drawing gets too complicated, it is not only difficult to work with it. The drawing can be corrupted too. That’s why developing the drawing during the design process is important.
In this article, we cover how to import the settings from another drawing.
Save Necessary Information in a Drawing
You can save your standards in one or more DWG files. You can keep blocks, layers, and styles in a file. You can save these settings in a file.

The easiest thing to do this is by creating a new file then import required settings to this file. If you are an experienced AutoCAD user, you can guess that we can use Design Center to do this.
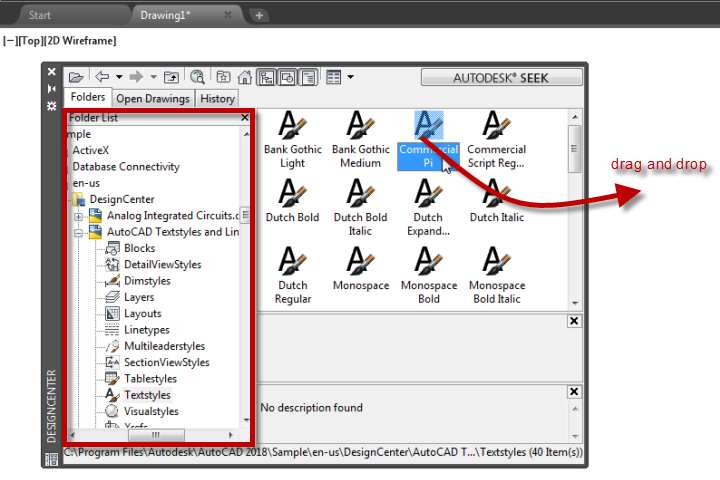
First, create a new file. With the new file active, type ADCENTER to open Design Center.
Design Center is similar to Windows Explorer. You can find the file in the Folder list and find the category that you want to import. Importing the element is easy, just drag and drop what you need to the drawing area.

You can also right-click on an element and choose Insert Block or Add Styles from the context menu.
If you open the file, you can find the file in Open Drawings tab. Sometimes it’s more convenient to open the file to make sure we choose the right file before we insert it.

Design Center is handy to import settings from a finished project, and you want to use it as a standard for your future project.
Search Content
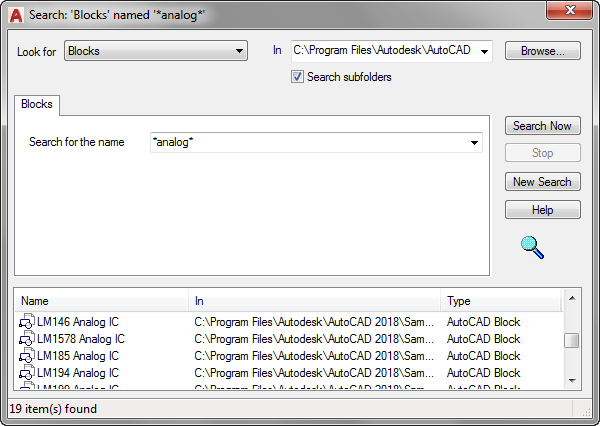
There is a handy feature in Design Center: Search. You can search blocks, layer, or styles inside DWG files with it, without opening the files.
Click the search icon on Design Center. ![]()
In this example below, I search all blocks with the analog word in their name. Notice that I can use the wildcard to find the block. You can insert the block from the search result. Just drag and drop or use the context menu after you select the block in the list.

You can also use this process to create a template. After you finished, save the file. If you have different standards, it is better to save each standard in separate files.
Importing Settings to Your Project
Creating the standard files is a tedious task. But after you already have it, importing to your project is easy.
Using Design Center
You may already guess this; you can import blocks and settings from your standard file using Design Center. The steps are the same as creating your standard file. But this time, you insert them to your working file.
Using Insert Command
Using Design Center is useful when you need to add a few settings one by one. However, when you need to import dozens of elements at once using Design Center is not that compelling.
If you need to import the whole settings from one file to your working file, you can insert the drawing. Just use the INSERT command. Click Browse… and select the file.

You don’t need to actually insert the file. After you click OK, you can cancel the block insertion when AutoCAD asks for insertion point. Or you can delete the block immediately.
This process will insert all the settings to your file at once.
Summary
To keep your template simple, you can save the settings in separate files. This method is quite common among AutoCAD users, especially with blocks. We often to save block in a separate file and insert it when we need it. I prefer to keep blocks with the same category within one file. But saving one block as one file is still a standard practice.
Inserting a file as a block will also import all the settings to your file. If you have separate standard files, you can quickly import all the settings. However, you can also selectively import setting with the Design Center.


