Revit doesn’t have the table as an annotation tool. Revit users have been dealing with this using different workarounds. They created a table using text and detail lines. Sometimes they created the table in an AutoCAD drawing then reference it in the Revit view or sheet. I don’t like any of those methods. They are not practical and takes a lot of time.
My preferred method is using Schedule Key. A schedule key works like any other schedule. You can change the font style and resize the column. It is more comfortable than using text or linking an AutoCAD file.
Creating a Key Schedule
Creating a Key schedule is similar to creating any other schedule. The difference is, the data is not related to elements in the model. You can add rows and columns as many as you need without needing to place elements.
To Create a Key Schedule
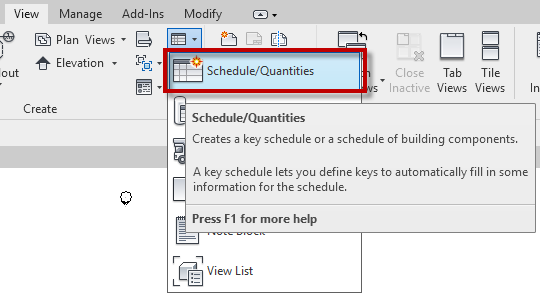
The process to create the Key Schedule is similar. In the Revit Ribbon, View tab, Create panel, click Schedules> Schedule/Quantities.
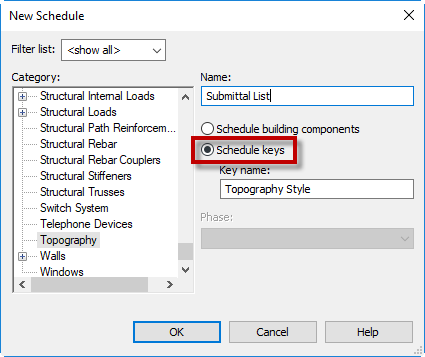
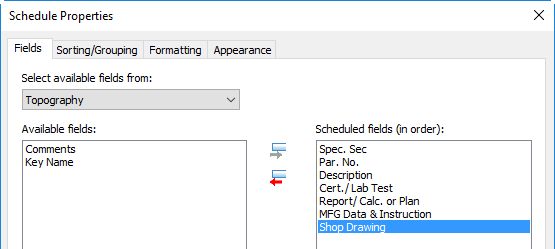
For the schedule category, select a category that you don’t use for that particular project. We want to avoid having too many parameters when creating a new schedule. For this example, I use Topography schedule.
For the schedule type, change it to Schedule keys. Rename the schedule as necessary.
To Create the Parameters
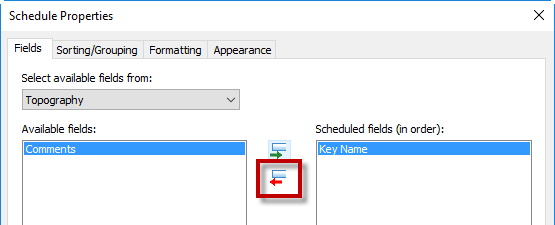
Revit opens the schedule properties. It has one field by default. We don’t want to use the key name. Select the field and click Remove Parameter(s).
A schedule needs to have at least one parameter. The parameters we create in this key schedule will be the column in the table. Let’s define the parameters.
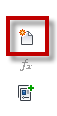
Click New Parameter.
Revit opens Parameter Properties dialog. The important thing to change in this dialog is the parameter name and type of parameter.
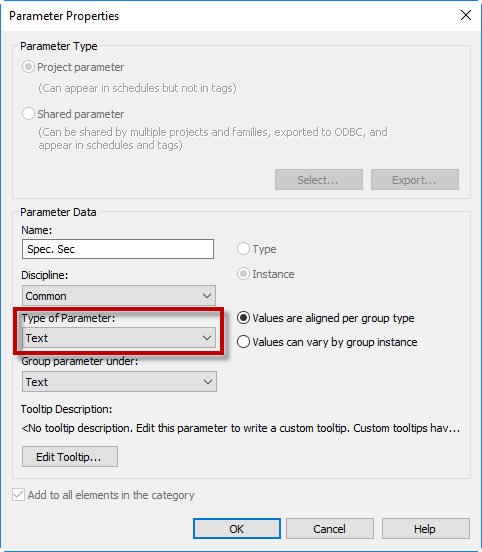
One thing that I want to highlight here, I always use Text as Type of Parameter here. We need to define the type of parameter correctly when we work with families. However, because the table is not related to any families, I keep it simple: all parameters are text. When we need to import the data from Excel, it can be confusing having too many different types.
Below is my completed parameters for my table.
Click OK. Revit opens the schedule.

Filling the Table
The table is ready. Now you can add rows and fill the table. On the Revit ribbon, Modify Schedule/ Quantities tab, Rows panel, click Insert Data Row.
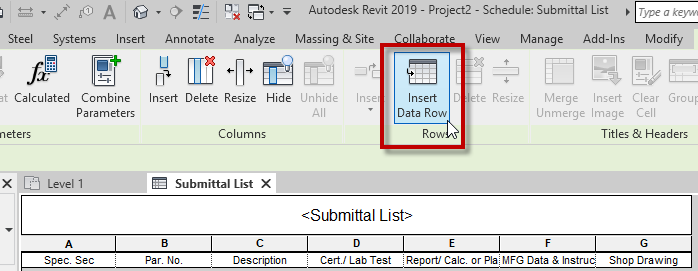
Revit adds a new row. Type the data in the cells. Add more row when you need to add more data.

Now you can place the schedule on your sheet.
Importing Data from Excel
Is it possible to import data from A Microsoft Excel table? Yes. But not with Revit native tools. We will cover this in the next article. We will use a plugin. And if you like more challenge, you can use this simple Dynamo script.


Amazing ! that worked out perfectly.
Hi,
Thank you for the trick, it’s awesome!
Is there any way we can make this schedule upside down and the same time can me make its height adjustable (like we can drag it to add more rows). While I was trying Those option was not selectable.
Regards
Ankita
Thank you
I was following your steps and was unable to select “Key Schedule”. The option is not selectable, as in its blocked or something. I’m not sure but in any case it doesn’t allow me to select key schedule.
Hi Mel,
Have you tried to use another category? You may select multi-category for the schedule, so you can’t use key schedule.
The Add Row remains dimmed when trying to add another row after the schedule is made and placed on sheets> I have looked EVERYWHERE on the internet and there appears to be NO SOLUTION:(:(:( What is the solution?
Hi,
Thank you for the trick, it’s pretty awesome! Is there a way to make multiple schedules with the same parameters? For example :
– Create a schedule to make a legend of all fluids in hydraulics
– Then create a similar schedule to make a legend of all fluids in plumbing
Regards,
Etienne
Hi Etienne,
You can duplicate the existing schedule then modify the value. It is easy to do if you use Excel to edit the data.
I have the same problems as Etienne. I am trying to make several similar schedules, but it will not let me use the same scheduled fields because it says they already exist, yet I cannot select it from the available fields. Is there something I’m missing to make me able to reuse them? The parameters for the schedules are the same. I wish I could just duplicate the schedule, but it does not have it as an available option. Tips and advice would be appreciated.
Hi Meghan, Etienne,
I apologize. Apparently, it is not possible to duplicate the schedule and key schedule. You need to recreate a new key schedule from scratch.
However, there are several plugins that you can purchase on the Autodesk App Store that can do the job: https://apps.autodesk.com/RVT/en/List/Search?isAppSearch=True&searchboxstore=RVT&facet=&collection=&sort=&query=table