In this Article...
The default grouping of Revit groups views is by Family and Types. You can also use other available default parameters. But if you need to group it further, like using sub-discipline or category, you need to add a custom parameter.
Take a look at the example below. In this project, the floor plans are grouped into three categories: Floor Plan, Furniture Layout, and Presentation.
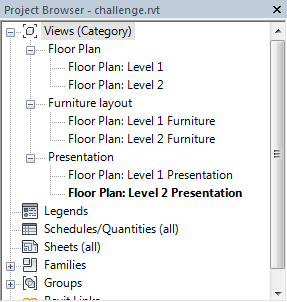
Revit MEP template already has sub-discipline that works the same way. But if you use Revit Architecture, you need to add the parameter manually. Let’s see how to do this.
Adding a Project Parameter
Go to Revit Ribbon> Manage tab> Settings panel. Click Project Parameters.

Revit opens Project Parameters. Click Add… (1). Revit opens Parameter Properties dialog.
Modify the Parameter Data (2) as follows:
- Name: Category
- Discipline: Common
- Type of Parameter: Text
- Group Parameter Under: Graphics
In the parameter Categories (3), check Views.
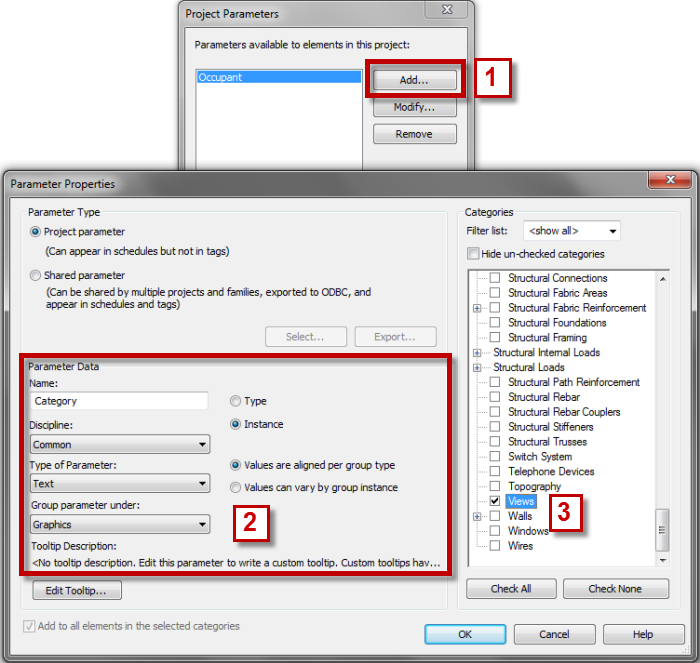
Click OK until all dialogs are closed.
Adding Categories
Examine in Properties Palette. You can see Category under Graphics group. The category is still empty.
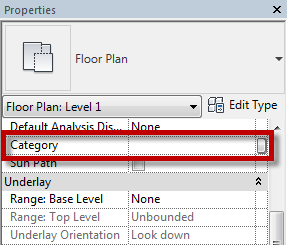
Click in the empty field and type “Furniture Layout.” You may use your category for this field.
Create a duplicate of this view and rename it.
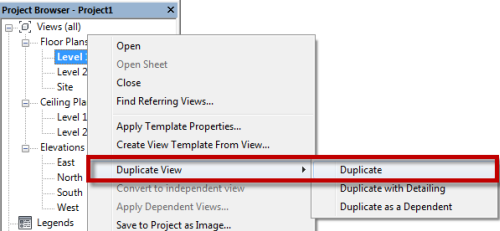
Open the new view. Examine the Properties Palette again.
This time you can see it already has Furniture Layout category. Click in the field and type “Presentation.”
Two views are using different categories, and you see them on the list. If you continue adding categories, Revit will add new items here.

How about deleting the categories that you don’t need? If no views using a particular category, Revit will remove the item from the list. If you still see the item, check if any view is still using the category.
Create a few more copy of your views and add the category.
Project Browser Organization
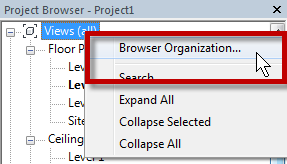
The last thing to do is manage the Browser Organization. Right click on Views then click Browser Organization on the context menu.
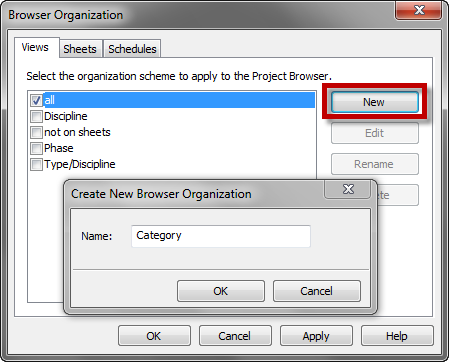
In the Browser Organization dialog, click New. Type “Category” for the new Views name. Click OK.
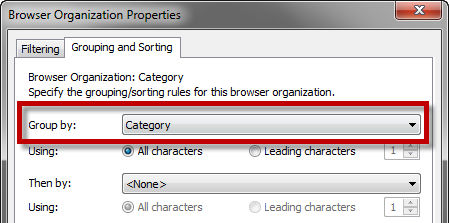
In the Browser Organization Properties, go to Grouping and Sorting tab. Change the first Group by to Category.
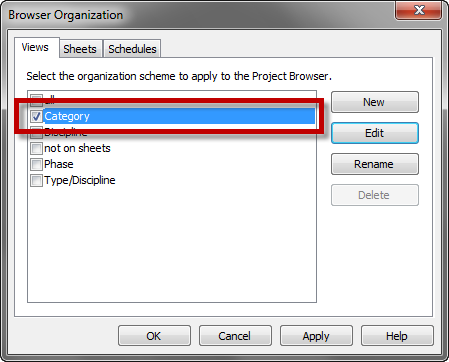
Click OK to close the dialog. Make sure you change the scheme to Category then click OK.
You should see now Project Browser groups the views by their category.
Unassigned Categories
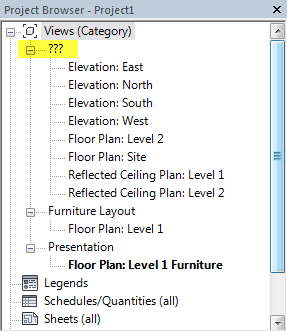
If you have views that haven’t been assigned to a particular view category, you will see ??? group in the Project Browser. When you assign a category to all views, that ??? category will disappear.
Step by Step Video
You can also learn how to do it by following this video tutorial.
Summary
Revit allows you to manage the appearance of your Project Browser. You can group and sort it and filter what you don’t want to see in your current task. If you need more than just the default parameter, you can add your parameter. It gives you more flexibility to find your views easier.


it is possible to change name of catergory if already make. without change category view one by one?
apakah bisa pak mengganti nama kategori yang sudah terlanjur dibuat tanpa harus mengganti nya satu per satu di view nya.
Bisa saja, selama kita bisa memilih beberapa view sekaligus di Project Browser atau di Schedule.
Ok pak, terima kasih banyak udah bisa, walaupun agak lama karena viewnya banyak.
HI
Manage to have the Category in the project and type in Presentation , on the second view the ( Presentation text doesn’t shown Which we should be able to select it straight away??. Did I miss something ?? so far
Hi Grace,
So sorry for the late reply. I will record a video and upload it so you can see how you to do it.
I will provide the link when the video is uploaded.
Hi Grace,
You can see how to follow the tips here: How to Group Revit Views by Category or Sub Discipline.