In this Article...
We have discussed how we can define wall structure horizontally.

Now the problem is, how can we define the structure vertically? We have discussed how we can add reveals and sweeps to do this. In this article, let us discuss how we can create a vinyl siding wall as example. The common way (and probably most suggested) to do this is simply using horizontal lines pattern, not actually creating real 3D forms. And later, we can use drafting tools to add details for the vinyl siding wall.
The reason why we do this is creating many horizontal sweeps/reveals can take much of your computer resources. When you are modeling a large building, this can be a problem. Of course, there are a downside: you have to take care the details later, manually.
Now, vinyl siding wall commonly used for simple houses, not multi story building. So I guess it is save if we create a real 3D vinyl siding, it would be acceptable.
Creating Reveal Profile
Create a new profile. Use Metric Profile-Reveal.rft (or Profile-Reveal.rft for imperial).
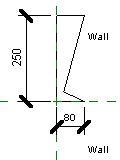
You need to define how your vinyl siding layer will be cut by this profile. Create reveal like below. Pay attention to the wall location. I use 250×80 as the outline. Remember this value, we are going to need it when defining our wall.
Save this file, and load it to your project.
Now why are we using reveal instead of sweep? You will see the difference later in the comparison section.
Applying the Wall Reveal
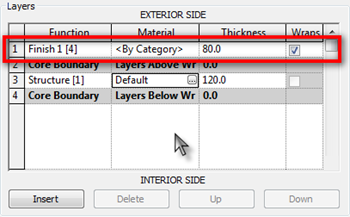
In your project, choose one of the wall type you want to modify. In this example I use generic 200mm. Duplicate, and add one more layer as your vinyl siding layer. Change the height to match your sweep profile.
To enable us adding reveal, change the view to section. Change it from drop down selection below the preview area.
![]()
In the modify vertical structure group, click reveal.
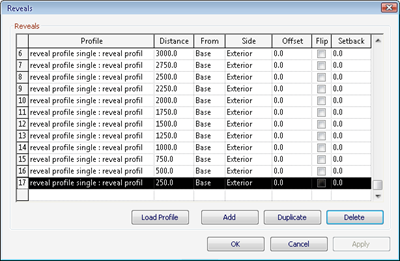
This will open another dialog box. Click add below this dialog to add a reveal definition. Select the reveal profile you created previously in the profile column. If you haven’t loaded it, click load profile.
Define the distance from base. Do it several times until it reach the highest wall in your design.
We are done. Click OK and close all the dialogs.
Now try to create walls and see how it looks like. I think this is quite nice :)
Comparison
Now let us get to (probably) some question you will ask.
Why not creating one reveal profile like below, so we don’t need to create many reveal parameters?

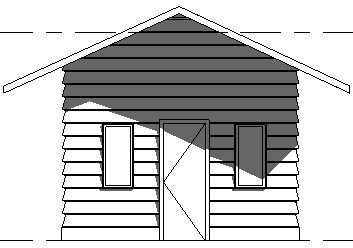
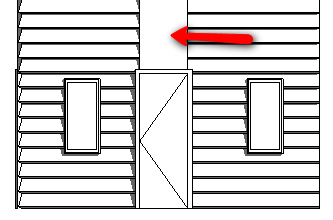
It doesn’t work as expected when we place door. See image below. The wall above the door will loose the reveals. I’m not sure why the window don’t have the same effects. I suspect this has something to do with the opening in the family. If that’s true, then creating the table is much easier than you modify your whole door family.
So why are we using reveal instead of sweep?
If we use reveal, it only remove part of existing wall. No wall, then it’s not showing. Sweep, will remain visible even if you have wall height less than your defined vinyl siding height.
This is unacceptable when we need to attach our wall to roof or having the top side of our wall is not horizontal.



Hey,
Just came across your website and liked the layout of your notes. Great Job! I make videos on CAD/ BIM and Photoshop techniques (HowNowVideos: https://www.youtube.com/channel/UCtQ3APje7s7R2c-QydPoa6A).
I’ll be checking out your website for new techniques, and feel free to do the same on mine!
-Dan
How can I add a similar profile to a roof? Can't find any solution to this. I can make the roof I need from a generic model, but then I can't attach or join the walls to it. Making a generic roof model also does not work, because I can not join an extrusion to the roof… Thanks
Hi Janis,
If you create in-place model, you can attach your wall to the roof. Are you taking the generic model from family library?
Hey Edwin,
a few days ago I tried to model in-place and it worked! Of course, there are some minor problems, like – since the roof contains quite a lot extrusions it makes my pc work to the limit when I try to edit it. Still at last I have what I need.
Yes, I took the generic model from the family library!
Best wishes from Latvia!
Nice article you have there Edwin. This should enables people to design and plan with there wall sidings.
Great Info and Tips!
So I figured out that if you create one large reveal profile and set it from the base it won't show up above the doors, BUT – if you set it from the top it does. It is much easier to space everything in the profile family than type in all the dimensions into the table
in short – make a large reveal profile for the whole wall – and set it to the top of wall.
Hi Jared,
I tried to create a single continuous profile and place it from top. It doesn't work, or probably works on certain condition. Can you email me or upload it somewhere, so I can take a look at your file?