In this Article...
One problem if you are migrating from AutoCAD to Revit is implementing your current AutoCAD standard to your Revit project. The common question I heard is how we can create your own families to looks like in your AutoCAD drawings. For the first question, you can read this family tutorial e-book.
Then the next question is how we can use our AutoCAD title block in Revit. We don’t want to use the default title block like in this tutorial, aren’t we?
In this post, we are going to import your existing title block in AutoCAD file to Revit family. Let us do it step-by-step.
Preparing DWG File
First, you need to prepare the DWG file. If you have a DWT template, you need to create an empty DWG file using that template. We can’t import DWT to Revit. Title block should be the only drawing element in that file.
What if you don’t have AutoCAD, but you want to use the DWT file? Easy. Just rename the file in Windows Explorer, change the dwt extension to dwg. DWT basically is DWG too.
When importing DWG to family, Revit will attempt to find objects in your layout/sheet first. If your title block is not in your layout, then Revit will ask if it should try to find in model space. It should be no problem, whether you use layout or model. BUT… you have to draw in 1:1 scale. Try to experiment with existing title block in default AutoCAD template if you have problem.
Create a New Family
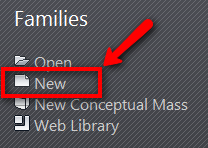
Let’s start. First, you need to create a new family. In home screen, click new under family group.

Revit will ask you to to choose a family template. Go to titleblocks folder, and choose the paper size you want. The paper size depends on your family units. I use metric, so I will see A0 to A4 paper size. Click open.
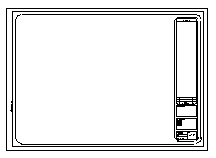
In your new family, you will see a rectangle that shows your paper size. You can create your title block here from scratch inside that rectangle. Or simply import your existing drawing from AutoCAD drawing. We are going to do the last one.
Importing the DWG File
Now you can import the DWG file to your family. Use import CAD tool in insert tab, import panel.

Find your DWG file. Before you click open, there are many options available in the dialog box. If your DWG file has correct unit (and not unitless) then you can choose import unit as Auto-Detect. Positioning should be fine if you choose ‘Auto-center to center’. Title block is a rectangular object that should fit the paper just fine. If it’s not, you need to scale or move it later to fit your paper.

Click open. You should now see the titleblock in your family.

Select the titleblock. You should see it is selected as a single object. Click explode, full explode from contextual ribbon to break the AutoCAD elements, to basic Revit elements.

Adding Labels
Title blocks pretty much only have lines and texts. You already have them after importing your drawing from AutoCAD. Revit does have some intelligent texts that will automatically update when the information changed. The changes can be manually by you, or automatic. Sheet number is defined by you. Date/time stamp will updated automatically by your computer.
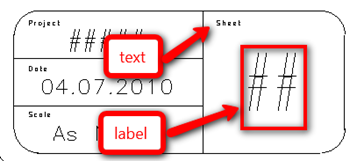
Let us see this part of our title block. The project number can be automatically take your project information. Date and sheet number can automatically changed. Those values should be created using label. The others, should use text as ‘static’ texts.

If we look at the ribbon, in home tab, text panel, we will see there are two types of texts. Now you know what their difference is, right?

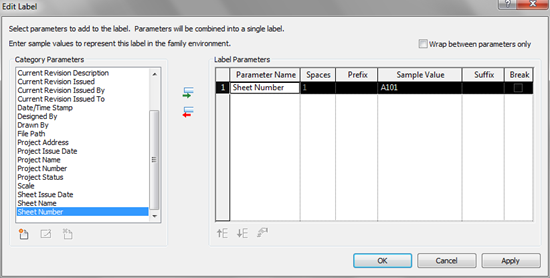
Now delete all texts that you will replace with labels. After you remove them, activate label and place in the location you want. Revit will open a dialog box, asking you which parameter you want to display. Choose which information should appear at that location, and click ‘add parameter to label’ button. Or you can double click it to add the parameter to your label.

Add every information you want. Save the family so you can load it later to your project. Or you can load it to your template.
Now you already have your titleblock. Try to create sheets using it and place some views.


Hi Edwin,
Yes excellent tutorial…..you’ve explained it so very clearly that I actually got the titleblock I wanted. I’m just learning Revit (13) coming from AutoCAD.
Thanks again