In this Article...
In the last MicroStation tutorial, we have learned how to use MicroStation cell. Cell is a common drawing element that you can use over and over again. In other word: it’s a library. So how to create MicroStation cell?
You need to draw your objects before you convert it to a cell. You can use SmartLine, block, circle, etc. After you finish, you can convert all the objects to a single cell.
Understanding Cell Library
Before we can actually create our cell,we need to create a cell library first. A cell library usually holds several similar cells. For example, you want a library of cars. You can create a cell library file named cars. Then you might want to create a cell library to keep your annotation symbols, or probably AEC symbols. That’s what a cell library is for. It keeps a similar cells within one file.
Let us try to create a cell library and cells. Download this file and open it. We have 3 simple objects that we want to save as cells.
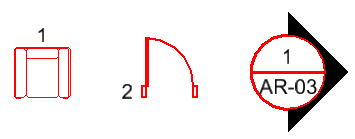
They are created from simple elements such as text, line, circle, arc and line string. These are the objects that form the elevation view symbol.
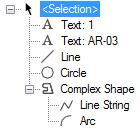
From MicroStation menu, select element>cells. The cell library dialog box will be opened. Take a look to the dialog title. It says cell library: [NONE].
![]()
It means that we haven’t attached any cell library yet. From this dialog menu, click file>new. Type a name for the new cell library. Something like Training Cell will do. Click save.
Now the dialog title will show you the cell name, but this cell library is still empty. Look at the right bottom of this dialog. you will see several buttons to create and modify cells. But all of them are grayed and disabled. Why the create cell button is disabled? We need to define the cell origin before we start creating it.
Creating Cell
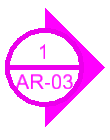
Now that we have created a cell library, we can start saving our cells here. This is a little bit tricky, especially for AutoCAD users. Move away the dialog box a bit, but don’t close it. Just enough for you to see the objects you are going to convert as a cell. Let’s start with the elevation symbol. Select all objects that make that symbol. You should see the whole symbol highlighted and turns to purple.
Now from navigation task, click and hold on place active cell, choose define cell origin from the drop down menu.
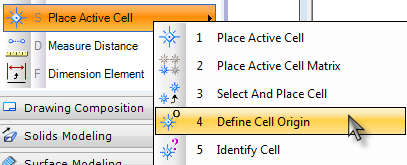
Place the origin at the center of the symbol. Origin is the base point or reference point that you will use when placing the cell. You may use different location for the origin. But I guess for this kind of symbol, we use its center point.
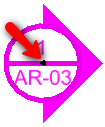
Now back to cell library dialog. You will see that now the create button is enabled!

Click the create button. Give the cell proper name and description.
Now you should see the cell name on the cell list.
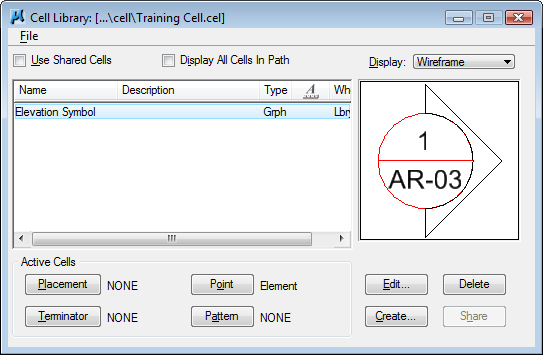
Not so difficult, right? Now create the rest of all the objects to cells.


very nice and simple explanation about the cell.
Thank you very much
What you can do in 2d you can do it also in 3d. So easy is microstation. Don't use 2d elements in 3d models. 2d models are really flat and 3d models ar solids and surfaces. Only use 2d elements to create 3d elements.It's easy in ms. Because the ucs is free to use the shortcut "e" cicle in f front s side t top. This shortcuts in combination with accudraw is very beautifull and very powerfull. So I thank the programmers of microstation for these funtionalities.
thank you very much as you say a little bit tricky but i think so it is very deficient
again thanks
your the best sir!!! please post ang create tutorial like these for 3d ??
Reaaly good explanation of cell