We have completed our AutoCAD drawing by creating a floor plan. We set several layers when we created wall and column. Why? We are going to create different drawing representative for relatively large and small scale. How? We are going to create two layer states.
Open your drawing, or download this DWG file. The drawing looks like this.

Saving current state
This is going to be how it look with all the details. Let’s just save this layer states. Click from your AutoCAD ribbon, home>layers>unsaved layer state>New Layer State.

Name it ‘high details’ and give the description something like given below.

That’s it! You’ve just saved a layer state! This layer state saves the layer properties of your current view. Which layer is thawed, frozen, color, line weight, and so on.
Saving another layer state
Now we are going to define another layer state. Open your Layer Manager.
Freeze these layers:
- A-Column-Structure,
- A-Wall-Pattern, and
- A-Wall-Structure.
Now change the line weight and color for these layers:
- A-Column: 0.15, blue
- A-Door: 0.05,red
- A-Wall: 0.09, black.
We change the color to recognize the changes. We change the line weight so it’s not going to be too thick when we plot it in large scale.
Using the same procedure as before, save this layer state. Name it ‘low details’ and give appropriate description. There you go, you already have two layer states!
Loading layer state
How can we use it? Easy. Just click your layer states in Layers section. You should see those two layer states there: high details and low details. Try to change it and see the difference.

Now you have high details representation and low level representation.
Using layer states in layout
Now open layout. I’ve provide one layout for this AutoCAD tutorial. Both of them look the same, aren’t they? They both have all layers on. These viewports were created before we change and create the layer properties.
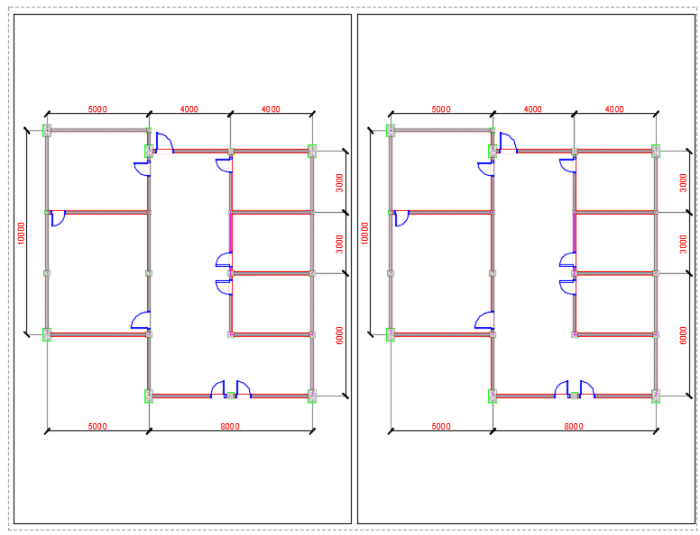
Now double click inside the right viewport. This will activate the viewport.
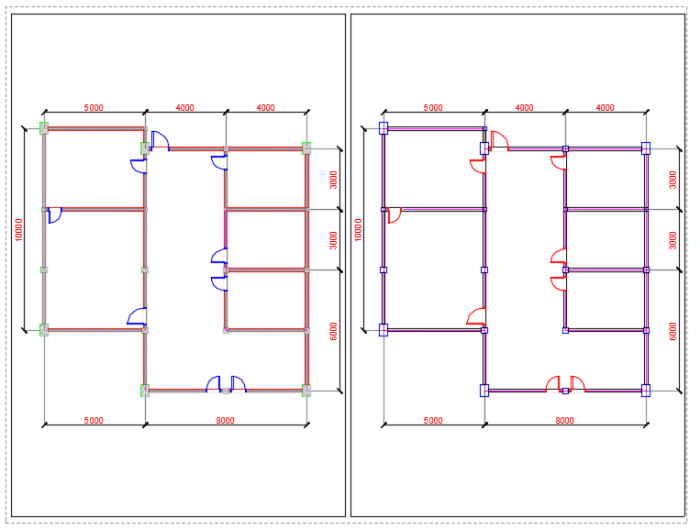
After your right viewport activated, change the layer states to ‘low details’. This should change the right viewport to low details, while the left viewport still showing the high details.
Can you see the differences? In this picture below, the easiest to see is the door color.
If switching from drop-down list doesn’t work
However, I found this doesn’t always work. Sometimes, both of them will change their representation to new layer states. But don’t worry, if you have this problem, you can follow these steps.
Restore both of your viewport to high details. Activate your right viewport again. Now from layer state list, select ‘manage layer states’.
In the layer states manager dialog box, select ‘low details’ state, and click restore at the bottom of this dialog box. This will do the job.
Now look at these viewport. You see same drawing in different viewports, and both showing different colors and lineweight.


Tanginique,Can you provide more details, which step doesn't work? Can you override the layer properties per-viewport without using layer states?What version of AutoCAD are you using?
okay i tried both ways like you explained but neither of them worked Tanginique