 I have wrote about creating new levels in Revit. It’s fine if you only have several levels. But what if you have 20 levels? or may be 50? Drawing each level in elevation view would be ridiculous. Even by picking lines it would be a tedious task. Why not create them using array? We know that we can use array to duplicate object many times easily right?
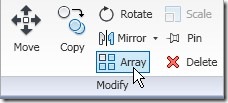
Open one of your elevation view. Select the top most level (by default it’s level 2). Your ribbon will open contextual tab: modify. Select array tool.

Using array tool here is the same with using array when modifying other objects. You may want to turn off the group and associate option. Then fill the number of levels you want to add, select move to 2nd (this will define floor to floor heights)
![]()
Click on your 2nd floor level on your drawing area, then move your pointer up. Type floor height you wanted then [enter].
I know a lot of you might already try this. But some are asking me: I saw the level in my drawing, but why can’t I see them on my project browser? It’s still showing Level 1 and Level 2.
Your levels are already defined. You can use them as reference, but Revit is not automatically create the plan views. I think this is a good smart choice by the programmer. If you have typical floor (I mean identical floor plans) from level 4 to 50, I don’t think you want all of them showing in project browser, right?
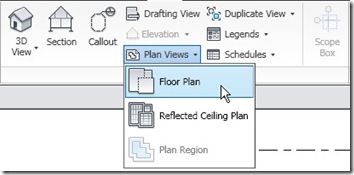
We have to define which floor plan views appear on project browser. Open view tab on your ribbon. Select plan views>floor plan.

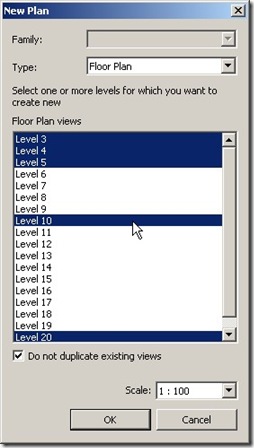
This will open new plan dialog box. Select the levels you want to appear in your project browser. You can hold [shift] or [ctrl] then click for multiple selection.

Click OK. There you go, you can see your plan views in your project browser!


