In this Article...
 Have you use AutoCAD data extraction? You can extract any properties from any objects in your AutoCAD drawings with data extraction. I believe some of you have seen a nice demo from Autodesk about this. They use a data set to create door schedule from a drawing. It count the number of door blocks, and report it on a table. If you haven’t seen it, you can try creating schedule by yourself here.
Data extraction actually can extract any data, not only from blocks. Lines, points, rectangle… any data! You might want to have a hole table, benchmark coordinates, or estimate pipe length from your drawing. Sure, AutoCAD might not the perfect solution, but if that what you have, data extraction might help you.
In this example I will try to extract data from lines. I draw several lines as shown below. Of course, you might want to use real data, better than mine :)

I created them in three layers. Imagine this layers define pipe size. If I draw pipe layout in my plan, I can generate a report how many pipe I will use.

To understand more about this data extraction, I override color in some lines. Not by layer, but define it’s color.
You can activate data extraction on blocks and references TAB. On linking & extraction section.

After you activate the tool, then a wizard will open. There are 8 steps you must follow before you can have your report. Trust me, these 8 steps are not scary at all :D
1. Begin
Here you must define, are you going to define a new data extraction or use previous extraction settings. Let’s just use create new data extraction now. Click next.
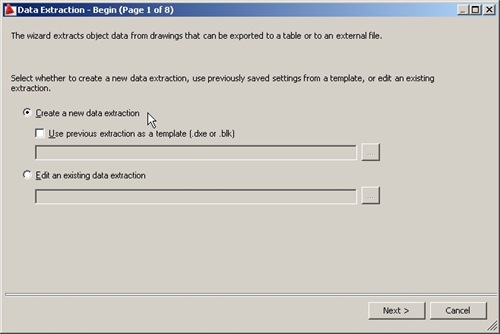
Type a setting file name. For example: lines.dxe.
2. Define Data Source
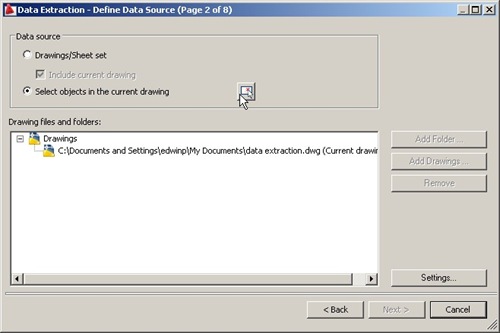
Next step, you must define your data source. Are you going to generate reports from all objects in your drawing (includes reference, nested blocks) or just some objects you selected.
Let’s just use select objects in current drawing, click the pick button on the right side of this option. Select all your lines, then [enter].
Click next.
3. Select Objects
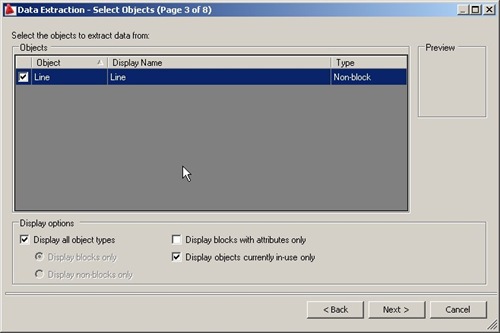
If you have different type of objects in your previous selection, you will see them here. You can filter what kind of objects you want to include (or exclude) in your report. In my drawing I only have lines, so that’s the only thing shown here.
After finish selecting your object, then click next.
4. Select Properties
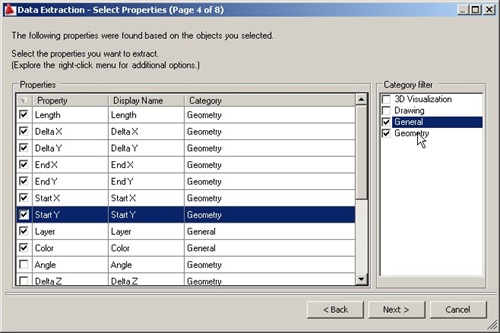
Next, you will see the list of your object properties. What you will see depends on what you choose on the previous step.
Line properties, grouped into 4 categories (column on the right). I only want to report general properties and geometry. I turn off the others.
See image below. I select length, start X & Y, end X & Y, delta X & Y, layer name, and object color. You can choose other than these example to suit your needs.
After this one, the rest is easy.
5. Refine Data
You will see a preview of your report here. You can sort the table by clicking the header column, arrange the column by dragging the header and change some options. Preview if necessary.
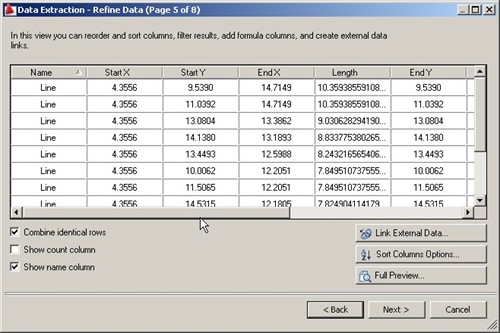
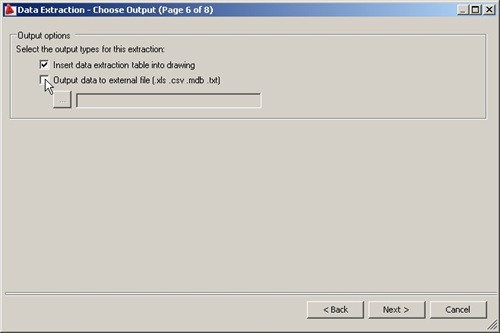
6. Choose Output
Where do you want to put your table? In the drawing or to excel file, or both?
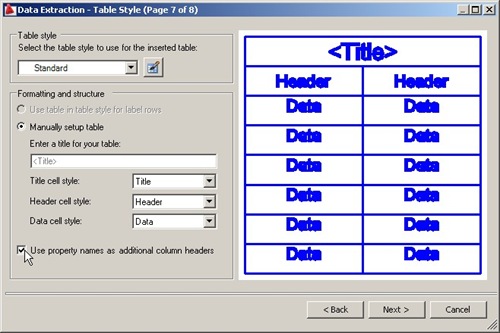
7. Table Style
Choose a table style you want to use. This step won’t appear if you don’t choose your output to drawing. Choose appropriate table style for your output.
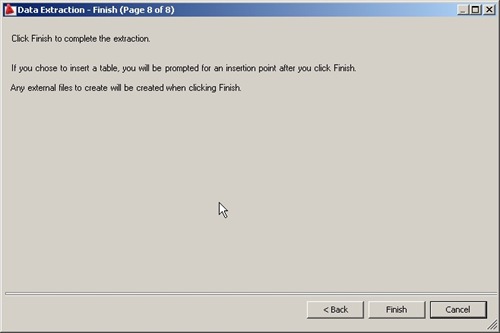
8. Finish
Well… there’s nothing to do here but click the finish button.
Here is my report.
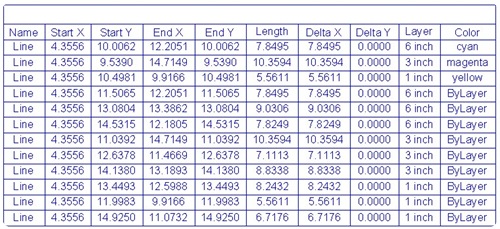
You might need to process your data further, you can do it easily in Excel or in your AutoCAD.
You may also want to see that you can report multiple coordinate from an AutoCAD block here. Easy isn’t it? So what kind of reports that you might want to create with data extraction? I would love to discuss it with you here.


Hi Edwin, thank you for your Post. I want to extract the geometry data and color data, and then transfer to file/Programm which robot can directly read and do the automatic spray painting work. Do you have any idea?
hi how can i have a report from all my blocks + their pics
Do any of you know why the “combine like rows” does not work when I use the (2012 Autocad) data extraction wizard? I Everything seems to work fine but that option. It is grey and is not selectable. I use a block with 2 attributes-a name and a quantity. So on my final report I want all the like names to be combined into one quantity. Secondly, my tree names are always 2 characters and my shrub names are always 3 characters-Is there a way to separate all the 2 character names/quantities from the 3 character names/quantities in my final report? We used to have a lisp routine to do this but it has been lost with a change of computer hardware. If don’t get it working I guess I will get out my highlighter and prints and start counting. Hehe.
Any help is greatly appreciated,B.
I've used this for years now (since 2008) and only recently, just out of the blue, it started with the "Deleteme" issue. I have no idea what caused it. But it's strange to use this feature for so long and just like that, it does it.
One workaround I've read about, and it does work for me, is to save the file to my local hard drive instead of the network drive of the project folder. For whatever reason, this works. I just have the small inconvenience of having to move the file from my desktop to the network folder after-wards.
I use the DATAEXTRACTION feature just like you and AutoCAD's help tell me to. On Step 5 I do a preview. Everything looks good. At the end, whether I choose insert a table or output data to an Excel file, I get nothing. Well, it creates an Excel file, but only one cell, A1, has anything in it, "DeleteMe". I've used it before and it worked. What happened? How do I fix it?
I found similar threads in many AutoCAD forums, and it looks like it's not solved yet. The workaround is to save it as csv, not xls. You can save it to xls with Excel, then insert it to AutoCAD using datalinks. I tried to search in Autodesk support page and can't find this issue.
I'm interested because it works before. Have you tried to install AutoCAD updates and reinstall it? Is it a machine specific or file specific problem?
I am using AutoCAD 2009 with SP1 & SP2. I have not tried searched for more recent service packs or tried to reinstall AutoCAD because we have recently recived 2010 and it will be getting installed within the next few days. The problem occurs on all files, and only on my computer. Other users in my department do not have the problem. My 2009 will be transfered to another user, so please let me know if a solution is found in case it occurs again.
I had not tried saving it as a CSV file. I was not familiar with that file type, so I ignored it. For now, it does work, though. If I find out anything more about it, I'll let you know. Thank you very much for your help!