In this Article...
Using publish command is very useful. It allows you to batch plot dozens your drawings, even to multiple plotters at once.

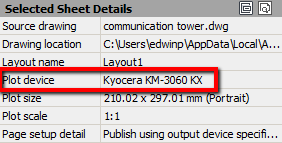
The problem is, it relies on page setup definition. One thing that is defined in page setup is plot device.

Let’s say one day your plotter is broken and you need to publish to new plotter. Or probably you need to plot it on other office that has different type of plotter. Your previous setup will not work.
Do we have to modify page setup for all files all over again?
Of course not!
Let’s see some workaround we can do.
Using DWF
DWF (or DWFx) is not only for design review purpose. You can consider to publish your sheets to DWF first, then plot it to your plotters.
DWF format is device independent. So you can send it and plot it anywhere. If the system can recognize the plotter, you can plot it there.
Other independent format you can consider is PDF. PDF is a standard format, almost every computer (including tablets and cellphone) can open it.
However, Autodesk claimed that DWF is better for design. You may need to try them both before deciding which format is best for you.
Change the format in publish dialog
If you are not convinced to use intermediate format like DWF or PDF, of course you can change the plotter in publish dialog.
You can create a new page setup in a drawing. You can create it in a new file or existing file that you want to publish. You only have to do this once. Before you do this, you need to have the plotter driver installed.
Now when you get back to publish dialog box, you can select all sheets in the dialog. Click the first sheet on the list, hold SHIFT then click the last sheet.
Now you can click the page setup field and choose the new one that you have created. If you created it on a file that’s not in the list, choose import. You need to import the page setup first.

In my version (AutoCAD 2014) I can only choose from the first sheet on the list.
After you select the new page setup, then you will see all sheets are using the new page setup. Now you are ready to plot to your new shiny plotter!
You can also add/copy more sheets on the list and repeat the procedure to send the drawings to other plotter.


SUPER. Helped me very much!
This is a great tip and we use it in our office. One thing to note – all of the paperspace layouts that are being bulk printed need to be set up with the same parameters for this to work. i.e. The title block needs to be inserted at the same point, the paperspace scale need to be the same (1:1), the pen setting file, etc. You would think that this is obvious and would be done all of the time as a matter of course, however I find in our office it is not always consistently done. We occasionally get unexpected results from the publish command when the paperspace layouts are not consistent.
Thank you for sharing your experience Karen.
It will be useful for the others who are using publish command!