You may already know how to change appearance of your Revit views. We change it in creating door and windows plan exercise. You can change the properties, visibility/graphics, detail levels, etc.
When you need to apply the same setting on next project, then you do it again. You may also need to do it within a project for multi story building. 1st floor plan, 1st floor door schedule, 1st floor this, 1st floor that… and repeat it for 2nd, 3rd, and so on. That would waste a lot of time.
Revit has the capability to save those common settings to a view template. If you save it in your project template, then you can use it for your next project. So you can apply them quickly, in just a few clicks.
You can find Revit this tool on your ribbon> view tab. Alternatively, you can right click a view name on our project browser, and choose from the contextual menu.

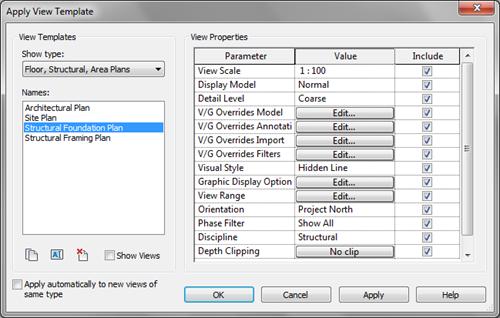
Let us try ‘apply template to current view’. In this dialog, you can find some default settings. If you are currently on 1st floor, try the site plan and click OK.

You can see on your screen now is showing site plan. You can see the contour (if your model has any), you can see the roof –not floor plan anymore-, and other changes.
Try to use the others and see how it works. You can also change the settings from the dialog. But I prefer to change the settings first until I’m sure to get what I want, then create the template. This will give a chance to review and see if it sets as I expected.
Now you know how to create a standard Revit view quickly right?
Some Notes
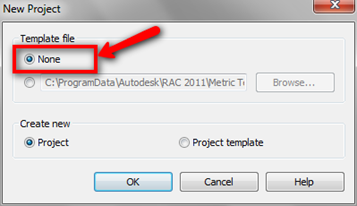
The default templates available may be different if you use imperial units. And if you use no template, you will see no view template available. You can create a new project without using template by choosing none when creating new project.

Now, can you imagine what types of templates you would create? If you already use it, can you share what are they?


I have this template I got from my teacher. And I’m new at Revit. I have created a component with the Furniture category. But when I go the the elevations, the view doesn’t cut the component. In the View Template in the Visibility/Graphic Overrides Model where it says cut lines and patterns, it’s gray and I can’t change it. Is there a way I can change the View Template so the Elevation will cut the component? Thanks!
Hi Jessica,
I assume you are using Revit 2014? This behavior is expected because you use view template. If you use view template, you can’t modify the visibility/graphic.
Hello,could you please tell us ,how you making a solider course above a window,door ? How you do stack wall with metal cap?
Thanks