In this Article...
You can create bridges in InfraWorks quickly during the conceptual phase. It is a great feature. However, the bridge style is limited. To create a custom bridge style, you must make the parametric model using another software. Then import it to InfraWorks. Previously you could only import a parametric model from Autodesk Inventor.
Good news for the AEC Collection subscribers. Since InfraWorks 2023.1 (it means you need to install update 1), you can import parametric components from generic Revit families.
In this post, I’ll cover how to import the family to InfraWorks.
Creating the Parametric Family in Revit
I don’t cover the step-by-step tutorial to create the family. There are many tutorials available, one video that you can follow is from Balkan Architect here:
You must provide at least three parameters:
- Overall height of the pier
- Pier cap left width from the center
- Pier cap right width from the center
Those three dimensions allows the pier to adjust its size automatically, following the terrain and bridge width.
You can refer to the dimensions in the image below.
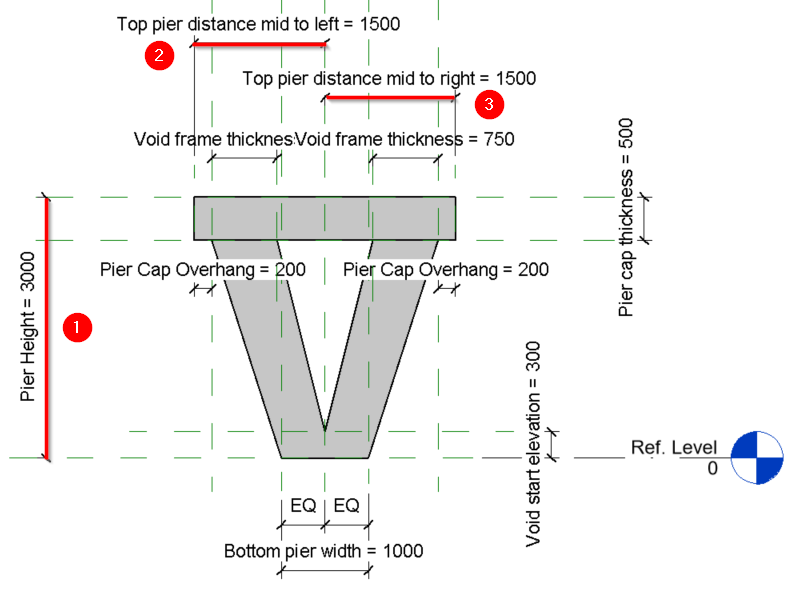
If you have more parameters in the family, InfraWorks also recognizes them. You can change the parameters manually from the properties palette in InfraWorks later.
Importing the Family Into InfraWorks Catalog
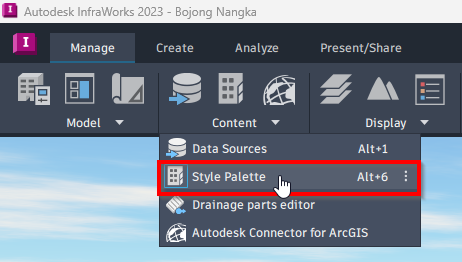
To import the family into the catalog, open the Style Palette.
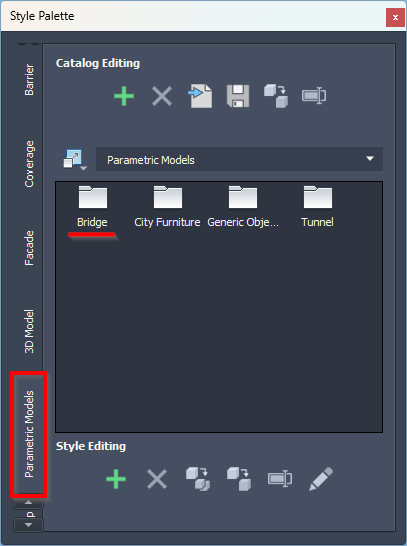
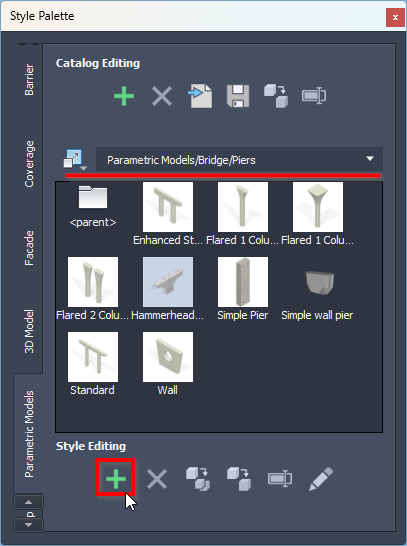
In the Style Palette, open the Parametric Models tab. Because we want to add a pier for our bridges, open the bridge folder and then the Piers subfolder.
After you open the Piers folder, click add a new style button.
In the Define New Parametric Models dialog, click the … button. Notice that InfraWorks now supports ipt, iam, and rfa files.

Find the rfa file and click open.
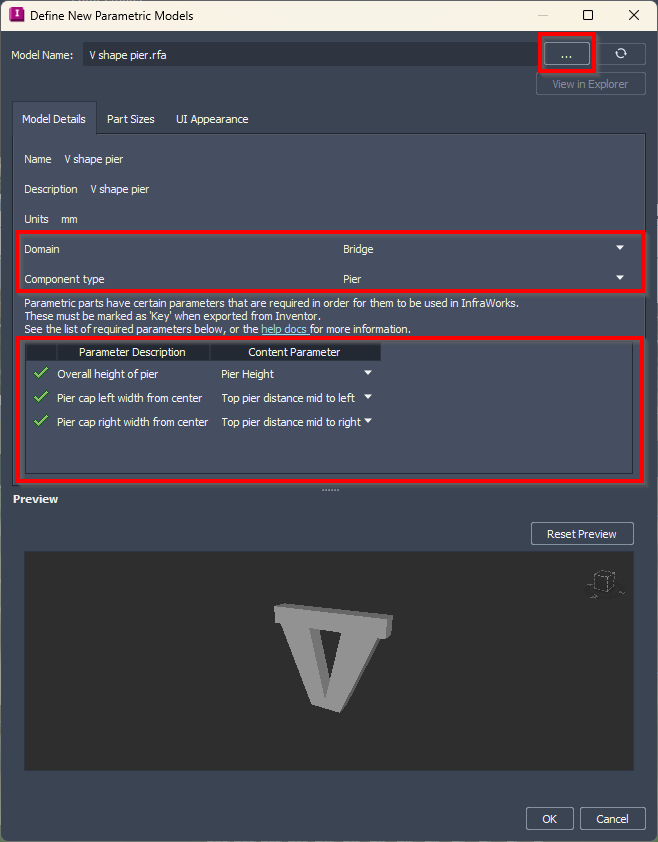
InfraWorks fills the model name and description automatically. However, you can rename it if necessary. Change the domain to bridge and component type to pier.
Map the InfraWorks parameter with the Revit parameter in the following category.
- Overall height of the pier
- Pier cap left width from the center
- Pier cap right width from the center
Go to the Part Sizes tab. Review the parameters. Notice that you can access the parameters from the Revit family in this tab.
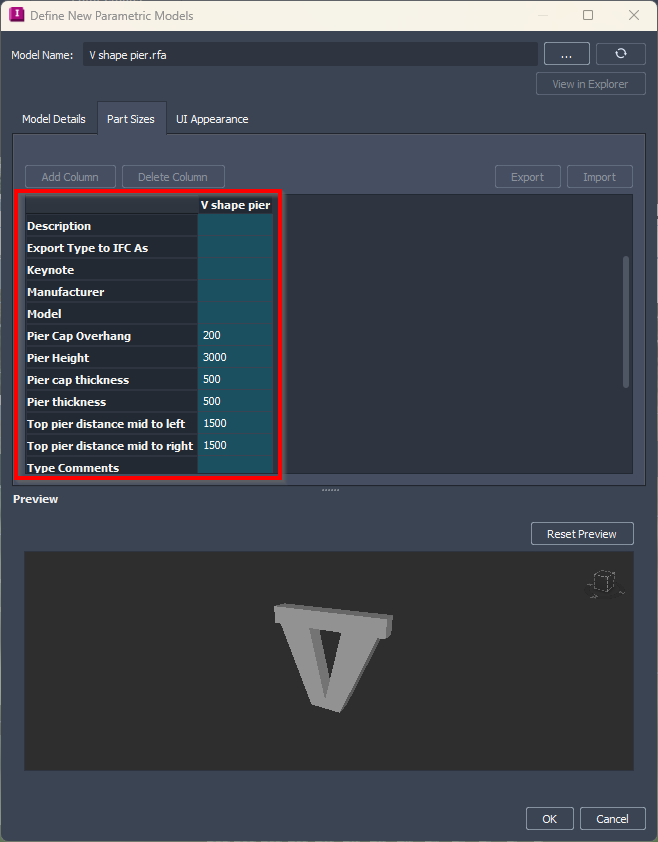
After everything is set, click OK to finish importing the component.
Using the New Pier on Existing Bridge
Now select a pier on the existing bridge. Remember that a pier is a subcomponent of a bridge. The first click will select the bridge, and the second click will select the pier.
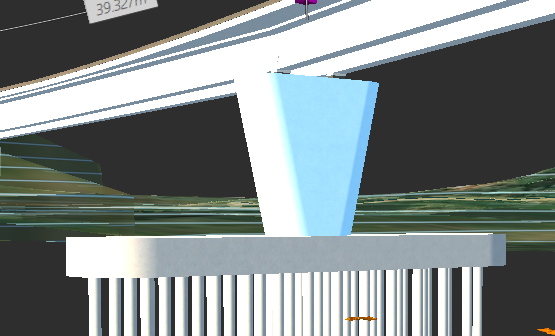
After the pier is selected, you can see the pier properties on the properties palette.
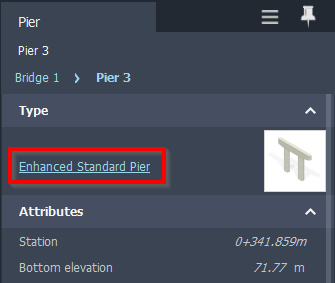
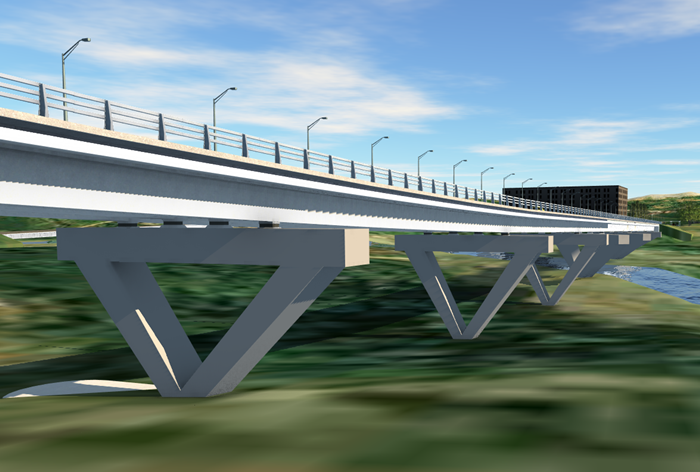
Change the pier type. Click the existing pier name to change it. Select the new pier type from the list. It changed only the selected pier. But you don’t need to do it repeatedly. With the pier still selected, right-click the mouse and choose Apply To…> All Piers from the context menu.

InfraWorks will change all of the piers in that bridge.
Saving the Bridge Style to Library
If you want to reuse this bridge in the future, you can save it to the InfraWorks catalog. Select the bridge, right-click, then click Add to Library… from the context menu.
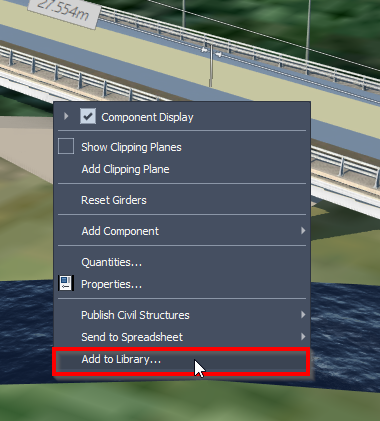
Now you can use the bridge style without having to set it up manually.
Practical Enhancements for AEC Collection Users
The ability to import a parametric component to InfraWorks is not a new capability. You can import the parametric components from Autodesk Inventor. It is quite strange because Inventor is not included in the AEC Collection. It means you need to purchase an additional license if you want to create a custom parametric component. If not parametric, no problem. You can use SketchUp, AutoCAD, or other 3D modeling software.
Finally, now we can use Revit to author the parametric components. It is a good decision because we know Revit also supports parametric modeling. And it’s included in the AEC Collection!
Now you can get creative and design custom bridges as you need!


