We learned how to create routes by placing the pipes to connect our equipment. In the next tutorial, we will create routes by using the auto-route feature. But first, we need to create the systems.
We need to place equipment before we use this feature. We are still using the previous tutorial file. Open the MEP tutorial project. You can continue using your project file or download this file.
Placing the Diffusers
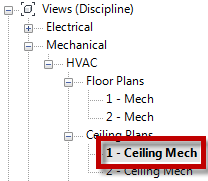
We will work on Ceiling Plan to put diffusers. In your Project Browser, open Views> Mechanical> HVAC> Ceiling Plans> 1 – Ceiling Mech.
You will see the ceiling grids in this view. We will use it to place our diffusers.
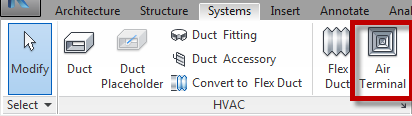
In Revit Ribbon, go to Systems tab. Click Air Terminal in HVAC panel.
Placing Supply Diffuser
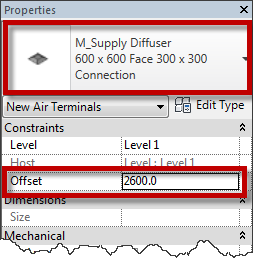
In Type Selector, change the family type to M_Supply Diffuser 600×600 Face 300×300. And change the Offset to 2600. 2600 is the ceiling elevation; it means we place the diffuser at ceiling height.
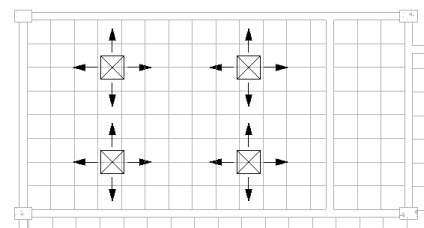
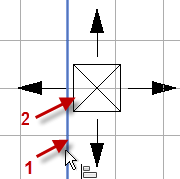
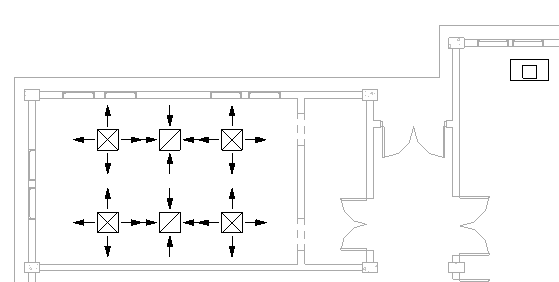
Zoom-in to the left top meeting room. Place four Supply Diffuser as shown below. Don’t worry if you can’t snap to place it at the exact location. We will move them later.
Press AL to activate align tool. Your cursor should show align tool is active. Select a ceiling grid line as a reference (1) then select the edge of the diffuser to align.
Repeat the procedure to all remaining diffuser.
We don’t use hosted diffuser because the ceiling is in a linked model. If you remove the linked file, all the hosted families will be deleted. To prevent this, it is advised to use hosted families only if the hosts are in the same project file.
Placing Return Air Diffuser
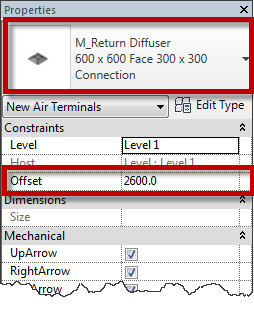
Now with Air Terminal tool still active, in Type Selector change the family to M_Return Diffuser 600×600 Face 300×300. Don’t forget to change the Offset to 2600.
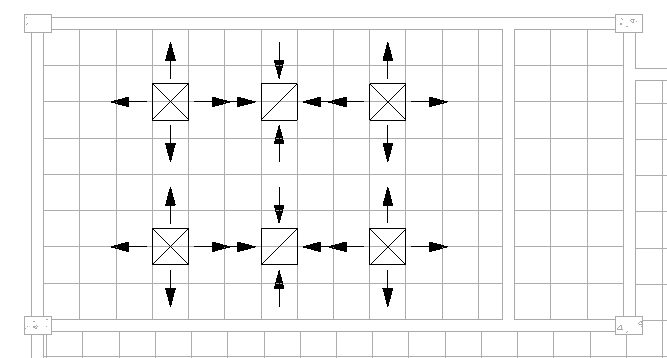
Using the same technique, place the return air diffuser at the following location.
Placing Air Handling Unit
Now let’s place Air Handling Unit (AHU). Click Mechanical Equipment in ribbon> Systems tab> Mechanical panel.

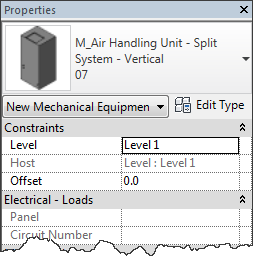
In Properties Palette, change in Type Selector to M_Air Handling Unit – Split System – Vertical 07.
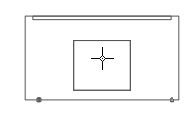
Place the AHU in right room as shown below.
Make sure the direction is like below before you place it. Press Space Bar to rotate the equipment before you click it.
Creating Systems
In the previous tutorial, we connect the equipment, and the system is automatically created. Now, we will create the system first.
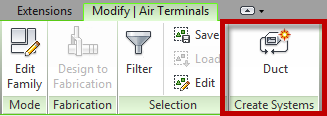
Select a supply diffuser. Right-click your mouse and select from context menu Select All Instances> Visible in View. All supply diffuser will be selected.
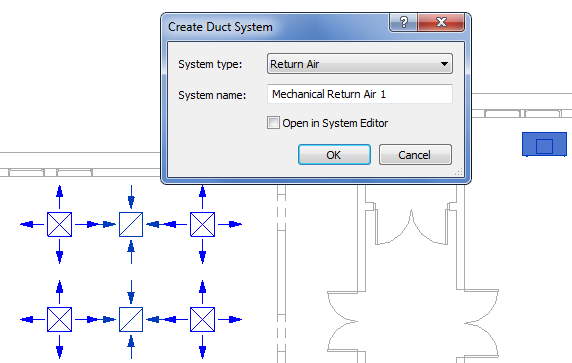
Hold Ctrl key and click the AHU to add it to selection. After you select the diffusers and AHU, click Duct in Create Systems panel.
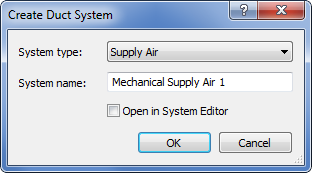
You will see a dialog to create a duct system. Revit automatically detects this is a supply air system. And the default name is Mechanical Supply Air 1. You may change it or leave the default value. Click OK.
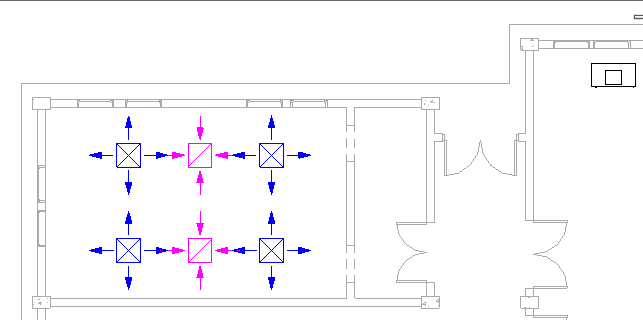
You should see the diffusers and AHU are now in blue color.

With the same procedure, create Air Return System.
Examining the Systems
You can easily see the air terminals that are already in a system. The supply diffusers are blue, and the return diffusers are purple.
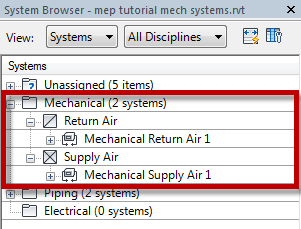
Examine in the System Browser. If you don’t see it, press F9 to open the browser.
You will see below Mechanical; there are two categories: Return Air and Supply Air. We can see our systems are below the categories.
Click it and see in Revit view, the selected object is highlighted. Expand the system and check the equipment in each system.
Having Problem Following the Tutorial?
If you having a problem following the tutorial, you can watch this video as a reference.
We will continue working with the systems in our next tutorial.


REVIT MEP VEDIO TUTORIALS DVD ETC. BASIC TO ADVANCE