In this Article...
We covered how you can control Revit object appearance in Revit using Object Styles. Now let’s continue how we can setup lines appearance in Revit. Engineering drawings are presented by lines, so this is important how you can setup this.
Line Weight
We can change line weight in Revit by changing it in Object Styles. As you can see below, it only shows in integers.
How thick is 1, 2, 3 and so on?

Let’s see the Revit line weight settings to see this clearly.
You can examine or change the line weight settings by accessing Revit ribbon> Manage tab> Settings panel> Additional Settings> Line Weights.

Revit will open Line Weights dialog. The default tab is model line weight. It controls the line thickness in your model.
The model line weight is scale dependent. For example the wall thickness is set to 3 in cut views.
If you set the view scale 1:100, then the line weight for that particular view is 0.25mm (in metric, obviously). If your view is set to 1:500 scale, then the line weight will be 0.1mm.
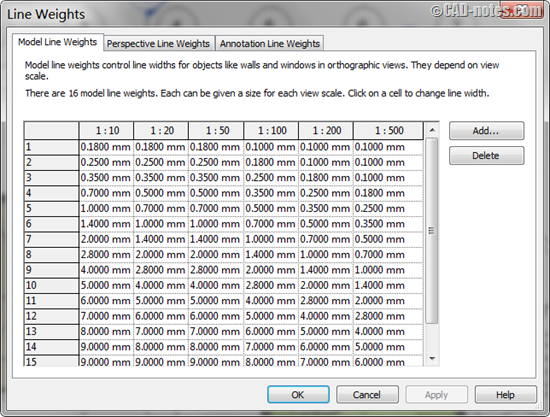
The other tab: perspective and annotation line weight are not scale dependent. Perspective view doesn’t have scale, does it?
And annotation lines are also not scale dependent. When you change a view scale, the model scale will change. But annotations won’t change. So the annotation size will not change regardless the scale you set for your views.
Line Color
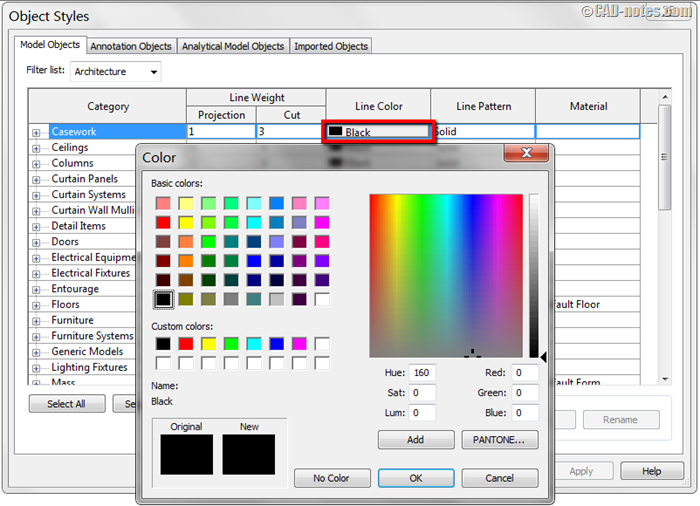
Line color is pretty obvious. You can change the line color in Object Styles or override it in Visibility/Graphics settings. You can also override each elements graphic. We will come to this later.
Line Pattern
You can modify or create your own line pattern in Revit. Click Revit ribbon> Manage tab> Settings panel> Additional Settings> Line Patterns.
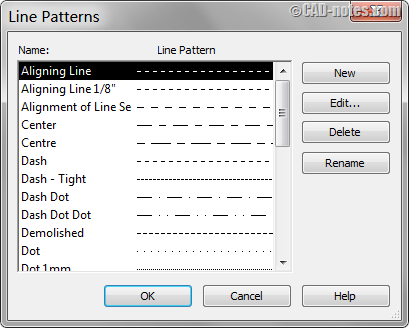
Revit already has some predefined line patterns. You can modify existing pattern or create a new one.
The line pattern definition is very simple. You can add dash, space or dot and define the length sequentially.
Below is the example for Dash Dot line pattern.
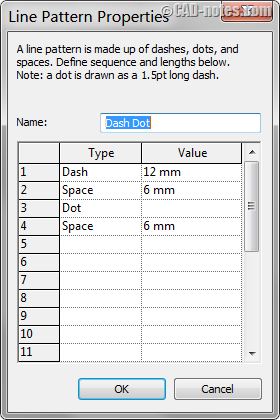
You can use these line patterns in Object Styles or other visibility settings.
Line Styles
You can use defined line styles when you draw Model Lines or Detail Lines.
After you activate the command, you can choose it from Line Style panel in properties palette or contextual ribbon tab.
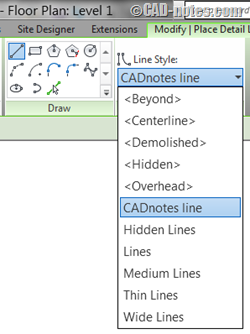
You can modify or create your own line style by accessing Revit ribbon> Manage tab> Settings panel> Additional Settings> Line Styles.
Click new in subcategories group at the right bottom of the dialog.

To wrap up
Sometimes the Revit settings are not set in one big dialog box. You need to find the settings on other place. Mostly they are very simple to configure, but you need to know how it works.
Many of the settings in Object Styles are configured in other settings. We cover about lines in this article.
How about you? Do you use Revit out of the box or do you configure your own settings?


