In this Article...

We have discussed about using the text tools in MicroStation. There are more text tools we can use for annotation. We will discuss it in this section.
Place Note
Place note will place a text and a leader arrow. Similar to place text, activating this tool will open the word processor. Type the text in word processor, then place data points to define the leader arrow in your drawing.
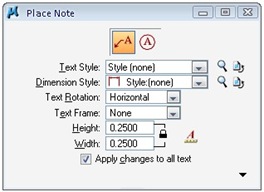
Take a look in tool settings window. Since XM edition, we now have callout mode here. In the pre-XM version, callout has separate button in annotation tool.
Open place note.dgn, and try to add some callout and note like this. Just type any text you feel right as a practice.
Graphic Group
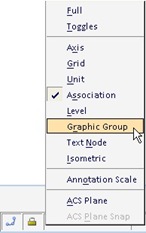
Notes leaders and texts are two objects in a graphic group. Check the ‘graphic group lock’ before you modify (moving or copying) the notes. Make sure it’s turned on or they will be treated as separate objects. You can turn on/off the lock by clicking the lock symbol
Enter Data Fields and Text Node
Both of these two tools are used to reserve some space for text. When we want to define the text location and style for later input, we can use them. This is common to maintain a drawing standard. For example: placing text in titleblocks.
Enter Data Field
We use enter data field for texts that we already know how many characters will be used. It can be the date format dd/mm/yyyy or standard drawing numbering like A-xxx or similar use.
We can place ‘enter data field’ by using text tool. Just use underscore _ to reserve the space. If we want to reserve the space for dates, then type __/__/____.
We can change the value by using ‘fill in single data field’ and ‘auto fill in enter data field’.

Both will open a text editor. Type the desired value and press [enter] to apply the value to the underscores.
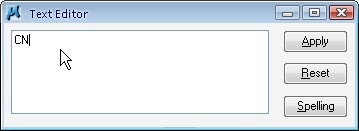
Fill in single data field will ask you every data field you want to change. Auto fill in enter data field will automatically search for empty data field. When it find data field that already changed, it will skip the data field.
Text Node
![]()
We use text node if we want to reserve text space that we don’t know the text length yet. You can change the text node value using the edit text tool.
Notes: We can hide and show enter data field and text node from view attributes
Exercise
Download this file and put it in your tutorial project. This is a simple table, and we are going to reserve some space for our text. The first column will be the revision number, 2nd column the revision date, and the last one the revision description.
- Activate the place text tool, type ‘REV-___’ (without quote) in word processor window. Place it at the first empty row in the revision number column.
- Place text ‘__/__/____’ in the 2nd column, top row.
- Activate place text node tool. Place it in the 3rd column, top row.
- Activate modify tool, hold [ctrl] and click the 3 texts we added. This will select the 3 texts.
- Press [esc] once to move the focus to home, then press 3 then 1 sequentially. This will activate copy tool. Change in tool settings dialog, number of copies to 8.
- Click anywhere in your screen to define a datapoint, move your pointer down, indexed to Y axis. Type 400 then click datapoint. Your texts are copied to the empty cells.
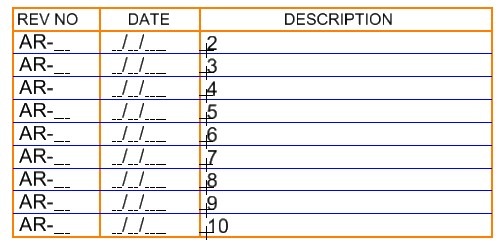
Try to use ‘fill in single data field’ to change the first row.
Then try what’s the difference when you use it to change the values in 2nd row.
Don’t forget to change the description using edit text!


Questions;
"3.Activate place text node tool. Place it in the 3rd column, top row." what is the 'it'?
Modify tool is modify element?
Where is graphic group lock?
I've been following the lessons in order, still confused.
just click the text node tool in the task navigation under text tools. Then add the data point on third column
first row. You will see there it appears a character with a cross.
I think you are right with the modify tool. Just follow the succeeding instruction that says hold ctrl and click the three texts you make.
Where is the graphic group lock? It is in the task bar (bottom) beside AccuSnap. Click it and check graphic group.
(This is discussed in the previous tutorial).
i am wrkng as dsgn engineer in k.s.a…i thnk ths nots will hlp me alot for imprvng ma profsnl skils…… thnk u
You're welcome Fernando! Keep following this blog for more updates!
Thank for the tips !!!
I just discovered your site on Bing. Good article. Thanks for taking the energy to share this.