In this Article...
Let us continue to explore creating our own Revit family further. We have created families with parameters. All of the parameters are type properties.
What is instance properties? Let’s take a look this wall instance properties.
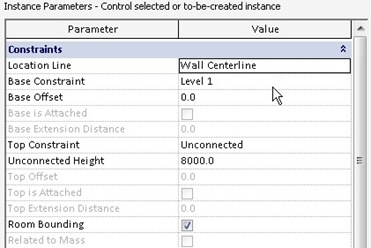
Instance properties define how a single object is placed in Revit. An object in an instance. They only control an instance. When you change the wall base offset, then only the wall you selected will be offset. When you change the wall height, then only that particular wall is changed.
So what about the type properties? Every instance that use the same family type will be affected. If you add one more layer to your wall type, then every wall will be updated with the new definition.
Let us try to add instance parameters to our Revit family. We will pretend this table can have different material finish. Do you still have this table?
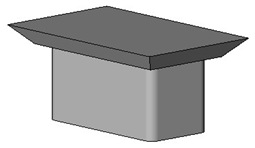
If you don’t keep it, you can download it here. Open the table.
Creating Instance Parameters
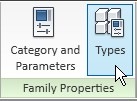
From your ribbon, access the types properties.
In the opened dialog box, parameters section, click add. Give this new material name: ‘table top material’. Change the group parameter to: ‘materials and finishes’. Change the type of parameter to: material. And don’t forget to change the parameter to instance.

Create another parameter named ‘table bottom material’. Use the exact same properties with the previous. You should see them both in Revit family types dialog.

Creating Material Definition
Next, we are going to change the material value to distinguish them both. Click the button next to ‘by category’.
We don’t have many materials defined here yet, so click duplicate to create a new material definition. Give it a name, you can use ‘wood’ or something else you like.
![]()
Check the ‘use render appearance for shading’. This will automatically change the shading color as close as possible to your render material.
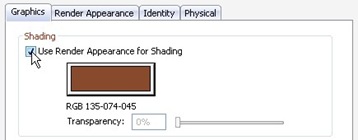
And then change the render material by clicking replace button in ‘render appearance’ tab.

Do it for both materials.

Applying Parameters to Objects
Now we need to tell Revit, which object will be using the parameters. Activate modify tool, and select the table top.
From the contextual ribbon tab, click instance properties.
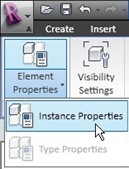
In the opened dialog box, find the material and finishes category. On the right most of material parameter, click the small button.

Again, Revit open another dialog box. You will see the material parameters we defined before. Select the table top material parameter, and click OK.

Repeat the step above for the table bottom. Save this Revit family, and try to load it to a project.
Testing the Family in a Project
We defined several parameters in the Revit family. To see the difference between instance and type parameters, place several tables in this project.
Try to change the table width, and observe what happen. And also try to change the table materials. Compare the changes between instance and type properties.


I ‘m looking for a parameters list to insert into a bearing wall in concrete, such as compressive strengths, Flexural Strengths, Modulus of Elasticity, ductility, density, resistance to abrasion and corrosion etc…
I was wondering if you have ever created a Revit family object with several material options? If so, how did you create the selection process as an instance so a single object could have several different material options in the same Revit session?
Thanks,
John
John,
You can select materials if you set parameter for material. You can also create sub objects if you want to have different materials in one family.
Which one that you want to do?
Thanks Edwin,
What I was trying to create is check box selection for each material as they are selected when placed on a wall. For instance, I have a check box for each of several panel Height and Depth. The end user select a check box and a parameter routine engages the correct combination. This is all done through “IF” statement routines.
When I try to apply the same approach with materials I get an error message telling me formulas cannot be applied to material parameters.
Since we can have several panels placed on a wall from the same family the instances approach is what I have been doing for the Height and Depth controls.
So I am looking at alternatives to solve the problem. I’m getting the idea a macro or program would be needed to solve this.
I’m interested in any ideas you would have. Thank you again,
John
This helps, although can I apply a instance parameter to a material of an import object? I have imported a 3d car from auto cad and used the layers (from acad) to control the render materials. This has worked so far but I would like to have multiple colors of that car in my project.
Thanks so much! Really helped in creating a new family. I was getting really frustrated that my materials werent showing up in the model until I realized from your post that you had to link the parameter to the object :-)
I'm glad that it helps :)
Have fun creating your Revit families!