We are going to discuss about creating our own Revit families. As a start, we are going to create 2D family: profile. Profile is used in many other Revit families. We use profiles to create roof edges, floor slab edges, sweeps and reveals, mullions, stair nosing, and railings. It’s a basic stuff, but you will use it a lot.
Choosing Family Template
First thing you need to consider when creating a family is choosing the right template. First time you click new>family, you will see many templates available. You should choose the right template for your family. If you want to create a door, then choose a door family. You can create it using a window template and make it looks like door, but it won’t be reported correctly in your schedule.
Don’t worry, most of the templates are very well self explained.
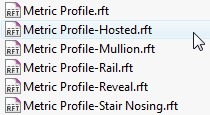
There are several profile templates available. Let’s try to use profile hosted. Choose the Metric Profile-Hosted.rft template, and click open. You will see on your drawing area like this.
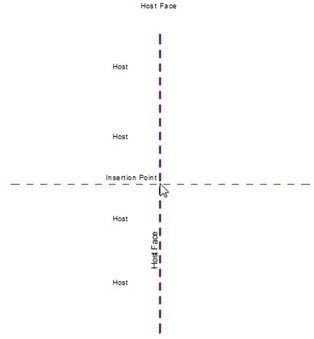
There are two dashed lines. The vertical line is the host face. We are going to create a wall sweep. Then the host face is the wall face. The ‘host’ text on the left is showing where the wall is. The horizontal line is only showing us where the insertion point is: at the intersection of those two lines.
Drawing the Profile
Let’s see the ribbon. The ribbon is now showing different tools than we used to see in Revit.

Activate line. Just like we see in Revit sketch mode, we see the contextual tab. It’s showing the drawing tools now.

Use line tool, and draw three lines like this. Don’t worry about the exact size. We will change it later.
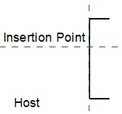
Add dimension to the profile like this.

- Click one of the horizontal line, then click the dimension value to edit it.
- Change it to 150 then press [enter]
- Select the dimension, and click the lock icon near it. This will constrain the distance to 150.
Add another dimension between the horizontal axis and the horizontal line. Change the distance to 75. Finish the profile like this.
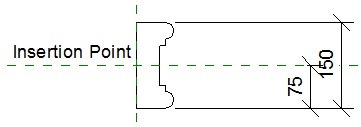
We are done! Save this family.
Using the profile for Wall Sweep
Open a new project. Create some walls, then open a standard 3D view.
We need to load the profile to this project before we can start using it. Activate the insert tab on your ribbon, click load family. Load the family you saved before.
Click the small arrow below the wall tool. Activate wall sweep.
![]()
Click the element properties> type properties.
As we did before, we need to create a duplicate of this default sweep family. Click duplicate, give the duplicate name ‘my sweep’ or whatever you like. Change the profile to the sweep profile we created previously.

Click OK, then you can start placing your sweep. Move your pointer to your wall, and click where you want to place the sweep. Click finish profile after you place it before continue to place another sweep.

Here is my sweep.
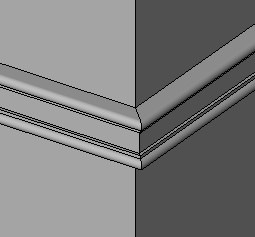
3D is very easy, right? :)
Basically that’s what we only need to do to create a profile for your Revit families. But sometimes, we need to create several same profiles with different sizes. It can takes time to draw all of them. And might be difficult to maintain many files. We need to use parameters to get several profiles from one family definition. Next, we will discuss about using parameter and create family types.


plese join me in your word family
Hi,
I am a new in revit.
I hope you can help me how to draw a concrete
gutter beam as revit family.
If you dont mind pls give me your email then
I can the dwg.
Tq very much.