• Home
  • Training Books
  • Subscribe to Our Email Newsletter
  • About
    • Contributors
    • Feedback
    • Contact
    • Privacy policy
    • Cookie Policy

CADnotes

CAD Tutorials and Best Practices for professionals and students

  • Featured
  • AutoCAD
    • AutoLISP
  • Revit
    • Revit Architecture Basic
    • Revit MEP Basic Tutorial
  • Inventor
  • MicroStation
    • MicroStation Basic Tutorial
You are here: Home / Revit / Applying material, scheduling and tagging Revit parts

Applying material, scheduling and tagging Revit parts

November 8, 2011 by Edwin Prakoso 3 Comments

In this Article...

  • Applying materials
  • Creating schedule
  • Tagging parts
  • Do you think you can use it?

So we learned how to create Revit parts. What are the benefits of parts anyway?

Dividing your element to smaller parts allows you to create detailed appearance of your element. You can have different materials in a wall layer. You can modify part size by dragging the grips.

Not limited to its appearance, you can report parts in your schedule. You can also tag them as separate elements, not as the whole original element.

Applying materials

Applying material is the same with applying it to original element.

Choose your part(s) and change your material in properties palette. You must uncheck material by original to allow this override.

Revit_part_material

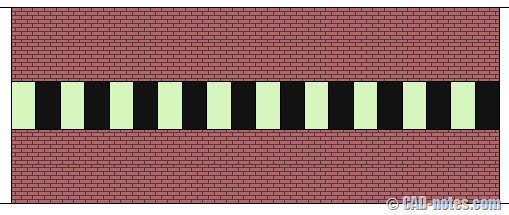
This is what I have done to my wall.

different_wall_materials

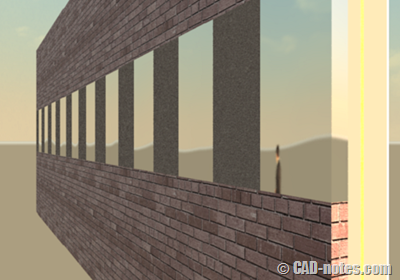
And yes, we can render it too.

Don’t forget to change part visibility to show parts! If you choose to set your view to show original, it will render the original element.
rendered_image

Creating schedule

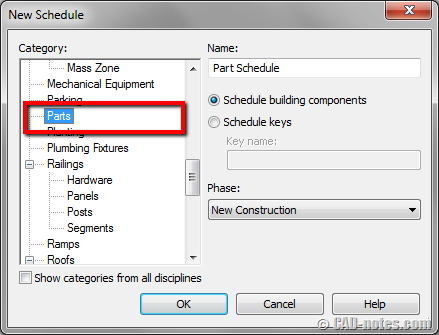
You can create parts schedule by selecting parts in category. The process is exactly the same as creating other schedules in Revit.
Revit_parts_schedule

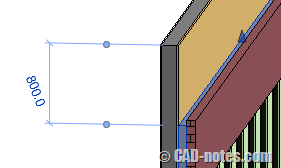
You may want to try changing parts size and see how the schedule is dynamically updated. You can drag shape handles to change part size.

To enable shape handle, you need to select the part and check show shape handles in properties palette.
shape_handle

Tagging parts

You can tag parts using tag by category.

tag_by_category

Activate the tool, then click on your part. If you haven’t loaded part tag, you will see this warning.

load_part_tag

Click yes to load tag. You can find part tag in annotations folder. Remember, M prefix is for metric families. If you’re using imperial families, you will see part_tag.rfa.

part_tag

Place your tags to your parts. You may see question marks like this. Why was that?
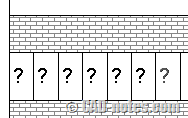
placed_part_tag

Just like other Revit tags, you need to define the element mark that shows the tag value. Select the part and fill mark value in properties palette.

part_mark

Do you think you can use it?

Do you think Revit parts can be useful in your work? Have you use it, or how do you plan to use it? Share with us here!

About Edwin Prakoso

I work as a Sr. Consultant in PT Cipta Satria Informatika. I've been using AutoCAD since R14 and Revit since Revit Building 9. I occasionally write for AUGIWorld magazine and I am also active in Autodesk discussion forum. I'm a member of Autodesk Expert Elite, an appreciation for individuals who give contributions to the Autodesk community.
Connect with me on twitter or LinkedIn.

Filed Under: Revit Tagged With: part tag, Revit part

0 0 votes
Article Rating
Subscribe
Login
Notify of
guest

guest

This site uses Akismet to reduce spam. Learn how your comment data is processed.

3 Comments
Inline Feedbacks
View all comments
Snarf
Snarf
13 years ago

 Try setting detail level to "Fine"

0
Reply
Rhonda
Rhonda
Reply to  Snarf
6 years ago

Can you add instance parameters to a “part tag”?

0
Reply
Nathan
Nathan
13 years ago

Edwin,  can you help me out with this, I place a beam on the RCP and it shows in sections but it does not show on the RCP.  I have tried to adjust the view range as well but still does not show up, very peculiar.  If you thought about it I would appreciated.

Nathan

0
Reply
wpdiscuz   wpDiscuz

Featured

Setting Up AutoCAD Sun Light is Easy!

Do you think setting up lighting for your AutoCAD rendering is difficult? try this tutorial to easily get compelling result!

Recent Articles

  • Autodesk Construction Cloud Activity Log
  • Exporting AutoCAD Plant 3D Model to Navisworks
  • Autodesk Data Connector for Power BI is Now Available

Advertisement

New on CADnotes

  • Autodesk Construction Cloud Activity Log
  • Exporting AutoCAD Plant 3D Model to Navisworks
  • Autodesk Data Connector for Power BI is Now Available
  • Autodesk Forma Design Contest
  • Revit 2025: Toposolid Enhancements

Meet the Authors

avatar for
avatar for
avatar for
avatar for
avatar for
avatar for

Get Connected

CADnotes on FacebookCADnotes on InstagramCADnotes on TwitterCADnotes on YouTube

© 2009 – 2025 CADnotes · Feedback · Privacy Policy · Become an affiliate

wpDiscuz