In engineering drawings, we need to add a special character or a symbol like a diameter symbol, tolerance, etc.
There are 3 ways to make it in Revit. We will see all of them here.
1. Using the Character Map
Character Map is a standard Windows application that you can use to find a special character.
In the below example, I choose the diameter symbol.
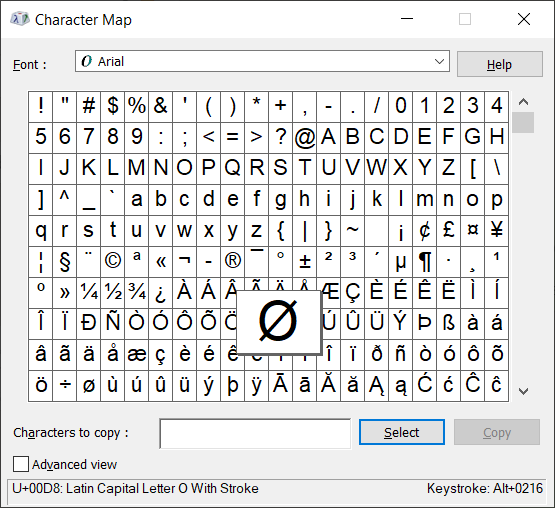
After finding the symbol that we need, click Select, then click Copy to copy the symbol to the clipboard.
Then you can paste it in Revit by using right click> paste. Or by using ctrl+V.
2. Using Keystrokes
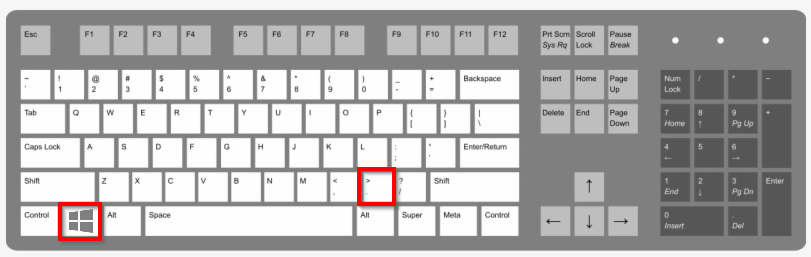
The second way to add a symbol is by using keystrokes.
If you see in the Character Map, at the right bottom of the screen, you can see the selected symbol’s keystrokes.
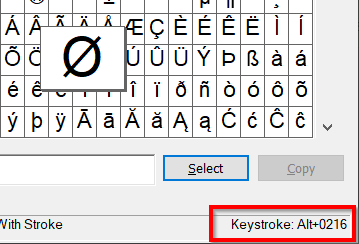
For the diameter symbol you need to hold Alt key then press 0216.
The problem with using keystrokes is you need to use a numeric keyboard. The numbers key at the right side. It will not work if you use the number at the top of your keyboard.
And you must press the keystrokes quickly enough before the ribbon shortcuts active.

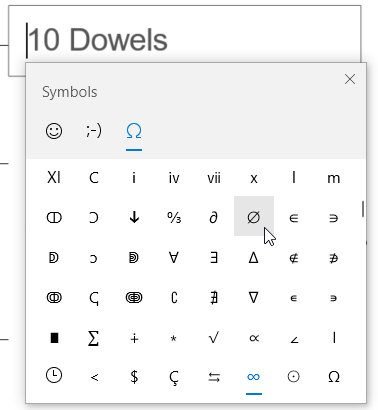
3. Using the Emoji Keyboard
Of course, We are not going to use emoji in our drawing. But the emoji keyboard is a great way to place symbols. Emoji keyboard is available in Windows 10.
You can activate the keyboard when in edit text mode, then press the Winkey + “.” (period/dot). Winkey is the button on your keyboard with the Windows logo.
Windows opens the emoji keyboard. Go to the symbol tab (Ω). You can see different types of symbols there.
Find the symbol under the appropriate category, then click the symbol to place it in the text field. Remember, press Winkey + . when you are in editing mode.
The interesting thing about the emoji keyboard is the history/most recently used. It’s handy when we use a set of symbols frequently. We don’t have to find them repeatedly on the list.
Video Guide
If you want to see all three methods in detail, you can watch it in the video below.
To Sum Up
Engineering drawings require symbols or special characters that are not available on a standard keyboard. There are several ways (we list 3) to make the symbols. You can choose the most convenient way for you.
I hope you find it useful!


