Sometimes, a fill pattern in Revit doesn’t appear the way you expect. A common example is a diagonal crosshatch pattern. When the wall is perpendicular or parallel to the view, the pattern may look correct. But once the wall is rotated, say, at a 45-degree angle, the pattern can suddenly look “wrong” or inconsistent.
This behavior is related to how Revit handles drafting pattern orientation. For drafting patterns, Revit allows you to control whether the pattern is oriented to the view or aligned with the element. This flexibility helps keep drawings readable and visually consistent across different views.
However, this option is not available for model patterns. And that actually makes sense. Model patterns represent the real-world pattern of a physical element (such as brick or tile), not just an annotation on a drawing. Because of that, their orientation is tied to the model itself rather than the view.
Where to find the pattern orientation settings
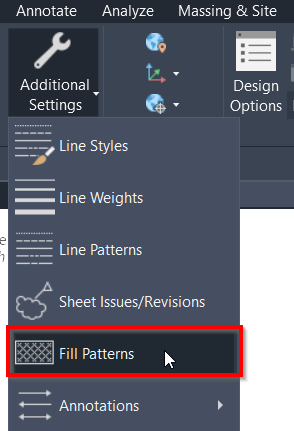
To review or change drafting pattern behavior:
- Go to the Manage tab.
- In the Settings panel, click Additional Settings.
- Select Fill Patterns.
Note: You can also access and edit fill patterns directly from the Material Editor, which is often more convenient when working with material definitions.
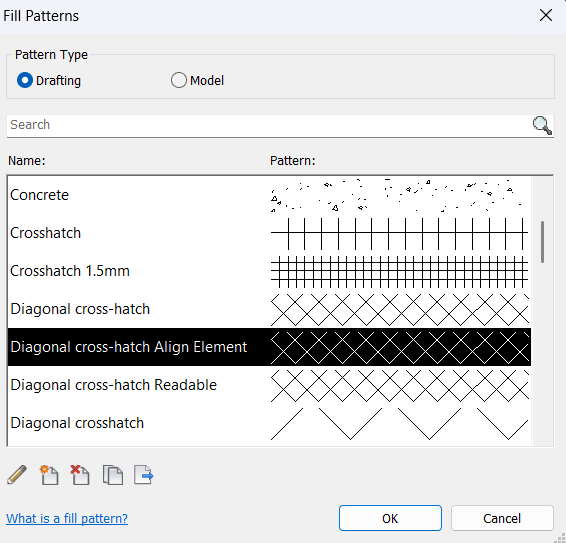
From the Fill Patterns dialog, select the pattern you want to modify. If you need multiple versions of the same pattern with different behaviors, it’s a good idea to duplicate the pattern first.
Then:
- Click the Duplicate icon to create a copy, or
- Click the pencil icon to edit an existing pattern.
Understanding “Orientation in Host Layers”
In the Edit Pattern Properties dialog, look at the bottom of the window. You’ll find the option called Orientation in Host Layers.
This setting controls how the drafting pattern behaves relative to the element and the view.
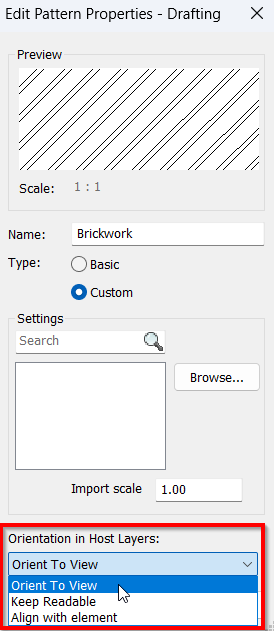
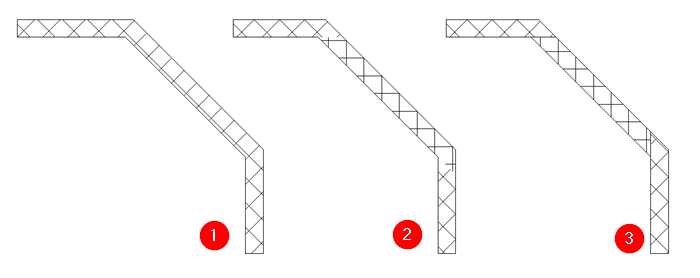
The available options are (see the image below):
- Orient to View: The pattern aligns with the view direction. This keeps the pattern visually consistent regardless of how the element is rotated.
- Align with Element: The pattern follows the orientation of the host element, such as a wall. Rotating the wall will rotate the pattern.
- Keep Readable: This option behaves similarly to Align with Element, but with an additional benefit: it maintains readability by showing wall joins and related linework more clearly.
Understanding these options can help you avoid confusing pattern behavior in drawings—especially when working with rotated elements—and make your documentation cleaner and more predictable.


