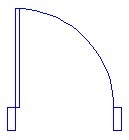
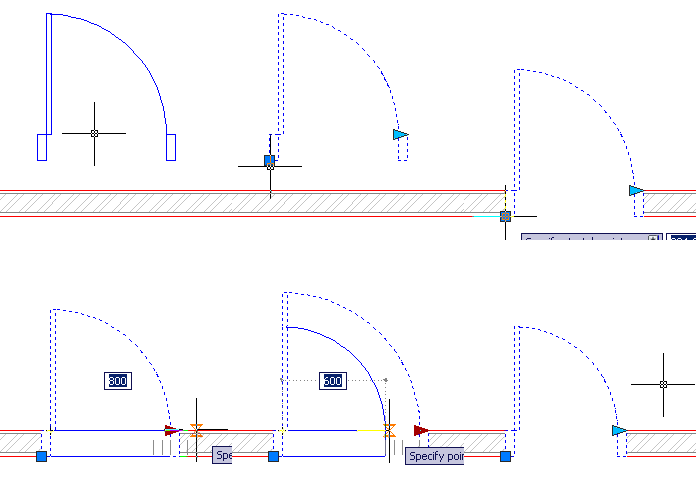
 This is the last object we are going to create using AutoCAD dynamic block. We are going to create a door. Basically it’s not that different with what we did with dynamic block before. But this time, we are going to learn about action properties in dynamic block. We are going to use wipeout as well.
Now, open your previous dynamic block tutorial file. We are going to create all of our dynamic blocks in a single AutoCAD file. This file will be our block library. We will create several dynamic blocks here. Don’t loose it until we finish our tutorial.
Creating the Geometry
In your AutoCAD file, create a new layer: A-Door, with color: blue, and lineweight: 0.09 mm. Set this layer as current layer.
Draw a 50×150 rectangle as the frame. Copy it to it’s right with 700mm distance. Draw a rectangle 30×650 as door panel. Then draw an arc for swing symbol to complete it.
The last thing we are going to add is a wipeout. Activate it, and draw a rectangle wipeout that covers the whole door width.
You will see the door frames are covered by the wipeout. Select the wipeout, right click, then from context menu select draw order>send to back.
Why do we use wipeout? We are going to host our door to a wall. We don’t want to trim or modify our wall after door placement. And modifying the wall length will be reported incorrectly. So we add wipeout to cover our wall later. We will try this at the end :)
Now as usual, create a block from this object. We will create it as dynamic block. Give it name ‘Single Door’. You can define insertion point wherever you think appropriate. Open your block in block editor.
Adding Parameters and Action
We are still using linear parameter. Add a linear parameter as below.
Delete the left arrow. Or you can change ‘number of grips value’ to 1 in properties palette.
There are 3 action we need to add, based to this parameter:
1. Add a stretch action to stretch our door width. Similar to what we do with adding action to dynamic block wall. This time we only need to create a small rectangle to include the right door frame and the wipeout.
2. Add scale action to resize the arc door swing symbol. This action is very simple to add. Just select the parameter, then select the arc. [ENTER] to finish.
3. Add another stretch action for resizing the door panel. Only select the door panel when this action ask you to select object.
Parameter and Action Properties
Placing those action is easy I believe. But we are not finish yet. We are going to limit the size. We don’t want AutoCAD users to change the door size without a guidance. We will change some parameter properties just like we did when we create column. Select the parameter. Change the Dist type to ‘List’ and click the … button to input distance value list.
Don’t forget to change this parameter name to something like ‘width’ or ‘door width’.
*You may want to use Increment. But since the last time we used it, I think it will be better to use list now.
Add more values to define your door width.
The last one, is changing an action properties. Not only parameter has properties! Remember the stretch action for the door panel? Where do you think the door panel will be stretch? Horizontally!
We need to change a property to override this behavior. Select this action, open your palette property. Under overrides category, change the angle offset to 90 degrees.
This will override the stretch action, it will stretch the door panel vertically even the parameter is stretch horizontally.
Ok, we are done! Save block, and close block editor.
If you have difficulties with the tutorial, you can watch this video. But sorry, this video don’t use WIPEOUT. But shouldn’t be a problem, because we are emphasizing on parameters and actions.
One more thing. We still can see our wipeout frame. Let’s turn it off. Activate wipeout, then type F [ENTER] to activate frame option. Type OFF [ENTER] to turn it off.
Command: WIPEOUT
Specify first point or [Frames/Polyline] <Polyline>: F
Enter mode [ON/OFF] <ON>: OFF
Regenerating model.
Try to stretch your door and don’t forget to try placing your door at walls!
*Notes:
- If you can’t see the wipeout covering your wall, select your wall and change the drawing order: send it to back.
- You might want to add flip actions so you don’t need to mirror it.


i see..when plotting, when the wall has lineweight in it,for example Im making .15m thick of wall.. when I place my door at the wall that has lineweight, the wall is still visible when i plot it, because the lineweight overlaps the width of the door frame which is also .15m.. but when i plot it with no value of lineweight,or just a line or default lineweigth,it fits.. can we do something with it?
Finally!!! i got it..!!! Thank you so much Sir Edwin.. You are always been my idol.. Also, I learned a lot on your Microstation article.. I hope there's more 3D to come.. Keep up the Good Work!!!
Sir Edwin,
finally i got it..but the upper end of the arc deattaches as i adjust the distance..it kips on opening..also,when i plot it..still, the wall was visible..
Sir Edwin,
Hello..Great Tutorial!!!.. even Im new in autocad..i follow the steps and repeated many times but my arc stil on its place but adjusting its scale.. It dettachesd.. what happened to my arc.. I cant find the solution..
also..when i plot it..or plot it with pdf..the wall are visible even i turned off the wipeout?what should i do?thanks you and more power..
Melvin,
Check your parameter placement. It has something to do with the referenced points.
Wipeout does have some issue with plotting to pdf. You need to plot to pdf using provided pdf driver in AutoCAD. You can't use Adobe distiller or other printer driver.
Thank you Tomijovanoski :)I'm glad these you guys like these tutorials. It's not like the 'big books' are not good. But we focus on different areas. You can help me to expand my tutorials by commenting and requesting tutorials here ;)I do have Twitter account: cad_notes
Great tutorials! Great work!I'm glad that you show these fine starter steps for free…I'm new in AutoCAD, and believe me, you helped me MUCH MORE than some big books did.Thank you… I'll follow you for something new…P.S. Do you have Twitter account?
To Aaron:In AutoCAD pre-2010, we use dynamic block visibility. Basically we create all the doors with different swing angles, and control the visibility. In AutoCAD 2010, we can use geometric constraint to do that. I will post about this later. Then I will post how we can use the constraint for the swing door angle. Thank you for asking :)
Do you have any idea how to make the arc adjust with the door swing angle?
Thank you Edward, I'm glad you like it :)
Another great tutorial.Especially the use of the wipeout is interesting and will certainly gain speed during initial drawing creation of walls with doors and windows.