 Tags is also annotation. This time, we are going to create a view with less details to show door and windows tag. To do this, we need to create additional view.
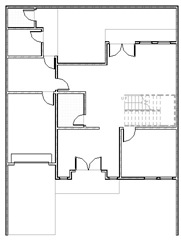
Revit doesn’t allow us to put a view to sheets more than once. So if we have different representations, we need to create several views. Open your training file. On your project browser, right click on 1st floor in floor plans group. Select duplicate view>duplicate. Revit will create a duplicate named Copy of 1st Floor. The active view is also changed to this new view. Right click on the view name, select rename from context menu. Give it name something like 1st floor door schedule. Pay attention that we don’t copy dimensions to this view. If you also need the dimensions, you should choose duplicate with detailing. But we don’t need them right now. Now let’s tweak the visibility a bit. Open view tab on your Revit ribbon. Click visibility/graphics in graphics tools group.
Uncheck under visibility column for these following items:
- casework
- entourage
- furniture
- furniture systems
- planting
Now check halftone column for these items:
- floors
- railings
- stairs
Still in visibility/graphics dialog, click the annotation categories tab. Uncheck visibility for sections and elevations. Click OK to apply changes.
Open your original 1st floor plan, and compare to this one. This is how you represent different views for your model. Either in plans, elevations, sections, etc. Now let’s add tags. You can manually add tags one-by-one by using tag by category.
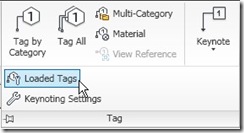
But instead of selecting objects one-by-one, let’s just tag all our doors and windows. Activate Tag All. First, let’s check if we already have our tag families loaded. Click tag group title to expand this panel. Select Loaded Tags.
Check if door tag and window tag are already loaded. If it’s not loaded yet, click load on the right side of this dialog. You can find those tag families in annotations>architectural folder. Click OK to close the dialog. Click Tag All. Hold [ctrl] and click on door tags & windows tags. Make sure both of them are highlighted. At the bottom of this dialog, leader section, check on create option. Use length 10 mm. Left the orientation to horizontal. Click OK. Your tags may obstruct each other. You can fine tune tags placement by turning off the leader or change the other options on option bar.
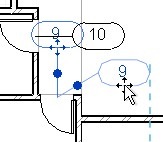
You can also click and drag your to new position.
And of course, you can arrange the tag leader!
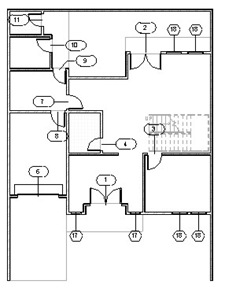
Here is the finished door and windows schedule plan.
In next Revit tutorial, we will work with room and room legend.
*You can purchase this Revit tutorial compilation in an e-book. Find out the books in our E-Store .


