I wrote how to create Spanish roof patterns in Revit. The next question is how to make the tile detail in the section view. Can we generate the details automatically?
Unfortunately, if you need to generate the section automatically, you must create the 3d model of the tile roof. I would avoid creating too many 3d details unless it’s necessary. It would make the model unnecessarily complex.
The typical way is to add the details in the 2d view. It sounds like tedious work, but keeping your model simple is a good practice.
When you have a large model, too many details will degrade the computer’s performance, making it prone to file corruption and computer crashing while you work.
Let’s see how we can create the 2D details for the Spanish roof in the section view.
Preparing the Detail Family
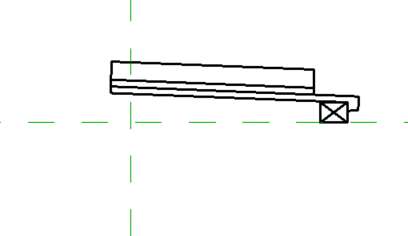
First, we need to prepare the 2D detail family. You can create one using the template Metric Detail Item.rft. Draw the tile section. I made the section like the one below.
Remember that we need to repeat the detail along the roof section. Consider the shape and distance. Create an array to test it.
After you finish, save the family.
If you want to follow the tutorial but don’t want to create your own 2D detail family, download the file here: spanish_roof_section.rfa. The section is in metric units.
Configuring the Repeating Detail Family
Before we can use the detail family, we need to create a new family type.
Loading the Family to Your Project
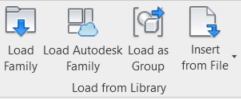
With your project open, go to the Insert tab. In the load from the library panel, click load family.
Load the family you created before.
Defining Family Type
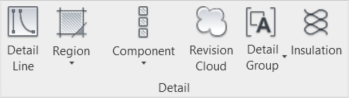
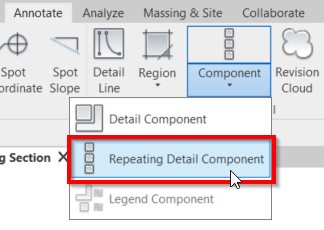
After we load the family, we need to define the family type. Activate the Repeating Detail Component tool on the Revit ribbon> Annotate tab> Detail panel> Component.
We need to create a new type for this family. With the Repeating Detail Component tool active, click Edit Type.
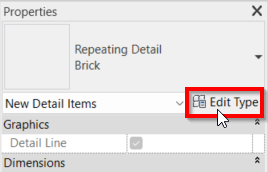
Click duplicate to create a new type, then name the new type Spanish Roof Section Detail.
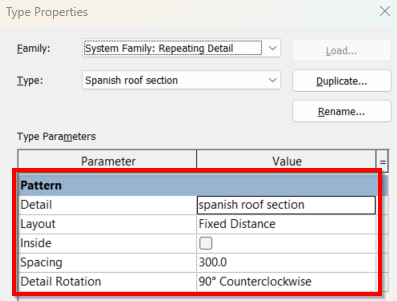
Change the parameters below:
- Detail: Spanish Roof Section
- Layout: Fixed Distance
- Spacing: 300
- Detail rotation: 90deg counterclockwise
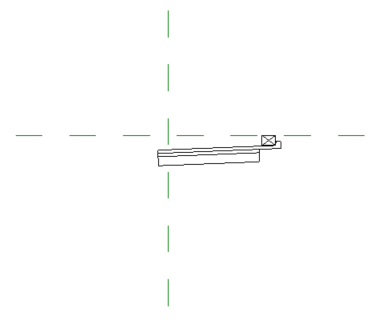
If you use your own family or using imperial units, the parameter values might be different. The family you downloaded is only for creating repeating details from left to right. You need to create another family for repeating details from right to left. You need to flip the family like in the image below.
Alternatively, you can use the same family and edit the repeating detail later.
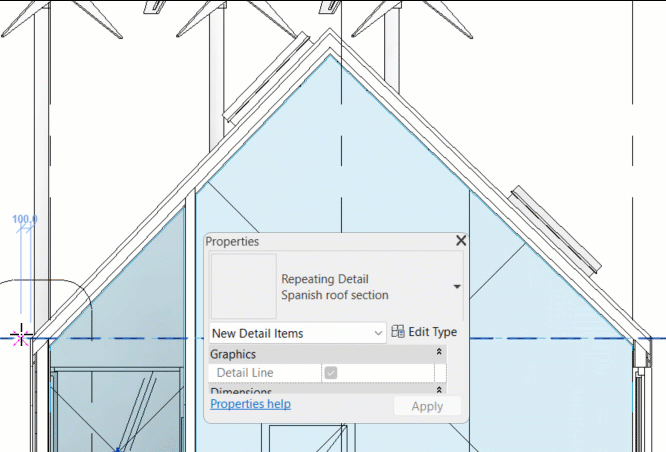
Using the Repeating Detail Component
Now we can use the repeating detail component in our roof section. Define the start and finish location for the roof section.
Not Ideal, But It’s the Best Practice
When we work with 3D models, it’s natural that we are tempted to model everything in 3D. Remember that when we add more details to the model, the model gets more complex. The file is getting larger, prone to corrupt and consume our computer resources.
The best practice is to add only the necessary details. If we only need to add details in specific areas, we can add only the 2D details. Revit can do it well. True, the downside is we need to modify it, we need to update the 2D details manually. Ideally, we only add the 2D details in the last stage of the design. This way, the changes will not be as often as in the early stages.


