In this Article...
We’ve already used some MicroStation manipulation tools in earlier exercise. We are going to learn how to select multiple elements before we go further with MicroStation manipulation and modification tools.
In that exercise, we only able to manipulate one element at a time. We activate the manipulation tool, then we choose the element. No way we can select more elements after that. We call this verb-noun selection.
In many cases, we need to manipulate multiple elements at once. We can’t do it with verb-noun selection. We have to select our elements first, then activate the manipulation tool. We call this noun-verb selection. This is very ‘Windows explorer’ behavior, isn’t it? How do you copy (or move) multiple files to another folder? Correct! We select them first, then activate the tool (either copy or move).
However, some tools are not able to manipulate/modify multiple elements. If you activate this tool, all elements in your selection set are removed.
I know in AutoCAD, it’s easier to use verb-noun selection. It’s a bit painful for AutoCAD users, but it is very friendly for the rest of Windows users.
We have many way to select objects in MicroStation, to make our life easier.

The basic way to do this is by holding [ctrl] and pick every single element we want. This will add the elements to our selection set. Or, we can click and drag our pointer and select every element inside the boundary. We are going to discuss how to select our elements in MicroStation.
MicroStation Element Selection Tool

MicroStation ‘Element Selection’ tool is the default tool that active every time you start MicroStation.
You can move your pointer to an element and see a tooltip (unfortunately doesn’t appear in my screenshot) before picking it.
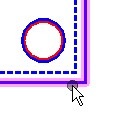
Element Selection Settings
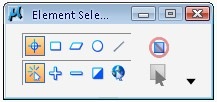
Like any other MicroStation tools, element selection has some settings on tool settings window. Let’s take a look.
Selection Method
![]()
The options for selection method are: individual, block, shape, circle, and line. If you activate the block/shape/circle method, then we are defining the shape. Every elements inside the shape will be selected.
This is something new in MicroStation V8i I believe.
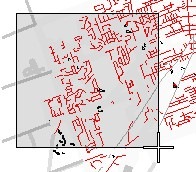
- When we define block (or shape/circle) with 2nd data point on the right side of 1st data point, then we are selecting elements that the whole parts of the element inside our boundary.
- When we define it right to left, then we will select every element that the whole part of it inside our boundary AND every element touching our boundary line. You will see the boundary line as dashed lines.
Except for line method, it will select every element touching that line.
 |
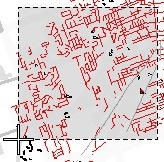 |
| Left to right selection | Right to left selection |
In V8XM, I remember that we need to change the selection by clicking the active selection method icon.
Selection Mode
![]()
The options are: new selection, add to selection set, subtract (remove) from selection set, invert your selection set, and select all elements. You can also press [ctrl] + A to select all elements.
If you have selected element in your drawing, then the selection mode will change. You will see another tool: clear selection set.
![]()
Attributes filter
If you click the small arrow on the right bottom of this tool setting, you will see extended settings for this tool.
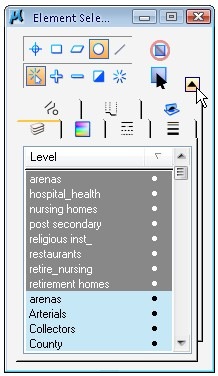
We used to call it power selector. But now, element selection and power selector are the same tool. You can see every attributes in your drawing in extended settings. If you want to select every element with red color, then go to color attribute tab, and click red. This is very excellent selection tool. I love it so much.
Let’s Try It
Open any file in MicroStation sample files. I use an example in Geospatial project.

I use BSI200-D03-Public Works.dgn in drawings folder.
Try to use different methods, different modes to see how they works.
Also try to click the attributes to select elements by attributes.
Select every elements by pressing [ctrl] + A. See that attributes selected are highlighted.
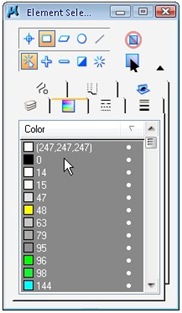
Try to filter out by clicking highlighted attributes.
It’s easy to select elements in MicroStation isn’t it? Next, we are going to learn how to use fence for multiple elements manipulation.


Your great sir..im looking for this tutorial for so many times..thanks a lot for sharing your skills and knowledge..your d best..stay kind and generous..GodBless!
hello sir,
hope u will have great time with ur friends and family. u have done a very respectable job by sharing ur knowledge with others.its show u a very nice and kind person. At the eime that no one have even a second for others,u spent so much time just to give knowledge to others.
i just pray that all joys of life be showered on u.
Regards