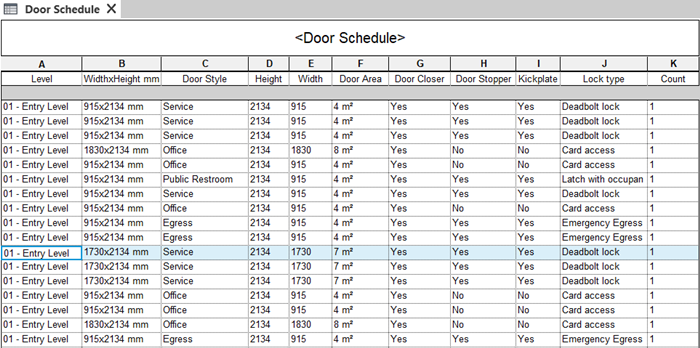
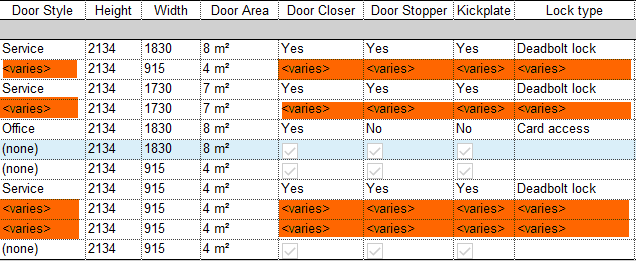
In the Revit Schedule 101 part 1, we created a schedule. And in part 2, we add more information using a key schedule. We have the schedule, but it only lists everything. Check the count column. We still don’t know how many doors we have for a particular type. How many of them are on entry-level, 2nd floor, and 3rd floor.
We still have several things to do before we can use this schedule!
Sorting and Grouping
The first thing we are going to do is to group the data. What data do you want to group? In this schedule, it’s obvious we want to group the same family type. We want to know how many doors for each type. Let’s try to group them now.
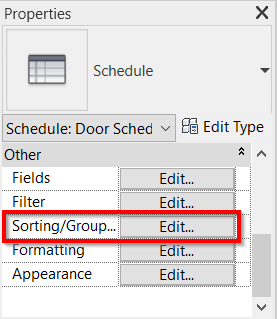
On the Project Browser, click the Edit… button next to Sorting/Grouping.
We want to group them by family type. But we don’t have the field in this schedule. Remember that we use a combined parameter instead of a family type in the part 1 tutorial? It seems that we do need to add the family type parameter in this schedule.

Adding Parameter to the Schedule
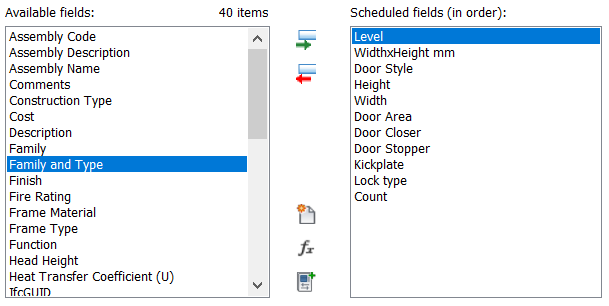
Let’s add the parameter. Open the field tab. Select the Level parameter in the scheduled fields. Then find the Family and Type parameter under the available fields. Click add parameter.
Selecting Level first will make Revit put the newly added parameter under Level.
Sorting and Grouping the Items
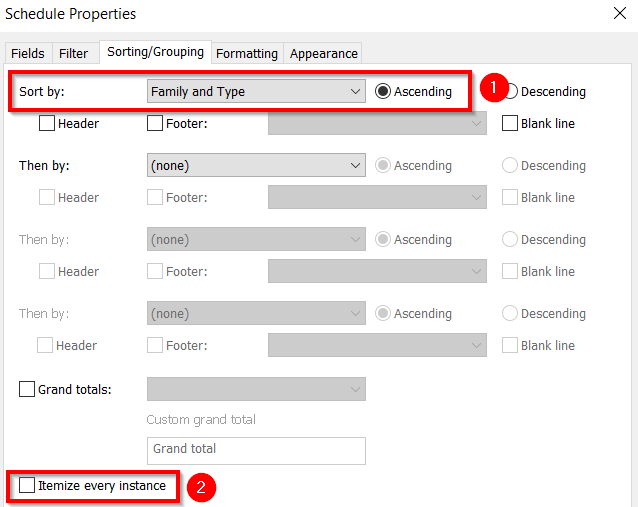
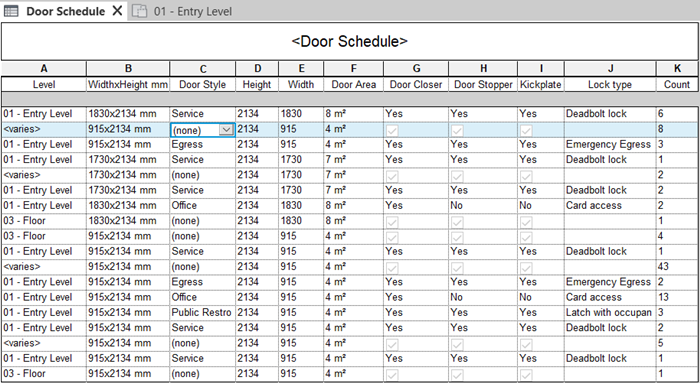
Now go back to the Sorting/Grouping tab. Next to Sort by, choose Family and Type from the dropdown list (1). This option sorts the item, but the schedule will still list all items. To show the total number of the same item, uncheck the Itemize Every Instance option (2).
Click OK to finish the schedule.
We can see that the schedule now grouping and counting the number of doors. However, door types are using different Door Styles. We can see some values are filled with <varies>.
Adding Secondary Grouping Parameter
We want to group this further. We want this schedule to list doors of the same type and the same door style.
Let’s go back to the Schedule Properties, Sorting/Grouping tab. Now add a second parameter to group the instances. For the Then by parameter after Family and Type, select Door Style.
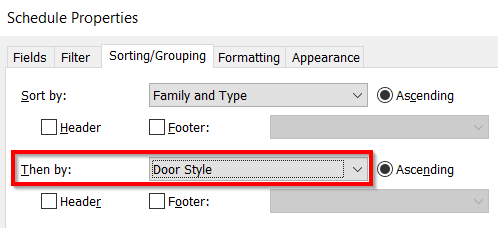
Click OK to close the dialog.
Hiding a Column
We added the Family and type parameter to group the instances in the schedule. But we don’t want to show it in our schedule. We still need it in the schedule, but we must hide it.
Click any cell under column Family and Type. On the Revit ribbon, contextual tab, in the column panel, click Hide.
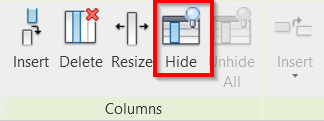
Now you can see the column is hidden.
Filtering Data
You can also filter the data to show in your schedule. For example, you want to show the door schedule for level 1 only next to the level 1 floor plan. Also, the door schedule for level 2 and level 3 is next to their respective floor plan.
Let’s do this now. Duplicate the Schedule two times. Rename the schedule to indentify their level.

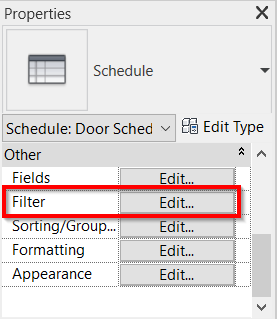
Open door schedule for the entry level. In the Properties Palette, click Edit… next to the Filter parameter.
Select the filter by level; conditional is equals to entry level.
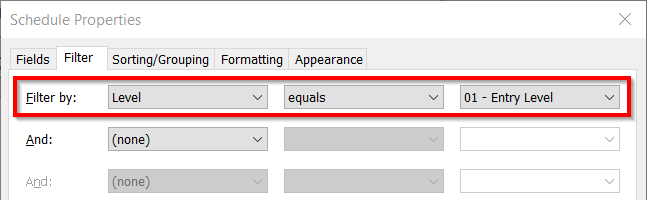
Click OK, and then you will see only doors on the Entry level in this schedule. Repeat the same steps for level 2 and level 3.
Video Guide
Do you want to see how it works? Check the video below for your guide!
Summary
As you can see, we can arrange and count the items based on different properties. You can filter the information that you want to show. You can do many things to control what data you want to show and how you want to show it.
Explore the filtering and grouping data using your own model before we continue to part 4!


