We learned how you can interact with Revit elements from Dynamo. We changed the element rotation. Changing the elements’ parameters using Dynamo is a popular use of Dynamo script. For this tutorial, I created two custom families: a circular window opening and a generic model box.
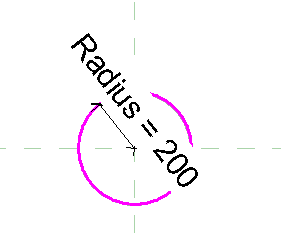
The circular opening has an instance radius parameter. So we can have a different radius for each instance.
For the box, we can control the thickness.
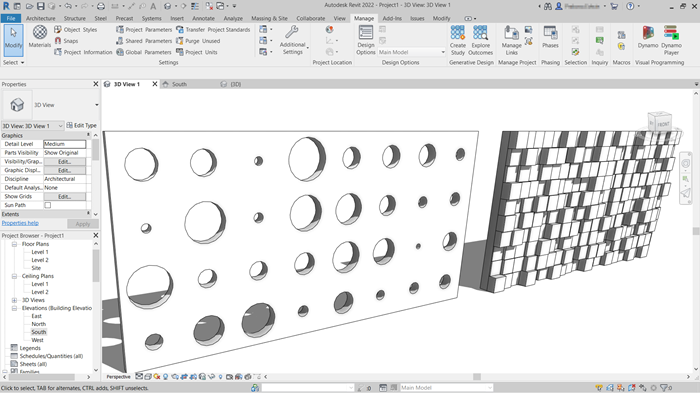
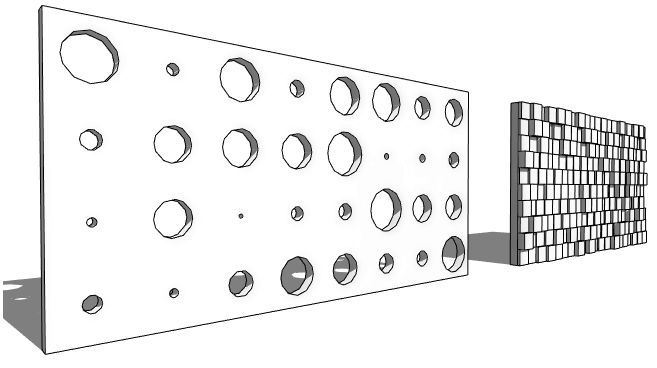
We are going to assign random radius and thickness to the families, and we will get the result like below. The script is simple, anyone can make it within minutes.
We won’t cover how to make the families in this tutorial. However, if you use Revit 2022, you can download the families here. And the project file to start here. If you use an older version of Revit, you need to create it yourself.
Let’s get started!
Opening Dynamo
Prepare the walls and place the window openings and the boxes on the wall. You can place them any way you like it, not necessarily similar to the image above.
If you’re not familiar with Dynamo yet, I suggest visiting the Dynamo 101 part 1 and part 2 first. Alternatively, you can watch the video as your guide if you want to jump directly to this 3rd part.
Open Dynamo and create a new script.
Selecting Elements
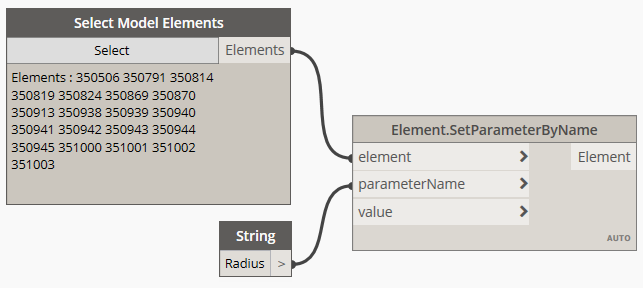
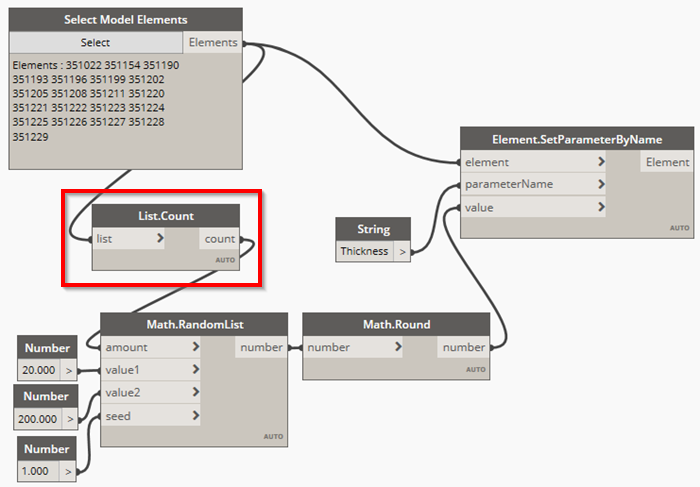
The first thing that we need to do is to add the Select Model Elements node. Select all the openings.
Hint: It is easier to hide the wall first before you select the openings or the wall pattern
We are going to change the radius parameter in this script. Add SetParameterByName node.
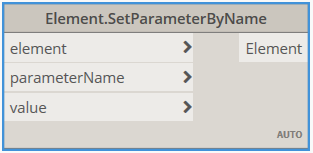
This node requires three inputs: the elements, the parameter name, and the value of the parameter that we want.
We have the elements from the Select Model Elements node. The parameter name is Radius, add a string node to provide the parameter name. Now the last thing we need is the radius value. We are going to create it using a random number list.
Creating Random Numbers
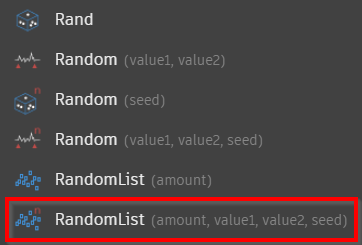
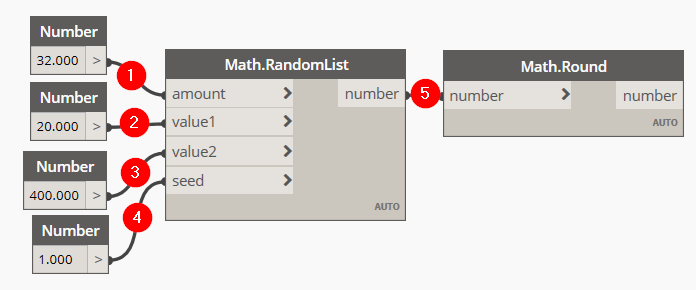
Dynamo has several nodes that can generate random numbers. In this exercise, we want to create a list of random numbers. And we want to control the minimum and maximum value. Add RandomList (amount, value1, value2, seed) node.
- The first thing you need to define is the amount of random numbers to generate. Define it as many openings that you have in the selection. I have 32 in this case, so I use 32.
- Define the minimum value. I want the minimum radius is 20mm.
- Define the maximum value. I want the maximum radius is 400mm.
- Use 1 as the seed number.
- The random numbers this node generates is decimal numbers. I add a round node to make integer numbers.
That’s it! Now you have 32 random numbers for your opening radius. Remember, you can always change the value later to explore your design options.
Modifying the Elements’ Parameters
Now you have everything you need. Let’s connect all the nodes.

Review the result in Revit. If you want to see alternative random openings, change the seed value using an integer number.
Random wall thickness
The random wall thickness uses the exact same script. Don’t forget that you need to change the amount and the parameter name, but the rest are the same.

Is it possible for Dynamo calculates the total amount of the elements, without us providing the input? Absolutely. You can use List.Count node to count the number of elements you selected.
We haven’t discussed the list yet, but there are many interesting things you can do with a list.
Video Guide
See the video guide from our YouTube channel if you have difficulties.
The Result
Now you can see that with basic Dynamo knowledge, you can create designs like below quickly.
Dynamo is very powerful but simple. We will see more Dynamo script samples in future tutorials. I hope you are excited to see what we will cover in the future!


Hello, thanks for the tutorial.
The Math.Random List node, from the version I use of Dynamo, only has amount.
Could it be that this node comes in newer versions?